
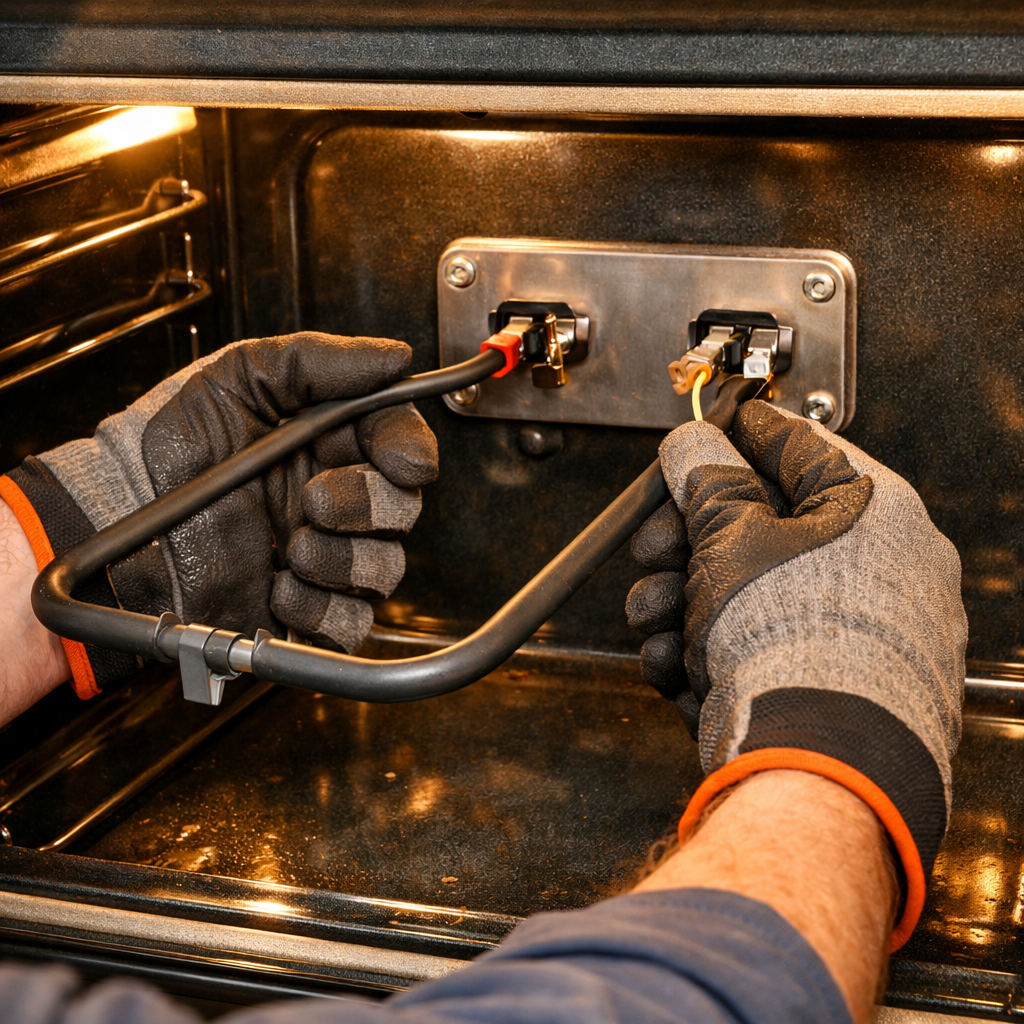
Error E118
Let’s dive into fixing error E118 on your Bosch HBL8651UC (Wall Oven). With the right tools and parts, you can usually tackle this repair in 1–2 hours, saving yourself from a costly service call.
🔨 Pro Tip from Dave
On the HBL8651UC, a common mistake I see is technicians replacing the sensor and calling it done — but it’s crucial to check connector harness J9 at the control board for heat-damaged pins first. The part number you want is Bosch 00642855, and remember that the sensor is recessed deeper in this model’s cavity than most, requiring you to remove the back interior panel for proper installation.
Part of our Top 20 Oven Models & Common Repair Issues Guide. Browse all oven repair guides for related models and issues.
Common Symptoms & Causes
If your Bosch HBL8651UC is showing error E118, you might observe several symptoms, either before or alongside the fault code.
- The oven display shows the “E118” error code and beeps repeatedly
- The oven fails to heat or reaches temperature then shuts off unexpectedly
- The cooling fan runs continuously even after the oven is turned off
- The control panel becomes unresponsive or resets during operation
Error E118 generally arises from a faulty oven temperature sensor, a failing control board, or degraded wiring connections disrupting communication between the sensor and the electronic control unit.
Safety First
- Cut power at the electrical panel before starting any repair. A wall oven is wired directly into its own circuit, not into a wall outlet, so switch the breaker off, lock or tag it, and confirm no voltage with a contact tester.
- Wear work gloves when handling metal brackets, sheet metal edges, or sharp components.
- Take photos with your phone before disconnecting any wiring harnesses or connectors.
- Work in a well-lit area with enough floor space to lay removed panels flat.
Tools & Parts Needed
Essential Tools
- Phillips #2 screwdriver
- ¼” nut driver
- Multimeter
- Work gloves (heat-rated)
- Flashlight
Replacement Parts
- Oven temperature sensor
- control board
- multimeter
Step-by-Step Repair Instructions
Step 1
First things first—disconnect power to the oven at the circuit breaker. Since E118 indicates a temperature runaway or temperature sensor fault, cutting power protects you from a potentially dangerous situation, keeping you safe from shock and preventing the control board from logging additional fault states while you diagnose.
Step 2
Give the oven a cooldown period of at least 30 minutes to prevent residual heat from affecting your readings. Locate the temperature sensor on the back wall of the oven cavity, disconnect its 2-pin harness, and remove the 2 Phillips screws. Set your multimeter to resistance and measure across the sensor pins— a healthy sensor should read about 1,080Ω at room temperature. If you get a reading below 800Ω, the sensor is shorted and sending a false overtemperature signal to the control board, which is what triggers E118; replace the sensor if it fails this test.
Step 3
If the sensor measures correctly, the fault likely lies with the control board’s temperature comparison circuit, which can no longer interpret the sensor signal accurately. When this happens, E118 will trigger even when the oven temperature is normal. The next step is to replace the control board, as this circuit isn’t field-serviceable.
Step 4
To access the control board, remove the oven’s trim panel, which is secured by 2 Phillips screws at the trim edges. I always recommend taking photos of all harness connections before disconnecting anything for reference during reassembly. Install the replacement board, reconnect every harness until each connector clicks into place, and then reinstall the trim panel— a loose harness can trigger new fault codes right after you power it back on.
Step 5
Once everything is back together, restore power at the breaker. Set the oven to 350°F and place an independent oven thermometer inside to verify the actual cavity temperature. Verify that the thermometer reading stabilizes around 350°F within the normal preheat time and that E118 doesn’t return. If the error pops up again after confirming a good sensor and a new board, check for a wiring short between the sensor harness and chassis ground before taking further action.
Where to Buy Replacement Parts
- Bosch HBL8651UC wall oven error E118 temperature sensor 00642855
- Bosch wall oven E118 runaway temperature fault
- Bosch oven control board replacement 00676192
When to Call a Professional
If the issue continues after you’ve gone through all the steps above, the problem may involve a failed main control board, a defective temperature sensor or high-limit thermostat, or wiring that needs specialized diagnostic equipment. In that case, it’s best to contact a licensed appliance technician. And remember, if you’re working with gas models, don’t attempt any work on the gas valve, burner orifices, or supply line— this work is restricted to a licensed gas fitter in most areas.
How Much Does This Repair Cost?
| Repair route | Typical cost |
|---|---|
| Do it yourself | $20–$80 (parts) |
| Professional repair | $150–$300 (parts and labor) |
When it comes to DIY parts for fixing Error E118, you’re typically looking at costs around $20–$80, depending on whether you need a temperature sensor, control board component, or wiring harness. Hiring a professional for a Bosch HBL8651UC usually runs between $150–$300, including labor. Taking on this repair yourself can save you $100 or more.
Frequently Asked Questions
What does error E118 mean on my Bosch HBL8651UC wall oven?
Error E118 indicates a fault with the oven’s temperature sensor or its connecting wiring. The oven cannot accurately read the internal temperature, so it shuts down as a safety precaution.
Can I clear error E118 by simply resetting the oven?
A reset by cutting power at the breaker for 60 seconds may temporarily clear the code, but it will return if the faulty sensor is not replaced.
Is it safe to use my Bosch wall oven while error E118 is displayed?
No, you should avoid using the oven until the repair is complete. An inaccurate temperature reading can lead to undercooked food or uncontrolled overheating.
Recommended Products
These are the parts and tools I recommend for this repair, based on compatibility and customer reviews:
- 00642855 Gas Range Oven Temperature Sensor Replacement For Bosch Stove 1387367 642855 Budora
- Bosch 00676192 oven control board — for when the sensor tests good but E118 persists
The Bosch-Specific Temperature Sensor That Actually Resolves E118
When E118 throws on your HBL8651UC, you need the exact sensor Bosch designed for this model—not a generic aftermarket probe. This is the part that fails in the vast majority of these cases, and ordering the right one the first time saves you a second trip to the parts bin.
What works
- Connector fits the Bosch harness perfectly—no crimping or adapter guesswork required when you install it.
- Resistance values match Bosch’s calibration, so the oven thermostat logic recognizes the sensor immediately after installation.
- The probe housing sits flush in the cavity without any forcing, and the mounting bracket aligns on first try.
What doesn’t
- Price is higher than universal aftermarket sensors, but the cost buys you a part that actually works for this model instead of one that half-fits and leaves you troubleshooting a bad connection.
- Availability can be spotty on some platforms; I’ve had to backorder this part before, so order early if you’re on a tight timeline.
I’ve learned the hard way that grabbing a generic sensor because it’s cheaper or ships faster almost always leads to a second call—the error clears temporarily, then returns, or the oven never holds temperature properly. Grab the Bosch 00642855 replacement sensor and you’ll close this repair out cleanly.
About This Article

Written by Dave Holt. Dave Holt has been taking apart and fixing household appliances since he was a teenager who couldn't leave a broken one alone. Eighteen years later, after fixing things for neighbors, friends, and anyone who'd let him, he's seen almost every failure mode there is. When he writes a repair guide here, it's based on the actual job, not a manufacturer overview. More about this site.
Scope and limits. Dave is a self-taught repairer, not a certified appliance technician. Unplug before you open anything, and leave sealed refrigeration systems, gas connections, and hardwired circuits to a qualified technician.



