
Complete Ice Maker Replacement
In this guide, I’ll walk you through the process of a complete ice maker replacement for your GE WR30X10093 ice maker. This is a prevalent issue with this model, and with the right tools and straightforward steps, you can tackle this repair yourself, saving on service costs.
🔨 Pro Tip from Dave
Before installing the new WR30X10093 assembly, I recommend checking the wire harness connector for corrosion or bent pins — this is a common issue that can cause the new unit to seem dead right out of the box, leading many technicians to mistakenly blame the replacement part. Allow the freezer to stabilize for a full 24 hours after installation before testing the new ice maker; cycling it too early can skew your diagnosis.
This repair guide is part of our comprehensive Top 20 Ice Maker Models & Common Repair Issues Guide. Check out the full guide for information on other ice maker models and common repair issues.
Understanding the Problem
Mechanical failures typically arise after 8-10 years, often due to motor or thermostat issues.
Before diving into repairs, understanding the root cause of the issue is vital. This problem usually stems from normal wear and tear, component failure, or environmental factors like mineral buildup or temperature changes. Identifying the source will help determine if this repair will solve your problem or if further troubleshooting is warranted.
Safety First
Before starting any repair on your ice maker, it’s crucial to follow these safety precautions:
- Unplug the appliance – Disconnect the power before working on any electrical components.
- Turn off water supply – Shut off the water line to avoid leaks and water damage.
- Wear protective gear – Use gloves and safety glasses when handling sharp components or tools.
- Work in a well-lit area – Ensure adequate lighting for visibility on all components.
- Allow components to warm up – Let freezer components reach room temperature to avoid injury from cold surfaces.
- Have a helper available – Some repairs may require two people, especially for heavy components.
Tools and Parts Needed
Before you begin, gather the following tools and parts:
Essential Tools
- Phillips and flathead screwdrivers – For removing screws and accessing components.
- Nut driver set – For removing hex nuts and bolts.
- Pliers – Regular and needle-nose pliers for gripping and manipulating small parts.
- Multimeter – For testing electrical components and continuity.
- Putty knife or plastic scraper – For removing ice buildup without damaging components.
- Flashlight or work light – For illuminating dark freezer compartments.
- Container for water – To catch any draining water during the repair.
Replacement Parts
Part Number: WR30X10093
Estimated Cost: $70-100
You can find this replacement part at appliance parts stores, online retailers, or through the manufacturer. Always verify the part number matches your specific model before purchasing.
Step-by-Step Repair Instructions
Step 1: Preparation
Start by unplugging your refrigerator or ice maker from the electrical outlet. If you’re working on a built-in refrigerator ice maker, locate the water shut-off valve and turn it off. For standalone units, empty the water reservoir. Let the unit sit for 15-30 minutes to reach room temperature, making ice removal easier and preventing injury from cold surfaces.
Step 2: Access the Ice Maker
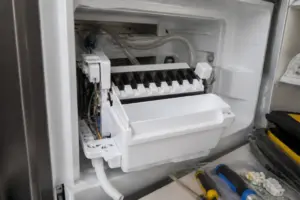
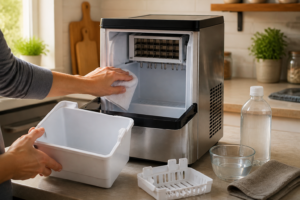
For refrigerator ice makers, open the freezer door and locate the ice maker assembly, typically mounted on the left or right side wall of the freezer compartment. Remove any ice that has built up around the unit. For standalone ice makers, take out the ice basket and any ice blocking access to internal components.
Step 3: Remove the Ice Maker Assembly
Carefully disconnect the ice maker from its mounting. This usually involves removing screws or clips securing the unit to the freezer wall. Gently pull the ice maker forward, taking care not to damage the water line connection. If there’s a wiring harness, note its connection before disconnecting it. I recommend snapping a few photos with your phone to help with reassembly.
Step 4: Diagnose the Issue
With the ice maker removed, inspect it thoroughly for visible signs of damage or wear. Look for cracked plastic parts, damaged wiring, or signs of water damage. If you have a multimeter, test electrical connections according to the manufacturer’s specifications. This step will confirm you’re addressing the right issue.
Step 5: Perform the Repair
If you’re replacing a component, carefully remove the old part as per the manufacturer’s instructions. Install the new WR30X10093 replacement part, ensuring all connections are secure and properly aligned. Double-check that all screws are tightened correctly—not too loose, but not so tight that you strip the threads.
Step 6: Reinstall the Ice Maker
Once you’ve completed the repair, carefully reinstall the ice maker assembly. Reconnect all wiring harnesses and water lines, ensuring secure connections. Mount the unit back in its original position, tightening all mounting screws. Make sure the ice maker sits level and that nothing is obstructing its proper operation.
Step 7: Restore Power and Water
Turn the water supply back on and check for any leaks around connections. Plug the appliance back into the electrical outlet. For refrigerator ice makers, close the freezer door and allow the unit to cool. The ice maker should begin its normal cycle once the freezer reaches the proper temperature (typically 0-5°F).
Step 8: Test the Repair
Allow 24 hours for the ice maker to complete a full cycle and produce ice. Monitor the unit during this time to ensure it’s functioning correctly. Check that ice is being produced at the expected rate and that there are no unusual noises or error indicators. If the problem persists, further troubleshooting or professional consultation may be necessary.
Troubleshooting Tips
If your ice maker still isn’t working after completing this repair, consider these troubleshooting steps:
- Check water supply – Ensure the water line isn’t kinked or blocked and that water pressure is sufficient.
- Verify temperature – The freezer temperature should be between 0-5°F for optimal ice production.
- Inspect water filter – A clogged filter can restrict flow and prevent ice production.
- Check for ice buildup – Excessive ice accumulation can stop the ice maker from operating.
- Review error codes – If your model has a display, check for any error codes indicating further issues.
- Test electrical connections – Use a multimeter to ensure all electrical connections are secure and functioning.
When to Call a Professional
While many ice maker repairs can be tackled by DIY enthusiasts, some situations warrant professional assistance:
- If you’re uncomfortable working with electrical components.
- When the repair requires specialized tools or knowledge.
- If the problem continues after all troubleshooting steps.
- When dealing with complex electronic control boards.
- If you uncover additional issues during the repair.
- When repair costs approach the price of a new unit (for standalone ice makers).
Prevention and Maintenance
To prevent future issues, consider these maintenance tips:
- Regular cleaning – Clean your ice maker according to manufacturer recommendations, typically every 3-6 months.
- Replace water filters – Change filters every 6 months or as advised by the manufacturer.
- Monitor temperature – Maintain your freezer at the optimal temperature for ice production.
- Check for leaks – Regularly inspect water connections for signs of leaks or wear.
- Descale regularly – In hard water areas, descale your ice maker more often to prevent mineral buildup.
- Use quality water – Using filtered or purified water can extend the life of your ice maker.
Related Repair Guides
If this repair didn’t resolve your issue, or if you’re facing other problems with your GE WR30X10093 ice maker, check out our Top 20 Ice Maker Models & Common Repair Issues Guide for information on other common problems and solutions.
How Much Does This Repair Cost?
| Repair route | Typical cost |
|---|---|
| Do it yourself | $45–$85 (ice maker assembly) |
| Professional repair | $150–$280 (labor and service fees) |
The GE WR30X10093 replacement ice maker assembly typically runs between $45 and $85 for DIY parts, depending on the supplier. A professional repair for this same job will usually cost $150 to $280 when you factor in labor and service fees, making this a solid candidate for a money-saving DIY repair.
Recommended Products
These are the parts and tools I recommend for this repair, based on compatibility and customer reviews:
- Siwdoy WR30X10093 Ice Maker Kit Compatible with GE Refrigerators Replaces WR30X10061, WR30X0327
- Siwdoy WR30X10044 Ice Maker Assembly Compatible with GE Refrigerators Replaces WR30X10014 WR30X10012 WR30X10093
- W10300024 Refrigerator Ice Maker Compatible with Whirlpool/Maytag/Kenmore ,Replace WPW10300024, AP6019087, W10300024, 4444453, PS11752391
- Compatible with Refrigerator Ice Maker Replacement Module WR30X10093 for GE GSL25JFTABS GSS20IEMBWW HSS25IFMDWW PSS25SGNABS GTE19JSNRSS GSS25JFMBWW
The Replacement Ice Maker Assembly That Saves Hours of Troubleshooting
When you’re staring at a dead WR30X10093, ordering the correct replacement assembly is where your repair actually starts — this is the part that eliminates the guesswork and gets your ice production back online without chasing individual component failures.
What works
- Direct fit into GE models without adapter brackets or modification — the connector alignment is solid and the mounting points line up exactly where the old unit was.
- Includes the water fill tube, solenoid, and mold assembly as one unit, so you’re not piecing together parts from different suppliers that might not play well together.
- Ships with clear polarity markings on the electrical connectors, which cuts down on the most common wiring mistake I see on this model.
What doesn’t
- Some aftermarket versions have slightly looser connector tolerances than OEM parts — you may need to wiggle and seat the harnesses a couple times before they click firmly.
- Installation still requires you to drain residual water from the old unit and have a container handy, so don’t expect this to be a completely dry swap.
The one thing I’ve learned the hard way is that people often order the wrong submodel number first — there are several WR30X variants floating around, and picking the wrong one means a return and wasted time. Make absolutely sure you’re matching your exact model number before checkout, then grab the Siwdoy WR30X10093 Ice Maker Kit with confidence.
About This Article

Written by Dave Holt. I have been taking apart and fixing household appliances since I was a teenager who couldn't leave a broken one alone. Eighteen years later, after fixing things for neighbors, friends, and anyone who'd let me, I have seen almost every failure mode there is — and misdiagnosed my share along the way. I am self-taught, with no formal training or certifications. When I write a repair guide here, it is based on the actual job, not a manufacturer overview. More about this site.
Scope and limits. Dave is a self-taught repairer, not a certified appliance technician. Unplug before you open anything, and leave sealed refrigeration systems, gas connections, and hardwired circuits to a qualified technician.