
GE GTW720BSNOWS Top-Load Washer Agitator Not Working: Complete Repair Guide
The agitator is the beating heart of your GE GTW720BSNOWS washing machine. When it stops working, your clothes won’t get cleaned properly, and you’re left wondering if a costly repair is in your future. The good news: many agitator problems on the GTW720BSNOWS are entirely DIY-fixable, especially if the issue is with the agitator dogs—small plastic components that are the most common culprit.
This guide walks you through diagnosing what’s actually broken, how to access and replace the failed components, and when you can temporarily run the washer without an agitator. By the end, you’ll know exactly what’s wrong with your GTW720BSNOWS and how to fix it yourself.
Step 1: Confirm the Agitator Is the Problem (Not the Motor or Transmission)
Before you start disassembling your GE GTW720BSNOWS, you need to verify that the agitator is actually the problem. The agitator, motor, transmission, and coupling work together—and confusion between them can lead to unnecessary parts replacement.
What You’ll Observe with a Failed Agitator
- The agitator doesn’t move at all during the wash cycle—it sits completely still while the washer runs
- The drum/basket rotates normally—you can hear and see the outer tub spinning
- Water fills and drains properly—no fill or drain issues
- The washer motor runs—you hear the motor running for the full cycle duration
- The spray jets (if equipped) may still work—because they’re separate from the agitator drive
What You’ll Observe with a Failed Motor or Transmission
- Both the agitator and drum are completely still—nothing moves
- No motor hum or running sound—complete silence during the wash cycle
- The drum may be locked up—you can’t spin it by hand (use caution; confirm power is off first)
- Burning smells—may indicate motor overheating or transmission failure
If you observe the first set of symptoms (agitator stationary while the drum spins), continue with this guide. If the entire washer is non-functional, the issue is likely the motor or transmission, which requires different troubleshooting.
Understanding Agitator Dogs: The Most Common Failure Point
The agitator dogs (also called directional cogs or clutch dogs) are small plastic or composite components inside the agitator assembly of your GE GTW720BSNOWS. They’re the reason your agitator fails more often than any other component.
What Agitator Dogs Do
The agitator dogs engage with a drive block connected to the transmission. During the wash cycle, the drive block rotates, and the dogs catch and push the agitator back and forth. This reciprocating motion is what scrubs your clothes clean. The dogs are designed to slip under high stress—this is intentional. When you overload the GTW720BSNOWS or wash extremely heavy fabrics, the dogs slip to prevent motor damage. After years of this slipping, the plastic teeth on the dogs wear down or break.
Symptoms of Failed Agitator Dogs
- Agitator won’t move at all—completely frozen in place
- Agitator moves only in one direction—forward but not backward, or vice versa
- Agitator moves weakly or inconsistently—stutters or hesitates during the wash cycle
- Grinding or clicking sounds coming from inside the agitator during the cycle
- Agitator wobbles or tilts to one side—indicating the engagement is uneven
- Clothes remain dirty despite running a full wash cycle on the GTW720BSNOWS
Why Agitator Dogs Fail
- Overloading the washer—putting too many clothes in forces the dogs to slip beyond their design limits
- Washing heavy items repeatedly—thick blankets, comforters, and heavy denim wear the dogs down faster
- Using improper wash cycles—selecting heavy-duty cycles for light loads over many years
- Normal wear and tear—after 5-10 years of use, plastic dogs simply fatigue and crack
- Manufacturing defects—some batches of dogs are made with substandard plastic
How to Access and Remove the Agitator on Your GE GTW720BSNOWS
The GTW720BSNOWS agitator is secured with a removable cap and a single bolt. The entire assembly can be lifted out once you’ve removed these fasteners.
Tools and Materials You’ll Need
- Adjustable wrench (or 3/8-inch socket and ratchet)
- Screwdriver (Phillips head for the cap)
- Flashlight or headlamp
- Bucket or towel (to catch residual water)
- Needle-nose pliers (optional, for disconnecting springs)
Step-by-Step Agitator Removal on the GTW720BSNOWS
- Unplug the washer from the electrical outlet. This is non-negotiable. The GTW720BSNOWS has no mechanical power-off switch for internal components, and the motor can start unexpectedly if water sensors trigger.
- Open the washer lid. On the GTW720BSNOWS, the lid lifts straight up. No latch to disengage.
- Locate the agitator cap at the top of the agitator. It’s a small plastic cover, typically white or grey, sitting at the very top center of the agitator shaft. The cap has a Phillips head screw or two holding it in place.
- Remove the cap screw(s). Use your Phillips head screwdriver. On some GTW720BSNOWS models, there’s only one screw; on others, there are two. Keep these screws in a safe place—they’re small and easy to lose.
- Lift off the cap. It should come free easily. If it’s stuck, gently pry with a flat screwdriver, but don’t force it.
- Locate the bolt beneath the cap. You’ll now see a single bolt directly under where the cap was. This is the agitator mounting bolt. It’s typically a 5/8-inch or 3/4-inch bolt, though this varies slightly depending on the specific GTW720BSNOWS production year.
- Remove the agitator bolt. Use your adjustable wrench or socket set. Turn counter-clockwise. The bolt may be tight—this is normal. On the GTW720BSNOWS, this bolt is torqued to approximately 25-30 foot-pounds during assembly. Expect some resistance.
- Check for any springs or clips. Some GTW720BSNOWS models have a small spring or retaining clip around the bolt. If present, remove it carefully and set it aside with the cap and bolt.
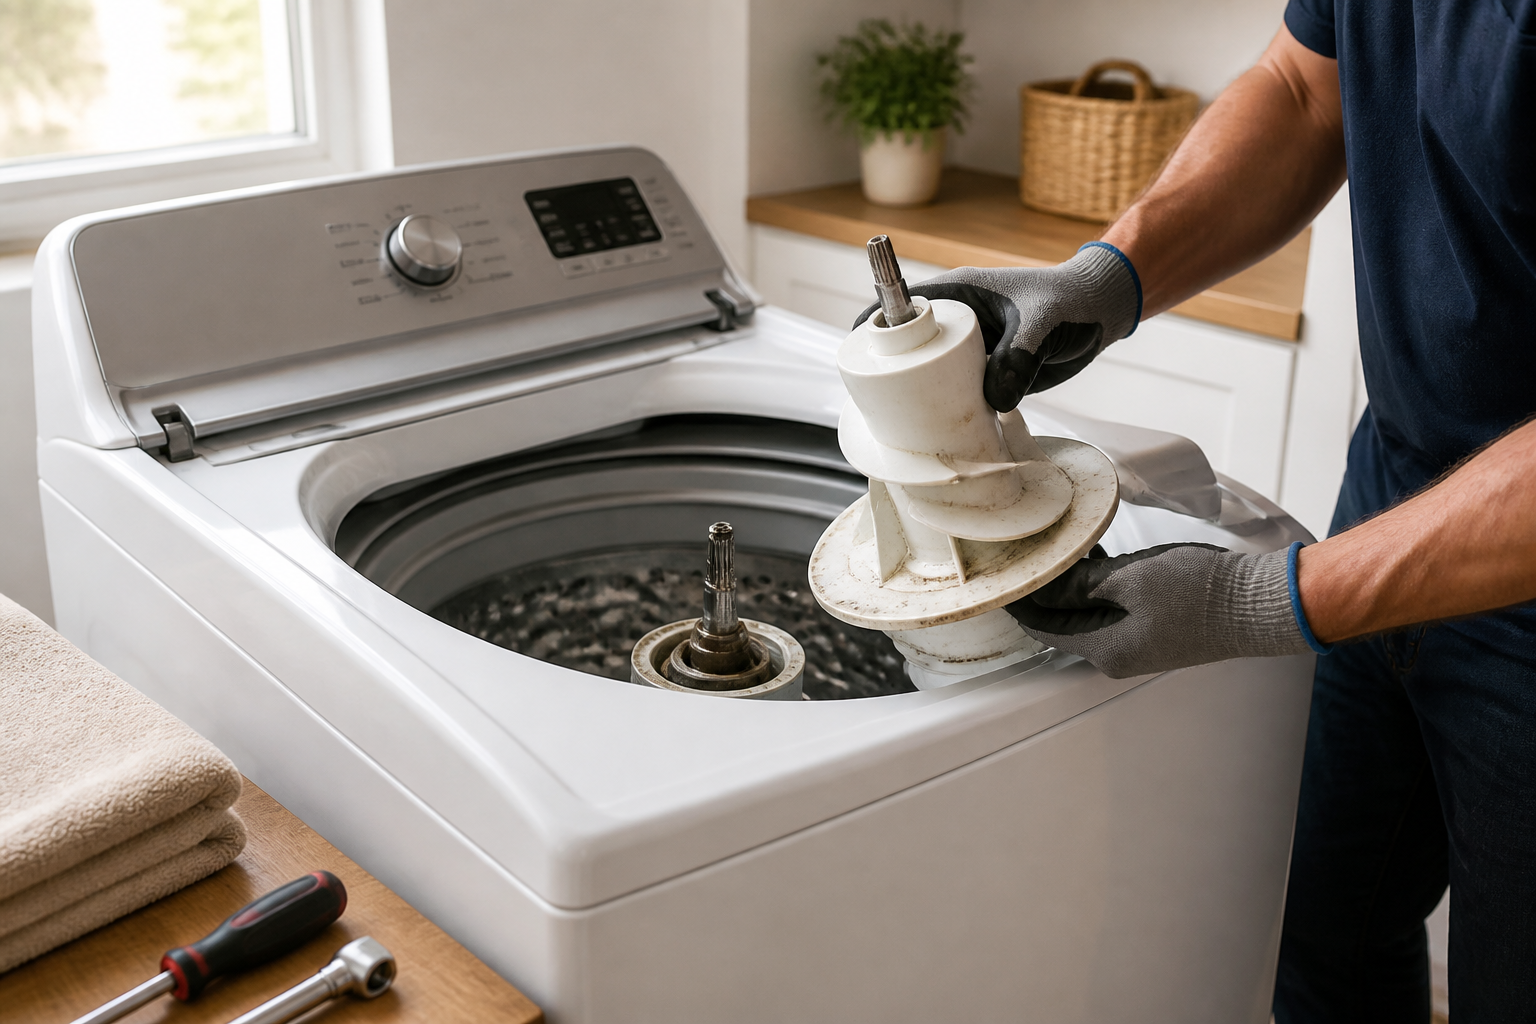
- Grasp the agitator firmly. Use both hands. It’s heavy (typically 3-5 pounds on the GTW720BSNOWS) and awkward to handle.
- Pull the agitator straight up. It should come free from the drive block below. On the GTW720BSNOWS, some resistance is normal—you may need to gently wiggle it side-to-side while pulling. Do not yank violently; internal parts can be damaged.
- Inspect the drive block below. Once the agitator is out, you’ll see the drive block (a square or rectangular plastic piece). This is what the agitator dogs engage with. The GTW720BSNOWS drive block should rotate freely. Spin it by hand to verify it moves smoothly. If it doesn’t, the transmission or coupling may be the issue.
- Set the agitator on a clean surface. You’ll now disassemble it to access the dogs.
Inspecting and Replacing Agitator Dogs (Part Number WH43X10024 and Variants)
Once the agitator is out of the GTW720BSNOWS, you need to access the internal dogs to inspect them. The dogs are seated inside the agitator hub, typically held in place by a spring clip or catch mechanism.
How to Access the Agitator Dogs
- Look at the bottom of the agitator. The hub (a circular or square piece at the base) houses the dogs. There’s usually a small clip or retaining ring holding everything together.
- Remove the retaining clip. On the GTW720BSNOWS, use needle-nose pliers to pry this clip free. It will pop out. Keep it safe.
- Lift off the hub or drive collar. The piece above the clip will now lift away, exposing the dogs.
- Inspect the dogs visually. You’re looking for:
- Cracks in the plastic
- Chunks missing from the teeth
- Flattened or worn-down teeth
- Discoloration or melting on the plastic
- Feel the teeth with your finger. On a new dog, the teeth are sharp and well-defined. On a worn dog, they’re rounded and smooth. Compare both dogs—sometimes only one is failed on the GTW720BSNOWS, even though both should be replaced together.
Agitator Dog Part Numbers for the GTW720BSNOWS
The primary part number is WH43X10024 (this is the GE OEM part number). Some aftermarket equivalents exist, but for the GTW720BSNOWS, OEM parts are recommended because the fit and material are precisely matched to your machine. There are also variant part numbers depending on the production year:
- WH43X10024 — Standard dogs, fits most GTW720BSNOWS units
- WH43X10024A — Variant with slightly different tooth geometry, also fits GTW720BSNOWS
Always verify the part number on GE’s official parts website or your washer’s manual to ensure exact compatibility with your specific GTW720BSNOWS production run.
Replacing the Agitator Dogs
- Remove the old dogs. They simply lift out once the clip and collar are off. There are typically two dogs per agitator on the GTW720BSNOWS.
- Clean the hub cavity. Use a dry cloth to wipe away any plastic debris, lint, or detergent residue. This ensures proper seating of the new dogs.
- Insert the new dogs. Align the tabs on the new dogs with the slots in the hub. They should seat firmly. The dogs on the GTW720BSNOWS are not symmetric—they fit only one way, so if resistance is high, flip the dog 180 degrees and try again.
- Reinstall the collar/drive piece. This sits directly on top of the dogs.
- Reinstall the retaining clip. Using needle-nose pliers, snap the clip back into its groove. You should hear or feel a click. This clip is critical—it keeps the dogs and collar from coming apart during use.
- Spin the agitator hub by hand. It should rotate smoothly and freely. If you feel grinding, remove and re-seat everything. Debris may be trapped inside.
Testing the Agitator Solenoid and Coupling (If Dogs Are Fine)
If you inspect the dogs and they look perfectly fine—sharp teeth, no cracks, no wear—the problem may be elsewhere. The GTW720BSNOWS has a solenoid-driven clutch mechanism that can fail independently of the dogs.
Understanding the Solenoid
The solenoid is an electromagnetic switch that energizes during specific wash cycle phases. When it energizes, it activates the clutch, which engages the drive block and causes the agitator to move. If the solenoid is dead, the clutch never engages, and the agitator won’t move even if the dogs are perfect.
Testing the Solenoid on the GTW720BSNOWS
⚠️ WARNING: You’ll be working near electrical components. Ensure the washer is completely unplugged and has been unplugged for at least 5 minutes. Water and electricity are a dangerous combination.
- Unplug the GTW720BSNOWS and wait 5 minutes. This allows capacitors to fully discharge.
- Access the solenoid. On the GTW720BSNOWS, the solenoid is mounted on the transmission assembly beneath the tub. You may need to remove the front panel or drain the tub to access it. Consult your specific model’s manual for the exact location.
- Use a multimeter to test for continuity. Set the multimeter to the resistance (ohms) setting. Touch the probes to the solenoid terminals. A working solenoid reads between 10-100 ohms depending on the coil design. If the reading is infinite (∞), the solenoid coil is broken internally.
- Listen for a click when power is restored. This is an easier test if you’re not comfortable with a multimeter. Plug the GTW720BSNOWS back in and select a wash cycle. Put your hand on the solenoid (carefully—it may vibrate). A properly functioning solenoid clicks audibly when energized. No click means the solenoid isn’t receiving power or is burned out.
- If the solenoid is bad, you can replace it. The solenoid on the GTW720BSNOWS unbolts from the transmission bracket and disconnects via a two-wire connector. Replacement is straightforward but requires some mechanical skill. Consider contacting a professional if you’re uncomfortable with transmission-level work.
Checking the Drive Shaft and Transmission
If the agitator dogs are fine and the solenoid tests good, the problem may be in the transmission or drive shaft. These are more complex to diagnose without specialized tools.
Visual and Physical Checks for the GTW720BSNOWS
- Look for oil or fluid leaks around the transmission area on the GTW720BSNOWS. A burnt transmission smell combined with oily residue indicates internal transmission failure.
- Spin the drive shaft by hand (with the machine unplugged). Remove the agitator and spin the drive block at the bottom of the agitator cavity. It should rotate freely without grinding, clicking, or resistance. Grinding sounds indicate internal transmission damage.
- Listen to the washer during operation. A failing transmission on the GTW720BSNOWS often makes a grinding, whining, or squealing sound during the agitate phase. This is distinct from the normal motor hum.
- Check for broken pulleys or belts. On some GTW720BSNOWS models, a broken transmission belt will prevent agitator motion even if other components are fine. This requires access to the undercarriage.
If you suspect transmission failure, this is beyond DIY repair scope for most homeowners. Transmission replacement on the GTW720BSNOWS requires near-complete disassembly and specialized tools. Contact a professional repair technician at this point.
Can You Run Your GE GTW720BSNOWS Without an Agitator? When Is This Acceptable?
Some people wonder if they can simply leave the agitator out and run the washer. The answer is complicated and depends on your needs and situation.
What Happens If You Run the GTW720BSNOWS Without an Agitator
- The drum spins normally. Without the agitator, the outer tub still rotates for the spin and rinse cycles.
- Clothes get cleaned—but much less effectively. The agitator creates turbulence and scrubbing action. Without it, cleaning relies entirely on the drum’s rotation and water circulation. Light loads may come clean, but heavily soiled clothes will not.
- The motor works harder. Without the agitator’s reciprocating motion, the motor must work during the entire wash cycle to achieve any cleaning action. This increases wear on the motor and transmission over time.
- Water consumption increases. To compensate for the lack of agitator action, the GTW720BSNOWS may require longer cycles and potentially more water to achieve similar cleaning results.
- Fabric tangling increases. The agitator prevents clothes from bunching up. Without it, delicate items and tight-weave fabrics can twist and tangle, potentially causing damage.
When Running Without an Agitator Is Acceptable (Temporary Fix)
- You’re waiting for replacement parts to arrive. If you’ve ordered new agitator dogs for your GTW720BSNOWS and they haven’t arrived yet, running a few loads without the agitator is acceptable for
Recommended Parts & Tools
GE Washer Agitator Assembly WH2X1050H
This is the direct replacement agitator for your GE GTW720BSNOWS model. If your agitator isn’t working properly, a worn or damaged agitator assembly is often the culprit and needs to be replaced. This OEM part ensures proper wash action and performance. Check current pricing on Amazon.
IFIXIT Pro Tech Toolkit
You’ll need various screwdrivers, hex keys, and removal tools to disassemble your washer and access the agitator assembly safely. This comprehensive toolkit includes all the precision tools needed for appliance repair work. Check current pricing on Amazon.
White Vinegar Cleaning Solution
Before replacing parts, cleaning out mineral deposits and debris from your washer’s interior can sometimes restore agitator function. White vinegar naturally dissolves buildup that may be preventing the agitator from moving freely. Check current pricing on Amazon.
The Agitator Assembly That Saves You From a Full Drum Replacement
If your troubleshooting has confirmed the agitator itself is stripped, cracked, or the dogs are permanently damaged beyond gluing back together, replacing the entire agitator assembly is faster and more reliable than hunting for individual internal components. This is the OEM-equivalent part that fits the GTW720BSNOWS and restores full wash action without surprises.
What works
- Fits the GTW720BSNOWS directly without adapter parts or modification—clips into place exactly as the original did.
- Comes fully assembled with all dogs and internal components included, so you’re not piecing together a repair from multiple sources.
- Installation takes about 20 minutes once the wash basket is out—much faster than sourcing and swapping individual gears or dog kits.
What doesn’t
- More expensive upfront than replacing just the agitator dogs if that’s all that’s actually broken—order this only after confirming the agitator shaft itself is damaged or the plastic body is cracked.
- Requires pulling the wash basket and possibly the transmission top cover depending on your model year, so it’s not a five-minute swap.
I’ve seen DIYers order just the dog kit first, then realize the shaft was cracked and order this assembly anyway—costing time and shipping twice over. If you’ve already confirmed the agitator itself is damaged, GE Washer Agitator Assembly WH2X1050H gets you a complete replacement and avoids a second order.
This post contains affiliate links. As an Amazon Associate, I earn from qualifying purchases at no extra cost to you.


