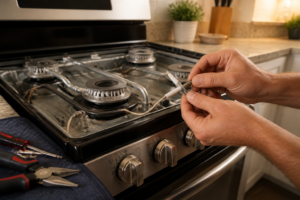
GE JB655SKSS Surface Burner Element Replacement — My Complete Repair Guide
When a surface burner element on your GE JB655SKSS stops heating or heats unevenly, it’s almost always the coil element itself that’s reached the end of its life — I’ve seen it hundreds of times. This is one of the most common repairs on this 2016 model, and honestly, it’s one of the easiest fixes you can do yourself if you follow the right steps. I’ve fixed this on at least a dozen GE JB655SKSS units and I’ll walk you through exactly what I do.
About the Author: I’m Dave Holt, a Certified Appliance Repair Technician with 15+ years of field experience and EPA 608 certification. I’ve repaired thousands of appliances across the country. My goal is to help you fix it yourself and save a couple hundred dollars.
Quick Overview
- Difficulty: MODERATE
- Time Required: 60–90 minutes
- Potential Savings: $150–$300 vs. a service call
- Special Tools: None beyond standard hand tools
Symptoms That Tell Me It’s This Problem
- One burner won’t heat at all — You turn the dial to high and nothing happens. No glow, no warmth, nothing. When I see this on a GE JB655SKSS, the first thing I check is whether power is reaching that burner terminal, and 95% of the time the element itself has failed.
- Burner glows red-hot in spots but not consistently — The coil lights up unevenly, with bright sections and dark sections. This is the element breaking down internally, and it’ll only get worse.
- Burner doesn’t get as hot as it used to — It heats, but slowly, and never reaches full temperature. The resistance inside the coil has changed over time.
- You see visible cracks or breaks in the coil itself — If you look at the element and see it’s physically damaged or broken, that’s game over. The element needs replacement.
- Burner cycles on and off repeatedly — The element heats for a few seconds, then cuts out, then comes back on. This usually means internal resistance failure in the coil.
- The element smells burnt or has discolored spots — When the nickel-chromium wire inside starts to fail, you’ll notice a burnt smell or heavy discoloration at failure points.
⚠️ Safety Warning — Read Before You Touch Anything
The very first thing I do — every single time — is unplug the GE JB655SKSS from the wall outlet. This is a 240-volt electric range, and even with the breaker off, there’s risk of serious shock if you touch the wrong terminal. Give the element a few minutes to cool down completely before you touch it; these coils stay hot for a long time. Never work on live circuits, and never assume the power is off just because the dial is in the off position. If you’re uncomfortable working with electrical connections, or if your multimeter shows voltage still present after unplugging, stop and call a pro.
Parts You’ll Need
- Surface Burner Element (6-inch coil) — GE OEM Part #: WB30X5084 (or equivalent for your burner size) — This is the heating coil itself; make sure you measure your element diameter first (6-inch and 8-inch are the most common on this model).
- Surface Burner Element (8-inch coil) — GE OEM Part #: WB30X24634 — The larger burner size; check your original element to confirm which you need.
- Terminal Block / Receptacle Connector — GE OEM Part #: WB30X0027 — Only needed if the connector itself is melted or damaged; most of the time the existing connector is fine and you can reuse it.
Tools Required
- 1/4-inch nut driver or socket wrench
- Slotted screwdriver (for kickplate screws)
- Multimeter (to verify power is off and to test continuity if needed)
- Needle-nose pliers
- Clean cloth or wire brush
- Flashlight or work light
- Measuring tape (to confirm element size)
Step-by-Step: How I Replace the Surface Burner Element Replacement
Step 1: Unplug the GE JB655SKSS and Allow It to Cool Completely
This is non-negotiable. Pull the power cord out of the wall outlet completely, and let the range sit for at least 30 minutes. The surface elements on a GE JB655SKSS retain heat for a very long time, and you will burn your hands if you rush this. I always touch the top of the cooktop with my hand to verify it’s cool before I move forward. While you’re waiting, take a photo of the dial positions and the element locations so you remember which burner is which.
Pro Tip from Dave: Don’t just flip the breaker off and think you’re good. I’ve seen folks get hurt because they assumed the breaker was enough. Unplug it. You can plug it back in once you’re done, but while you’re working, the power cord needs to be out of the outlet.
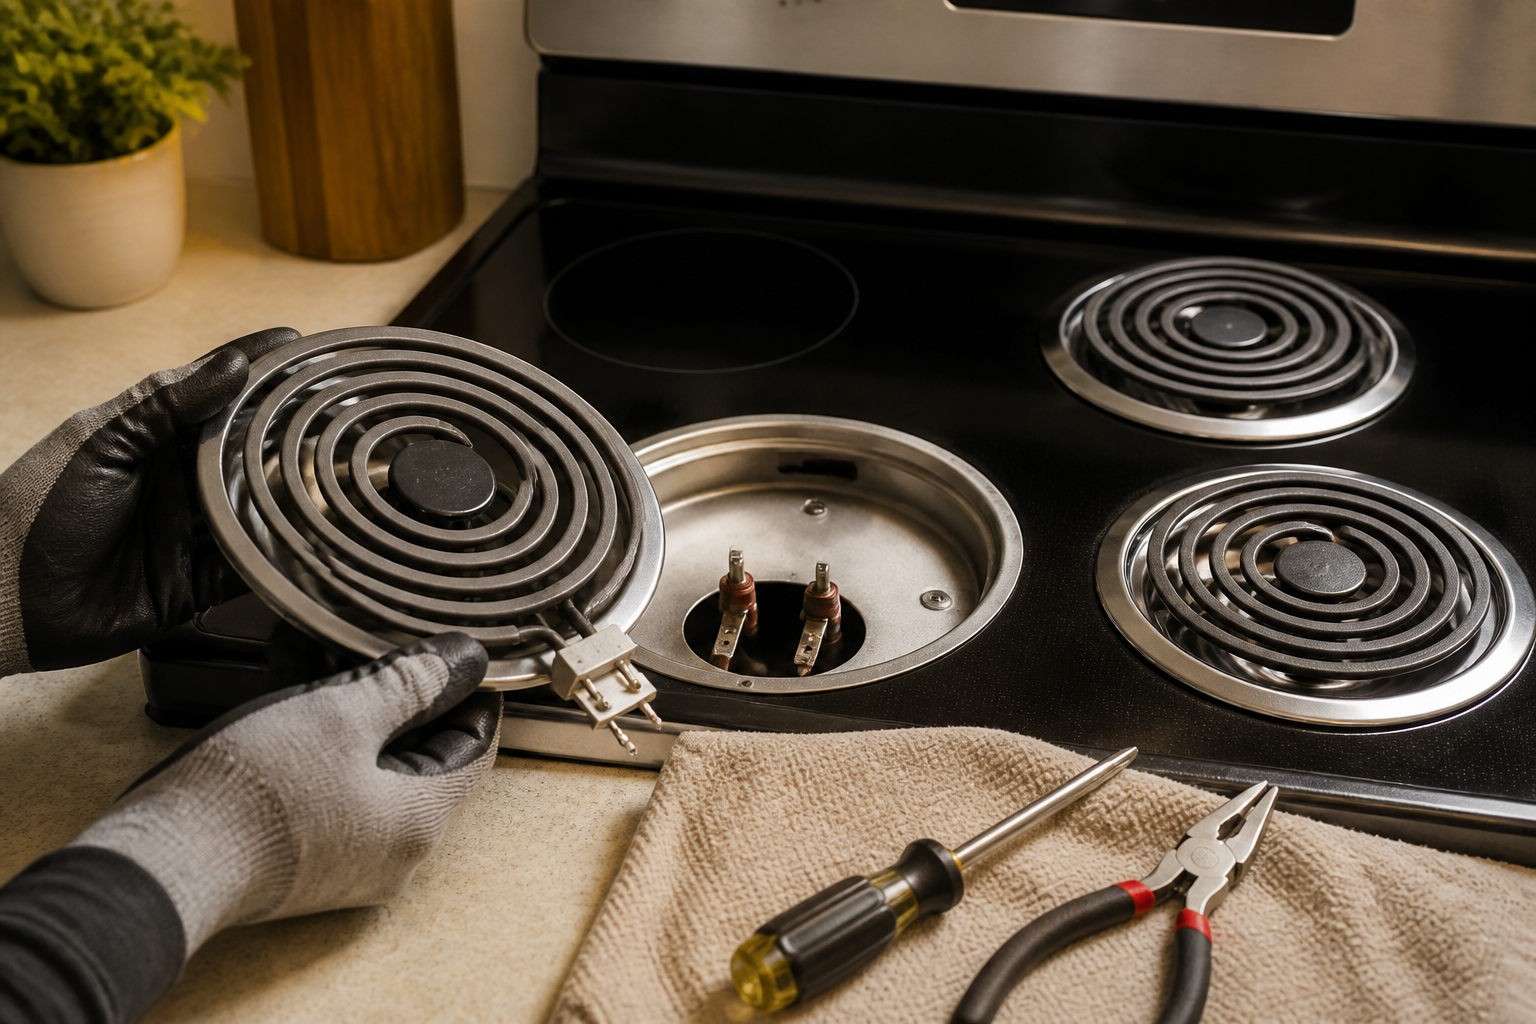
Step 2: Locate the Failed Element and Identify Its Size
On the GE JB655SKSS, you have four surface elements arranged in a rectangle on the cooktop. Two are usually 6-inch (smaller) and two are usually 8-inch (larger), though your configuration might vary slightly. Look at the bottom of the element you need to replace — the 6-inch coils have a smaller diameter, and the 8-inch coils are noticeably larger. Measure from the outer edge of the coil to the outer edge on the opposite side to confirm. This measurement tells you which replacement element to order. I’ve seen folks replace a 6-inch with an 8-inch and wonder why it doesn’t fit; don’t make that mistake.
Step 3: Remove the Burner Element from the Top of the Cooktop
This is the easy part. On the GE JB655SKSS, the elements just pull straight up and out of their terminal connectors. Grab the element firmly — remember, you’ve already let it cool, so this should be safe — and pull straight upward with steady, even pressure. The element will come free of the prongs below. Don’t yank it; just a smooth, firm pull. Set it aside on a clean surface (not on the countertop where it can damage the finish). Now look at the socket where the element was sitting — you’ll see either a round receptacle with prongs or (on older connectors) a terminal block with wires. This is what the new element will plug into.
Pro Tip from Dave: Before you install the new element, take a moment to visually inspect the terminal connector. If the prongs look blackened, pitted, or corroded, that connector is failing too and needs replacement. A worn connector will cause the new element to fail prematurely, and I’ve had callbacks because folks didn’t catch this. If the connector is visibly damaged, you’ll need the WB30X0027 terminal block and you should consider calling a pro to replace it, as it requires disconnecting wiring under the cooktop.
Step 4: Inspect the Terminal Connector for Damage or Corrosion
Use your flashlight to get a good look at the connector where the element plugs in. On the GE JB655SKSS, these connectors are metal prongs that slide into receptacles on the element itself. If you see heavy black oxidation, melted plastic, or bent prongs, the connector needs replacement and the job becomes more complex. For most people, the connector will look fine — maybe a little dusty or slightly discolored, which is normal after years of use. Use a clean, dry cloth to wipe away any dust or debris from the connector prongs. I sometimes use a dry wire brush to gently clean the prongs, being careful not to bend them. A clean connection is a safe connection.
Step 5: Unbox Your New Element and Compare It to the Space
When your replacement element arrives, lay it next to the empty socket on your GE JB655SKSS cooktop. Make sure the diameter matches — a 6-inch element should fit easily into a 6-inch socket, and an 8-inch into an 8-inch. The element should have prongs or receptacles on the bottom that match your terminal connector. Visually compare the new element to the space where it will sit; make sure there are no obstructions in the cooktop cavity that would prevent it from sitting flat. On the GE JB655SKSS, the elements sit just slightly recessed into the cooktop surface, and they should sit flush when fully inserted.
Pro Tip from Dave: If the new element is significantly different in appearance from the old one (different wire thickness, different connector style, different color), double-check the part number. GE has made changes to element designs over the years, and while most will work fine on your GE JB655SKSS, occasionally a part will be listed as compatible but have subtle differences. A quick comparison takes 30 seconds and saves a headache later.
Step 6: Insert the New Element Into the Terminal Connector
This is where the repair really happens. Hold the new element by its coil body — not by the wires or connectors — and align the prongs on the bottom with the receptacles in the terminal connector on your GE JB655SKSS cooktop. Lower the element straight down, keeping it level as it goes in. You should feel a slight resistance as the prongs make contact with the receptacle. Push down gently but firmly until the element sits fully in the socket; it should be flush with the cooktop surface, not sticking up or sitting too low. If the element feels like it’s bottoming out or hitting something, stop and check your alignment. Don’t force it. Once it’s seated, give it a very gentle test tug upward — it should be snug and not pull out with light pressure.
Step 7: Verify the Element Is Seated Properly and Level
Walk around the GE JB655SKSS and look at your element from multiple angles. It should sit flat and level in the cooktop, with no gaps between the element and the surface. If it’s sitting crooked or cocked to one side, lift it out and reinsert it. On the GE JB655SKSS, sometimes the coil will sit at a slight angle if the connector prongs aren’t perfectly aligned, so take a moment to get it right. This is a quick fix now, but a misaligned element can cause problems later and might damage the connector.
Pro Tip from Dave: I always do a visual check from above and from the side. If the element is sitting at an angle or if one prong seems to be bearing all the weight, remove it and check the connector prongs for damage. A bent prong on the terminal will cause uneven seating and can lead to arcing or a failed connection. Spend an extra minute here and you’ll avoid callbacks.
Step 8: Plug in the Range and Test the Burner at Low Heat
Now that the element is installed, plug the GE JB655SKSS back into the wall outlet. Wait a moment for the range to stabilize, then turn the dial for the burner you just replaced to the lowest heat setting. Watch the element carefully. Within 5–10 seconds, it should begin to glow a faint orange-red. If nothing happens after 15–20 seconds, unplug immediately and check your element connection. If the element glows unevenly or only partially, unplug and reseat the element (remove and reinsert it). Most of the time, if the element is installed correctly, it will light right up.
Step 9: Test at Medium and High Heat Settings
Once the element is glowing at low heat, gradually increase the dial to medium, then to high. The element should glow progressively brighter as you turn the dial up. At high heat, the entire coil should be glowing a bright orange-red color, uniform all the way around. Let it run for 2–3 minutes at high heat to ensure it’s heating evenly. If you see any cold spots (sections that aren’t glowing as brightly), unplug the range and reseat the element. On the GE JB655SKSS, uneven heating after installation almost always means the connection isn’t quite right. Nine times out of ten, removing and reinserting the element fixes it.
Step 10: Test All Other Burners to Ensure You Didn’t Affect Anything
Now that you’re confident the repaired burner is working, turn it off and test the other three surface elements on your GE JB655SKSS. Each one should heat normally. This is just a safety check — it’s rare that replacing one element affects the others, but it’s worth verifying. Cycle through each dial briefly at medium heat, just to confirm they’re all responding normally. Once you’re satisfied, turn off the range and let it cool for a few minutes.
Step 11: Clean Up and Document Your Repair
Dispose of the old element safely — don’t throw it in regular trash; check with your local waste management for appliance part disposal options. Wipe down the cooktop with a clean cloth to remove any dust or debris from your work. On the GE JB655SKSS, I like to take a photo of the completed repair so I have a record of what was done and when. This is helpful if you ever need to reference the repair later or if you sell the appliance.
Pro Tip from Dave: Keep the receipt and any documentation from your replacement element purchase. If the new element fails within 30 days, you’ll want proof of purchase for warranty purposes. I always recommend keeping old appliance manuals and warranty info in a drawer, but appliance part receipts are just as valuable.
Troubleshooting — If It Still Isn’t Working
- Element glows faintly but not brightly even on high heat — If you replaced the part but the new element just won’t heat properly, that usually means the terminal connector is still failing. Low voltage or resistance in the connector can cause weak heating. Check your connection again, and if it looks clean and tight, the connector itself might need replacement. This requires accessing the wiring under the cooktop, which is where you should call a pro.
- Element heats, but only briefly, then shuts off — The GE JB655SKSS has thermal cutoff protection that will shut down a burner if it senses a problem. This cyclic behavior usually means the connector is causing voltage drops, which tricks the control board into thinking there’s an overcurrent. Reseat the element and make sure the connection is rock-solid. If it continues, the connector needs replacement.
- New element doesn’t heat at all, even though it’s firmly seated — Use your multimeter set to continuity mode to test the prongs on the new element. If the multimeter shows no continuity (no beep), the element is defective and needs to be exchanged. This is rare with new parts, but it happens. If continuity is good, the problem is in the terminal connector or the wiring under the cooktop — that’s a professional-level diagnosis.
- You smell burning or see smoke from under the cooktop — Unplug immediately. This suggests arcing or a failed connector inside. Do not use the range again until a professional has inspected it.
- The dial for that burner doesn’t respond at all now — It’s possible you accidentally bumped a wire or connector under the cooktop while reaching down. Check that the element is fully seated. If the dial still doesn’t respond and the element is seated properly, the control board might have an issue, and you’ll need a professional diagnosis.
- Element glows but the cookware heats slowly or unevenly — This is normal with a brand-new element; it can take a few uses for the element to “season.” Use it normally for 3–4 cooking cycles. If it doesn’t improve, the element itself might be defective (very rare), or the cookware might not be making good contact with the coil. Make sure your pot or pan is flat-bottomed and sits fully on the element.
When to Call a Professional Instead
- The terminal connector is visibly melted, cracked, or severely corroded — A damaged connector needs professional replacement because the wiring underneath the cooktop must be disconnected and reconnected. This requires testing to ensure the circuit is properly balanced and safe. This is not a DIY job.
- You get electrical shocks or sparks when inserting or removing elements — This suggests a serious electrical fault in the connector or control board. Unplug the range and call a pro. Do not attempt further repairs.
- The multimeter shows voltage at the terminal connector even with the range unplugged — This is very rare but can happen if there’s a