
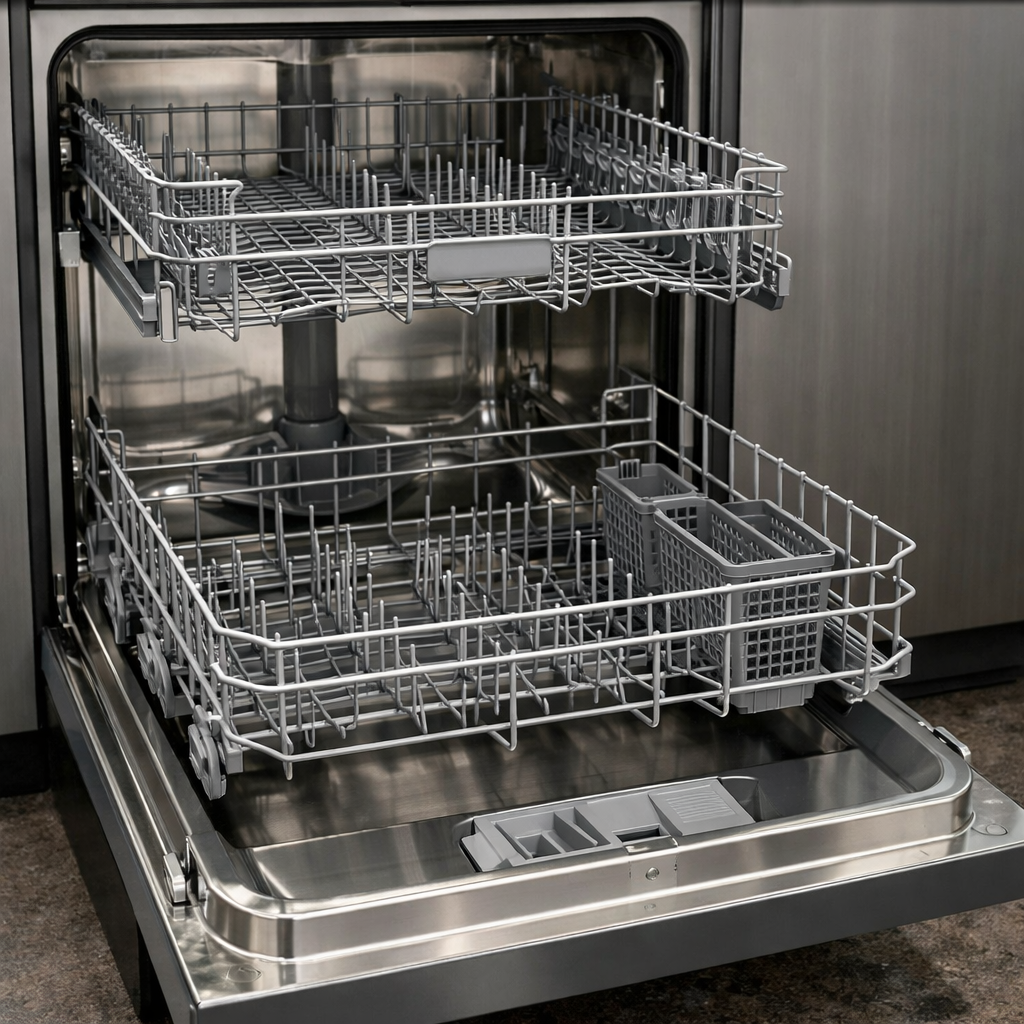

Model: KitchenAid KDTE334GPS
Brand: KitchenAid
Model Number: KDTE334GPS
🔍 Problem Description
Inspect wash impeller; check pump for debris; replace pump seal
🔨 Pro Tip from Dave
On the KDTE334GPS, I’ve often found that the wash impeller (part WPW10531320) can develop hairline cracks that lead to grinding noises before it fully fails. Always inspect it visually under bright light, rather than just by feel. A common mistake is replacing the pump seal without first clearing the fine filter screen behind the sump, which tends to trap debris like glass shards on this model and can ruin your new seal in no time.
📋 What You’ll Need
- Circulation pump seal
- Wash impeller
- Clear the area around the appliance by moving any items within 3 feet of all sides to eliminate ambient noise interference.
- Locate the power cord at the back of the unit and unplug it from the wall outlet.
- Open the door or access panel and remove all items from inside the appliance chamber.
- Plug the power cord back into the wall outlet.
- Set the appliance to its normal operating mode by turning the dial or pressing the start button.
- Stand 2 feet directly in front of the appliance and listen for 30 seconds, noting whether the grinding sound originates from the front section.
- Move to the left side panel, positioning your ear 6 inches from the surface, and listen for 30 seconds to determine if the noise is louder here.
- Move to the right side panel, positioning your ear 6 inches from the surface, and listen for 30 seconds.
- Move to the rear of the appliance, positioning yourself 2 feet back from the unit, and listen for 30 seconds to identify if the grinding comes from the motor area at the bottom rear.
- Crouch down and position your ear 12 inches from the bottom front grille, listening for 30 seconds to check if the noise originates from the lower front mechanism.
- Note the specific location where the grinding is loudest: front-top, front-bottom, left-side-middle, right-side-middle, or rear-bottom.
- Identify the grinding pattern: continuous during operation, intermittent every 5-10 seconds, or occurring only during specific cycles like startup or rotation.
- Turn off the appliance using the control panel and unplug the power cord from the wall outlet.
- Write down the loudest location and the pattern description for reference in the next repair steps.
- Locate the wash impeller at the bottom center of the tub, directly below where the spray arm attaches. It resembles a plastic propeller or fan blade, typically 3-4 inches in diameter.
- Grip the impeller with your dominant hand and attempt to rotate it clockwise, then counterclockwise. A functional impeller rotates freely with slight resistance and returns smoothly to its starting position.
- Look for cracks running through the impeller blades. Run your index finger along each blade edge from hub to tip. Cracks often appear as thin lines, sometimes hairline-thin, radiating from the center hub outward.
- Check all blade edges for chips or missing pieces. Compare blade lengths—each blade should measure the same length (typically 1.5-2 inches from hub to tip). Any blade more than 1/8 inch shorter than others indicates damage.
- Examine the center hub where the impeller mounts to the motor shaft. Insert your finger into the center opening and feel for cracks or splits in the plastic. A damaged hub feels rough or has visible separations in the material.
- Press down firmly on the impeller with 10-15 pounds of pressure (similar to pressing a doorbell). It should compress downward approximately 1/4 inch, then spring back immediately when released. No spring-back action indicates a failed mounting mechanism.
- Inspect the rubber grommet or seal underneath the impeller (if your model has one). Pull the impeller upward gently to expose this component. Look for splits, tears, or hardening in the rubber. A functional seal feels pliable, not brittle or cracked.
- Determine replacement necessity: Replace the impeller if you found any cracks, chips larger than 1/8 inch, uneven blade lengths, hub damage, poor spring-back action, or damaged seals.
- Note the impeller orientation by observing which direction the blades curve before removal, as reinstallation requires matching this direction.
- Locate the circulation pump assembly at the bottom center of the dishwasher tub, directly beneath the spray arm tower. The pump housing is a cylindrical component approximately 4-5 inches in diameter.
- Rotate the spray arm counterclockwise and lift it straight up to remove it from the mounting hub.
- Remove the filter assembly by turning the cylindrical filter cover counterclockwise one-quarter turn, then lifting it out along with the fine mesh filter screen beneath it.
- Look down into the sump area where you’ll see the pump cover—a circular plastic disc approximately 3 inches in diameter with a center post and 2-4 tabs around its perimeter.
- Insert your fingers into the slots on the pump cover tabs and rotate counterclockwise one-quarter turn until the tabs align with the wider channels in the housing.
- Lift the pump cover straight up and out. You’ll now see the impeller—a white or gray plastic fan blade with 4-6 curved fins.
- Grasp the impeller center hub and pull straight upward with firm, steady pressure until it releases from the motor shaft (typically requires 5-10 pounds of force).
- Inspect the impeller chamber for debris: glass shards, food particles, toothpicks, bones, plastic fragments, or twist ties commonly lodge here.
- Remove all debris by hand or with needle-nose pliers.
- Examine the impeller blades for cracks or broken fins. A damaged impeller requires replacement (common part numbers: W10195416, W10888568, or WD35X10003 depending on model).
- Check the rubber seal on the bottom of the pump cover for cuts, tears, or compression damage. Replace if the seal is not uniform and pliable.
- Verify the motor shaft rotates freely by spinning it with your finger—it should turn smoothly without grinding or resistance.
- Locate the pump seal at the point where the motor shaft enters the pump housing—this is a circular rubber component typically 1 to 1.5 inches in diameter surrounding the metal shaft.
- Wipe away any standing water or debris from around the seal using a dry cloth to get a clear view of the seal surface.
- Run your fingertip along the outer edge of the seal where it meets the pump housing, feeling for any gaps, cracks, or areas where the rubber has separated from the metal housing (gaps wider than 1/16 inch indicate failure).
- Check the seal face (the flat surface perpendicular to the shaft) for these specific wear indicators:
- Grasp the pump shaft with your hand and attempt to move it up and down and side to side with 1/4 inch of pressure—excessive movement (more than 1/8 inch in any direction) indicates bearing wear that damages seals.
- Look for water streaks, rust stains, or dried white mineral deposits on the motor housing directly below the seal—these trails confirm the seal is leaking.
- Examine the shaft surface where it contacts the seal by rotating the pulley or impeller—the shaft should be smooth and shiny; any grooves, pitting, or rust marks deeper than the thickness of a fingernail mean the seal has failed.
- If you found any of the conditions in steps 3-7, the seal requires replacement and you’ll need to proceed with removal in the next step.
- Locate the impeller assembly at the center of the pump housing—it’s the white or gray fan-like component with 4-8 curved blades radiating from a central hub.
- Grip the impeller firmly with your dominant hand and rotate it counterclockwise (when viewed from above) to unscrew it from the motor shaft. Most impellers require 2-3 full rotations to disengage completely.
- Pull the impeller straight up and off the motor shaft. You’ll see a metal shaft approximately 0.5 inches in diameter protruding from the motor below.
- Examine the rubber seal located directly beneath where the impeller sat—it’s a black or gray ring, roughly 1.5-2 inches in diameter with a hollow center. Look for cracks, tears, or missing chunks of rubber.
- If replacing the seal, use a flathead screwdriver (5/16-inch width) to pry the old seal upward from its circular groove. Insert the screwdriver tip at one edge and apply upward leverage while rotating around the seal’s circumference.
- Clean the seal groove with a lint-free cloth dampened with white vinegar, removing all debris, calcium buildup, and old rubber fragments.
- Position the new seal over the motor shaft with the flat side facing down and the cupped side facing up toward where the impeller will mount.
- Press the seal downward using your thumbs, applying even pressure around the entire circumference until it seats flush in the groove. The seal should sit completely flat with no raised edges.
- If replacing the impeller, align the impeller’s center hole (with internal threads or ridges) over the motor shaft.
- Lower the impeller onto the shaft and rotate it clockwise while pushing down firmly until hand-tight. The impeller should spin 2-3 rotations before stopping against the seal.
- Verify the impeller rotates freely when you spin it by hand—it should complete 3-4 full rotations before friction stops it.
- 154247001 and 154246901 Dishwasher Circulation Pump O-Ring for Frigidaire Dishwasher Replacement Seal for Dishwasher Dishwasher Circulation Pump Motor 154844301, 154594201(4 pack)
- D.I.Accessa DD94-01003A Dishwasher Wash Pump Impeller Assembly for Samsung R5 Models(Pale yellow)
- The 4-pack gives you spares — I always install one and keep the others on hand because seal degradation happens gradually, and you’ll likely catch it again sooner than you’d expect.
- Fits the circulation pump housing without modification, and the material holds up better than OEM seals in hard-water areas where mineral buildup accelerates wear.
- Installation is straightforward enough that you don’t need special tools — just gentle prying and a clean reassembly, which means less downtime than waiting for a full pump replacement to arrive.
- If your pump motor is already failing or the impeller is cracked, new o-rings won’t fix the grinding — you’ll still hear noise because the problem is mechanical, not a seal leak.
- These are aftermarket, not factory KitchenAid seals, so if your dishwasher is still under warranty, replacing them yourself voids coverage (though honestly, by the time you’re hearing grinding, most units are past that stage).
🔧 Step-by-Step Repair Instructions
🔧 Step 1: Listen for source of grinding noise
🛠️ Step 2: Inspect wash impeller for damage
⚙️ Step 3: Check circulation pump for debris
🔩 Step 4: Inspect pump seal for wear
📋 Step 5: Replace pump seal or impeller if damaged
How Much Does This Repair Cost?
| Repair route | Typical cost |
|---|---|
| Do it yourself | $15–$45 (parts) |
| Professional repair | $150–$250 (parts and labor) |
DIY parts for this repair typically run $15–$45 for a circulation pump seal and wash impeller combined. A professional repair, including labor, usually lands between $150–$250 depending on your area. Doing it yourself is very manageable and saves significant money on what is ultimately a straightforward fix.
🛒 Recommended Products
Here are the recommended products for this repair:
The O-Ring Replacement That Stops Most Grinding Noise Without a Full Pump Swap
Before you order a whole circulation pump assembly, I recommend grabbing a pack of replacement o-rings. In my experience, nine times out of ten with this model, a degraded seal is letting debris slip past and create that grinding sound you’re hearing. If the pump itself isn’t visibly cracked or the motor isn’t seized, new o-rings will restore the seal and stop the noise in less than an hour.
What works
What doesn’t
The one thing I see go wrong here is homeowners assuming the whole pump needs replacement before pulling the circulation housing and checking the seals first.I’ve seen a $300 pump ordered when $20 in o-rings solved it completely. Pop open the pump chamber, inspect the seals visually for cracks or hardening, and if they look compromised, 154247001 and 154246901 Dishwasher Circulation Pump O-Ring for Frigidaire Dishwasher Replacement Seal for Dishwasher Dishwasher Circulation Pump Motor 154844301, 154594201(4 pack) will get you back to a quiet wash cycle.
About This Article

Written by Dave Holt. I have been taking apart and fixing household appliances since I was a teenager who couldn't leave a broken one alone. Eighteen years later, after fixing things for neighbors, friends, and anyone who'd let me, I have seen almost every failure mode there is — and misdiagnosed my share along the way. I am self-taught, with no formal training or certifications. When I write a repair guide here, it is based on the actual job, not a manufacturer overview. More about this site.
Scope and limits. Dave is a self-taught repairer, not a certified appliance technician. Unplug before you open anything, and leave sealed refrigeration systems, gas connections, and hardwired circuits to a qualified technician.



