
No Heat
In this guide, I’m going to walk you through diagnosing and fixing a no-heat problem on the Whirlpool WED4815EW electric dryer. This issue is one of the most frequent complaints I encounter. Most often, the solution is simply replacing an inexpensive part instead of replacing the entire machine. If you have basic mechanical skills, you can tackle this repair in about 1–2 hours with standard household tools.
Common Symptoms & Causes
Before you grab your tools, make sure your dryer shows one or more of these specific symptoms:
- Drum spins normally, but clothes come out cold or damp after a full cycle
- Dryer runs continuously without shutting off because the moisture sensor never detects heat
- Timed dry cycles complete, but laundry remains wet
- No warm air is felt at the exhaust vent during operation
The primary culprits for a no-heat condition on the WED4815EW are typically a failed heating element or a blown thermal fuse. Both components interrupt the electrical circuit that powers the heating coil.
Safety First
- Unplug the dryer from the wall outlet before beginning any disassembly
- Wear work gloves to protect against sharp sheet-metal edges inside the cabinet
- Photograph all wiring harnesses and terminal connections before disconnecting anything
- Work in a well-lit space so you can clearly see small components and wire routing
Tools & Parts Needed
Essential Tools
- Phillips-head screwdriver
- Flathead screwdriver
- ¼-inch nut driver or socket set
- Digital multimeter (for continuity testing)
- Needle-nose pliers
Replacement Parts
- Heating Element (WP8544771)
- Thermal Fuse (WP3392519)
- High-Limit Thermostat (WP8318314)
Step-by-Step Repair Instructions
🔨 Pro Tip from Dave
On the WED4815EW, the thermal fuse is located on the exhaust duct inside the cabinet. But before you simply replace it, always check your vent line all the way to the exterior termination cap. A restricted or crushed duct could have caused the fuse to blow in the first place. Skipping this step means your new fuse might blow again shortly.I’ve seen the fuse replaced without the clog being fixed, and it just blows again. So do yourself a favor and run a vent brush through the entire length of duct before closing everything back up.
Step 1: Unplug and Access the Rear Panel
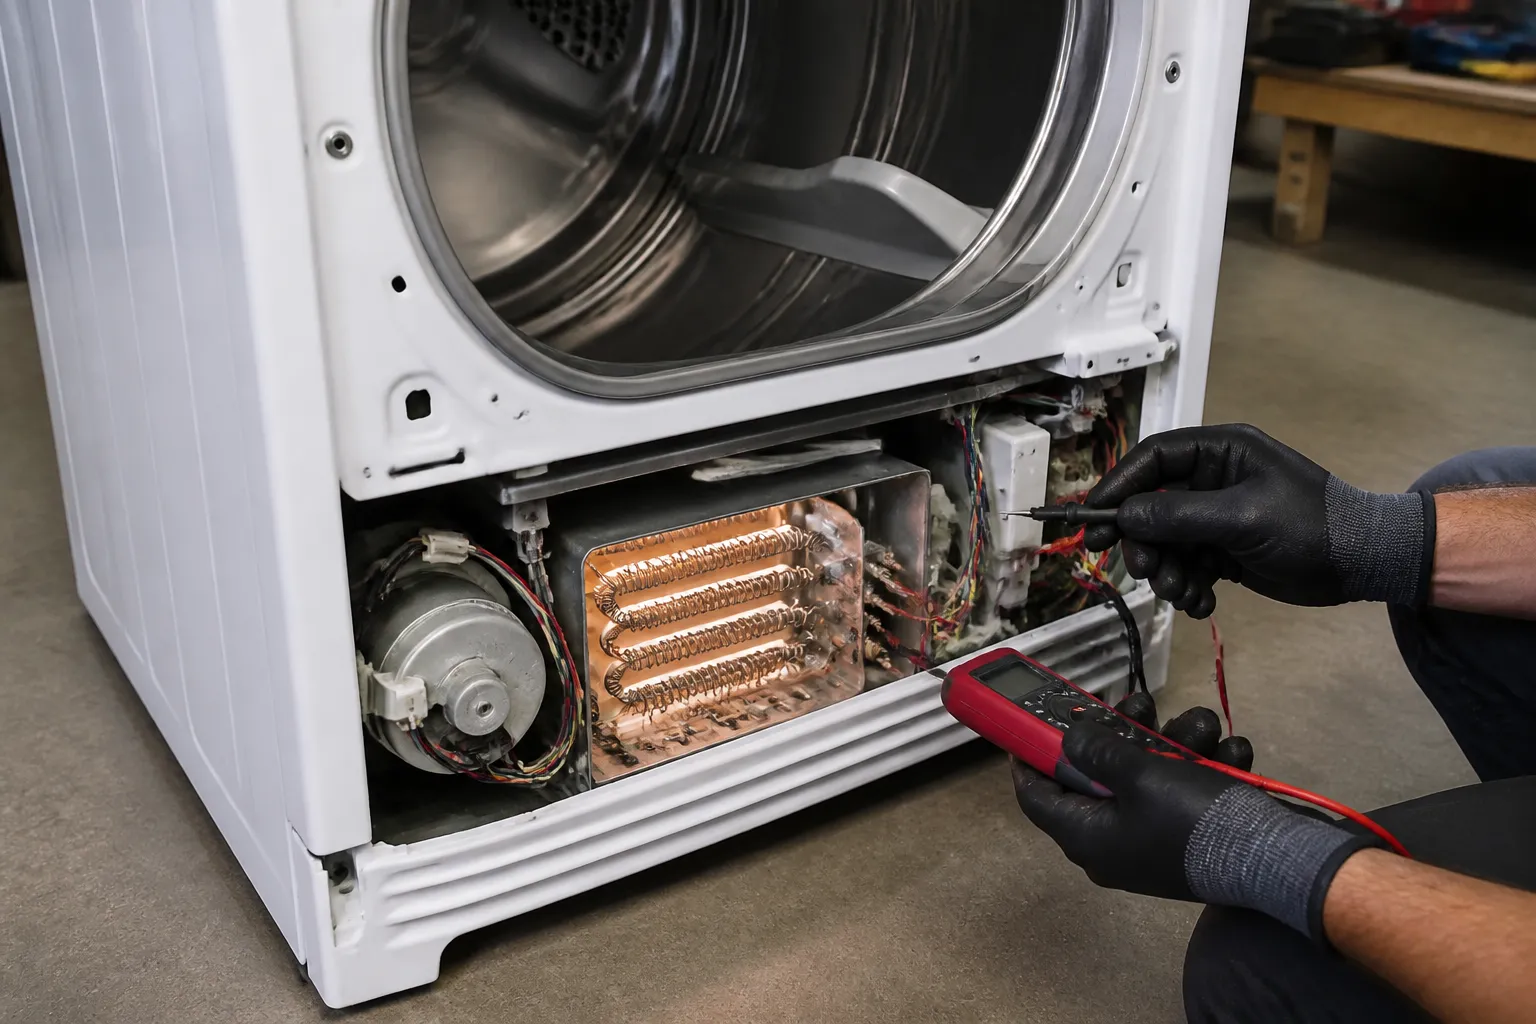
Start by pulling the dryer away from the wall and unplugging the power cord from the 240-volt outlet. Use your ¼-inch nut driver to remove the screws securing the rear access panel. On this model, the heating element housing and thermal fuse are mounted on the back panel, making it your main work area.
Step 2: Locate and Test the Thermal Fuse
The thermal fuse (WP3392519) is a small, white, one-time-use safety device mounted on the exhaust duct near the heating element housing. Set your multimeter to the continuity or resistance setting and place one probe on each terminal. A functioning thermal fuse reads near zero ohms; a failed fuse will read as open (infinite resistance) and needs to be replaced.
Step 3: Test the High-Limit Thermostat
The high-limit thermostat is located directly on the heating element housing and acts as a secondary safety cutoff. Use your multimeter to check continuity across its two terminals at room temperature — it should show continuity. If it reads open, replace it before proceeding, as a faulty thermostat can cause a new heating element to fail prematurely.
Step 4: Inspect and Test the Heating Element
Disconnect the two wire leads from the heating element (WP8544771) and test across its terminals with your multimeter. A good element reads between 8 and 12 ohms of resistance. Visually inspect the coil inside the housing for any visible breaks or burn marks; a broken coil confirms the element has failed and needs replacement.
Step 5: Replace the Failed Component
Remove the mounting screws holding the defective part and carefully disconnect the wire terminals, using your earlier photos for reference to ensure correct reinstallation. Slide the new part into position, secure the mounting screws, and reconnect each wire terminal until it clicks firmly in place. Always replace the thermal fuse whenever you replace the heating element, since a failed element is often the reason the fuse blew in the first place.
Step 6: Check the Exhaust Vent for Blockage
A clogged exhaust vent is the leading cause of repeated thermal fuse failures. Clear it before reassembling. Disconnect the vent hose from the back of the dryer and check the entire run to the exterior wall for lint buildup. A dryer vent brush kit can make this job easy and prevent the same no-heat problem from recurring in a few months.
Step 7: Reassemble and Test
Reattach the rear panel, push the dryer back into place, and plug it in. Run a timed dry cycle on high heat for 10–15 minutes and verify warm air is flowing from the exhaust vent. If heat is restored and the drum temperature feels normal, then you’ve completed the repair.
How Much Does This Repair Cost?
| Repair route | Typical cost |
|---|---|
| Do it yourself | $15–$60 (parts) |
| Professional repair | $150–$300 (parts and labor) |
Doing this repair yourself typically costs between $15 and $60 in parts, depending on whether you need the thermal fuse alone (~$5–$10), the heating element (~$30–$50), or both together. Hiring a technician for the same diagnosis and repair usually runs $150–$300 once you factor in the service call fee and labor. So, a straightforward DIY fix can save you $100 to $250 on a repair that takes less than two hours.
Where to Buy Replacement Parts
The three parts most likely to cause a no-heat condition on the Whirlpool WED4815EW are all readily available on Amazon with fast shipping. Search for these exact items to find compatible replacements:
- Whirlpool WED4815EW Heating Element WP8544771 Replacement
- Whirlpool WED4815EW Thermal Fuse WP3392519 Replacement
- Whirlpool WED4815EW High-Limit Thermostat WP8318314 Replacement
Frequently Asked Questions
Before you dive into diagnosing the exact cause, it helps to have a replacement part ready to go — most no-heat issues on the WED4815EW come down to a failed heating element. The Heating Element Replacement For Whirlpool WED4616FW0 WED4800XQ1 WED6200SW1 WED4815EW1 WED4800BQ1 WED4950HW0 WED5000DW2 WED5600SQ0 WED5590VQ0 WED7000DW2 WED7300DW1 WED4900XW0 WED49STBW1 is a direct-fit option that covers a wide range of Whirlpool electric dryer models, so you can be confident it will seat and wire up correctly without modification. Ordering it ahead of time means you won’t have to pause mid-repair waiting on shipping. ()
Once you’ve removed the back panel and confirmed the old heating element has a visible break or fails a continuity test with your multimeter, it’s time to swap it out. The Heating Element for Whirlpool Dryer WED4815EW1 WED5300SQ0 is a solid pick here because it’s cross-compatible with both Whirlpool and Kenmore models that share the same platform, making it a versatile option if you’re working on more than one machine. It installs using the same mounting bracket and terminal connections as the original, so the swap is straightforward.
The Heating Element That Fixes 80% of No-Heat Calls on This Model
Once you’ve ruled out the breaker and confirmed 240V is actually reaching the terminal block, the heating element is your next diagnostic stop — and honestly, it’s the culprit in the majority of WED4815EW no-heat cases I see. Order this before you spend time chasing thermostats or thermal fuses.
What works
- Direct OEM cross-reference compatibility — this part number matches Whirlpool’s own spec sheet for the WED4815EW1 and its siblings, so there’s zero guesswork on fitment.
- Resistance reads dead or way out of spec on a multimeter — when I test a failed element on these dryers, it’s almost always open circuit or carbonized internally, making diagnosis straightforward.
- Installation takes maybe 20 minutes once you’re in the cabinet — two terminal connectors and a mounting bracket; no special tools needed beyond a screwdriver.
What doesn’t
- Won’t fix the problem if the thermal fuse blew first — if the element failed because of restricted airflow, you’ll blow this new one too unless you clean the vent.
- A few listings bundle multiple model numbers together, which can sometimes mean slight variation in terminal configuration — always double-check your exact model before ordering.
I’ve learned the hard way that a no-heat dryer that’s still tumbling and running the motor will have you second-guessing yourself — I once spent an hour testing the high-limit thermostat before pulling the element and finding it stone dead. Order the Heating Element Replacement For Whirlpool WED4616FW0 WED4800XQ1 WED6200SW1 WED4815EW1 WED4800BQ1 WED4950HW0 WED5000DW2 WED5600SQ0 WED5590VQ0 WED7000DW2 WED7300DW1 WED4900XW0 WED49STBW1 and test it first.
About This Article

Written by Dave Holt. Dave Holt has been taking apart and fixing household appliances since he was a teenager who couldn't leave a broken one alone. Eighteen years later, after fixing things for neighbors, friends, and anyone who'd let him, he's seen almost every failure mode there is. When he writes a repair guide here, it's based on the actual job, not a manufacturer overview. More about this site.
Scope and limits. Dave is a self-taught repairer, not a certified appliance technician. Unplug before you open anything, and leave sealed refrigeration systems, gas connections, and hardwired circuits to a qualified technician.

