
Freezer not freezing
This step-by-step repair guide walks you through fixing freezer not freezing on your GE GSS25IYNFS (Side-by-Side). With the right tools and parts, most homeowners can complete this repair in 1–2 hours and avoid a costly service call.
🔨 Pro Tip from Dave
On the GSS25IYNFS, don’t overlook the defrost thermostat (WR50X10068) — it’s a sneaky failure point that mimics a bad compressor and trips up a lot of DIYers. Also, when you pull the rear freezer panel, check the evaporator fan blade for ice buildup first before ordering parts; a manual defrost cycle alone sometimes reveals the real culprit and saves you an unnecessary parts purchase.
Part of our Top 20 Refrigerator Models & Common Repair Issues Guide. Browse all refrigerator repair guides for related models and issues.
“`html
Common Symptoms & Causes
If your GE GSS25IYNFS freezer is struggling to maintain temperature, watch for these telling signs before diagnosing the problem.
- Freezer temperature reads above 10°F even after several hours of normal operation
- Ice cream is soft or melted despite the freezer running continuously
- Frost builds up heavily on the back freezer wall near the evaporator coils
- The freezer fan runs but little to no cold air circulates through the compartment
These symptoms are most commonly caused by a failed evaporator fan motor, a faulty defrost heater or thermostat, or a worn door gasket allowing warm air infiltration.
“`
Safety First
- Unplug the refrigerator from the power outlet before starting any repair — never work on a live appliance.
- Shut off the water supply valve before disconnecting any water lines or hoses.
- Wear work gloves when handling metal brackets, sheet metal edges, or sharp components.
- Take photos with your phone before disconnecting any wiring harnesses or connectors.
- Work in a well-lit area with enough floor space to lay removed panels flat.
Tools & Parts Needed
Essential Tools
- Phillips #2 screwdriver
- ¼” nut driver
- Needle-nose pliers
- Multimeter
- Flashlight or work light
Replacement Parts
- Defrost heater
- defrost thermostat
- evaporator fan motor
- multimeter
Step-by-Step Repair Instructions
Step 1
Place a probe thermometer in the center of the freezer and wait 15 minutes for a stable reading. If the temperature is above 20°F, the freezer is genuinely underperforming and warrants further diagnosis rather than a simple door-seal or loading issue. This baseline reading also helps you confirm the repair worked when you recheck after reassembly.
Step 2
Unplug the refrigerator before touching any internal components — the defrost heater circuit carries 120V. Remove the freezer back panel (4 Phillips #2 screws) to expose the evaporator coils, which reveal the failure mode at a glance: a thick blanket of frost means the defrost system is not melting ice buildup as it should, while completely bare, non-cold coils suggest a refrigerant leak that requires a certified technician. Identifying which condition you have here determines every step that follows.
Step 3
Test the defrost heater — the glass or quartz tube running along the evaporator — with a multimeter set to Rx1, because this component is responsible for melting frost off the coils during each automatic defrost cycle. An open circuit (no continuity) means the heater has burned out and must be replaced; compare your resistance reading to the value printed on the appliance label, which should fall roughly between 20 and 50 ohms. Pro tip: handle the glass heater tube carefully — it is fragile and oils from your skin can create hot spots that shorten the life of a new heater.
Step 4
Test the defrost thermostat, the small bi-metal clip fastened at the top of the evaporator, which acts as a safety cutoff that stops the heater once the coils reach the correct temperature. At room temperature the thermostat should show continuity; an open reading at room temperature means it has failed in the tripped position and is preventing the heater from ever energizing. This is a common and inexpensive failure, so test it even if the heater passed.
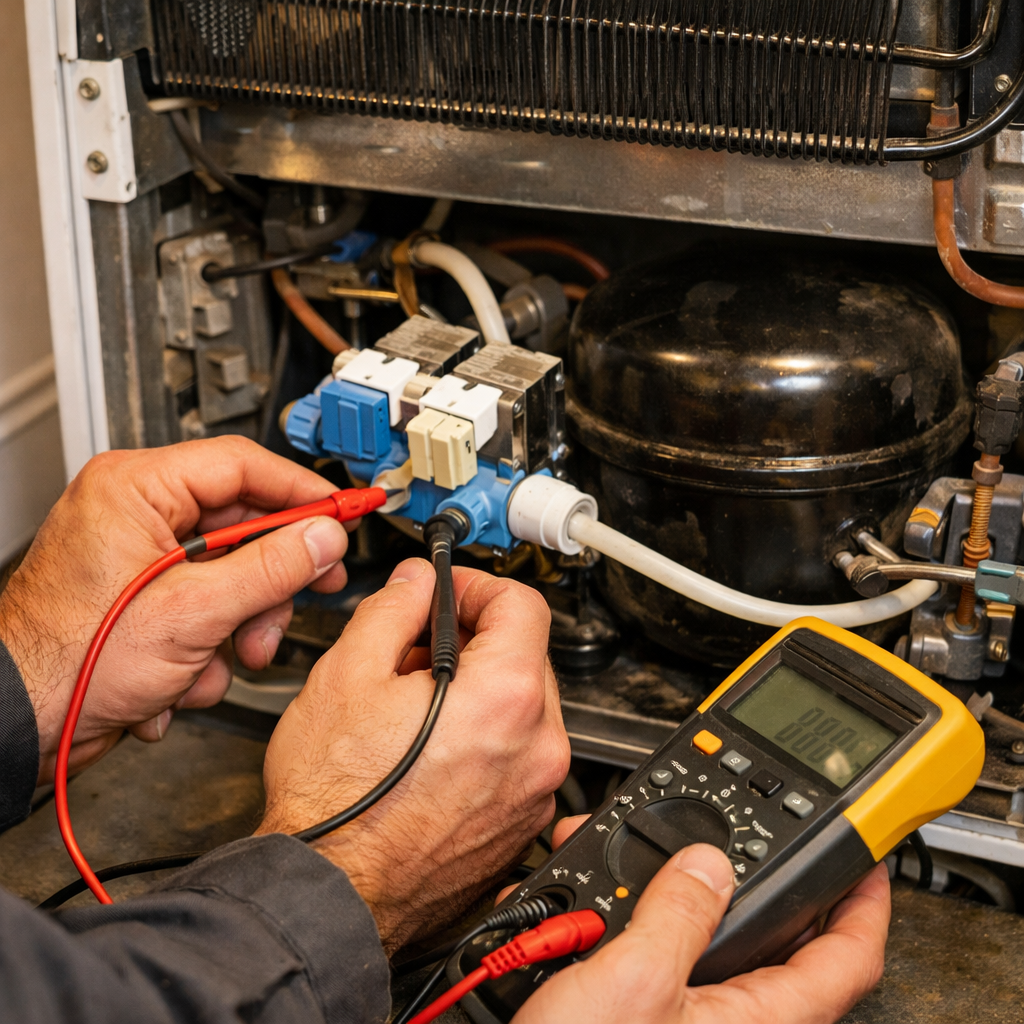
Step 5
Spin the evaporator fan blade by hand to check for bearing failure, and test the motor windings on Rx1 to catch an electrically open motor — a failed fan motor means cold air cannot circulate from the evaporator into the freezer compartment, causing warm temperatures even when the refrigeration system itself is working. Replace the motor if the blade is seized, wobbles on its shaft, or the motor shows no continuity; removal takes two Phillips screws and a harness unplug. Safety note: the fan blade edges can be sharp, so use a rag or glove when spinning it by hand.
Step 6
Reassemble the back panel, plug the unit in, and allow four hours for the freezer to pull down to operating temperature before judging the repair. The freezer should reach 0°F or below; if it is still above 10°F after you have confirmed and corrected a defrost system fault, the remaining cause is likely a sealed-system issue — low refrigerant or a failing compressor — which requires a licensed technician. Recording the before and after temperatures gives you concrete evidence of whether the repair succeeded or a service call is the next step.
Where to Buy Replacement Parts
Find genuine OEM and aftermarket replacement parts for your GE GSS25IYNFS (Side-by-Side) on Amazon:
- GE GSS25IYNFS defrost heater WR51X10055
- GE refrigerator defrost thermostat WR50X10068
- GE refrigerator evaporator fan motor WR60X10141
When to Call a Professional
If the issue persists after completing all steps above, the problem may involve the sealed refrigerant system, a failed main control board, or wiring that requires specialized diagnostic equipment. Contact a licensed appliance technician — attempting sealed-system repairs without EPA 608 certification is illegal and unsafe.
“`html
How Much Does This Repair Cost?
DIY parts for this repair typically run $20–$150, depending on whether you’re replacing a start relay, evaporator fan motor, or defrost heater. A professional service call on a GE GSS25IYNFS usually costs $150–$300 once you factor in labor and diagnostic fees. Tackling this yourself can save you $100 or more while keeping your freezer running efficiently.
“`
Frequently Asked Questions
How long does it take for the GE GSS25IYNFS freezer to reach temperature after a repair?
After completing the repair, allow 24 hours for the freezer to fully reach 0°F. Avoid opening the door frequently during this period to help it stabilize faster.
Could a dirty condenser coil cause my GE GSS25IYNFS freezer to stop freezing?
Yes, clogged condenser coils are a common cause of poor freezing performance. Clean them with a coil brush every 6–12 months to maintain proper airflow.
Is a faulty evaporator fan motor a likely cause of this freezer problem?
Absolutely — if the evaporator fan motor fails, cold air won’t circulate through the freezer compartment. Listen for unusual noises or silence where fan operation is expected.


