
Compressor noise
This step-by-step repair guide walks you through fixing compressor noise on your LG LRMVS3006S (French Door). With the right tools and parts, most homeowners can complete this repair in 1–2 hours and avoid a costly service call.
🔨 Pro Tip from Dave
On the LG LRMVS3006S, always check the compressor mounting grommets (part number ACQ88143201) before assuming the compressor itself has failed — worn grommets cause a rattling vibration that mimics internal compressor failure and fool a lot of techs. A common mistake is ordering a full compressor replacement when a simple grommet swap fixes the noise entirely. Also check that the drain pan underneath isn’t vibrating against the compressor housing.
Part of our Top 20 Refrigerator Models & Common Repair Issues Guide. Browse all refrigerator repair guides for related models and issues.
“`html
Common Symptoms & Causes
The following symptoms can help confirm that your LG LRMVS3006S compressor is the source of the noise you’re hearing.
- A loud humming or buzzing sound coming from the bottom rear of the refrigerator
- A knocking or rattling noise that cycles on and off with the compressor
- The refrigerator vibrates noticeably on the floor during cooling cycles
- Interior temperature rises while the compressor runs louder than normal
These symptoms are typically caused by worn compressor mounts, a failing compressor motor, or refrigerant flow issues that put excessive strain on the compressor unit.
“`
Safety First
- Unplug the refrigerator from the power outlet before starting any repair — never work on a live appliance.
- Shut off the water supply valve before disconnecting any water lines or hoses.
- Wear work gloves when handling metal brackets, sheet metal edges, or sharp components.
- Take photos with your phone before disconnecting any wiring harnesses or connectors.
- Work in a well-lit area with enough floor space to lay removed panels flat.
Tools & Parts Needed
Essential Tools
- Phillips #2 screwdriver
- ¼” nut driver
- Needle-nose pliers
- Multimeter
- Flashlight or work light
Replacement Parts
- Start relay
- overload protector
- condenser cleaning brush
- ¼” nut driver set
Step-by-Step Repair Instructions
Step 1
Unplug the refrigerator from the wall outlet and pull it 2–3 feet away from the wall to safely access the rear components. Working on a live appliance risks electrical shock, and you need clear access to the compressor area before touching anything. Never skip the unplug step even for a quick inspection.
Step 2
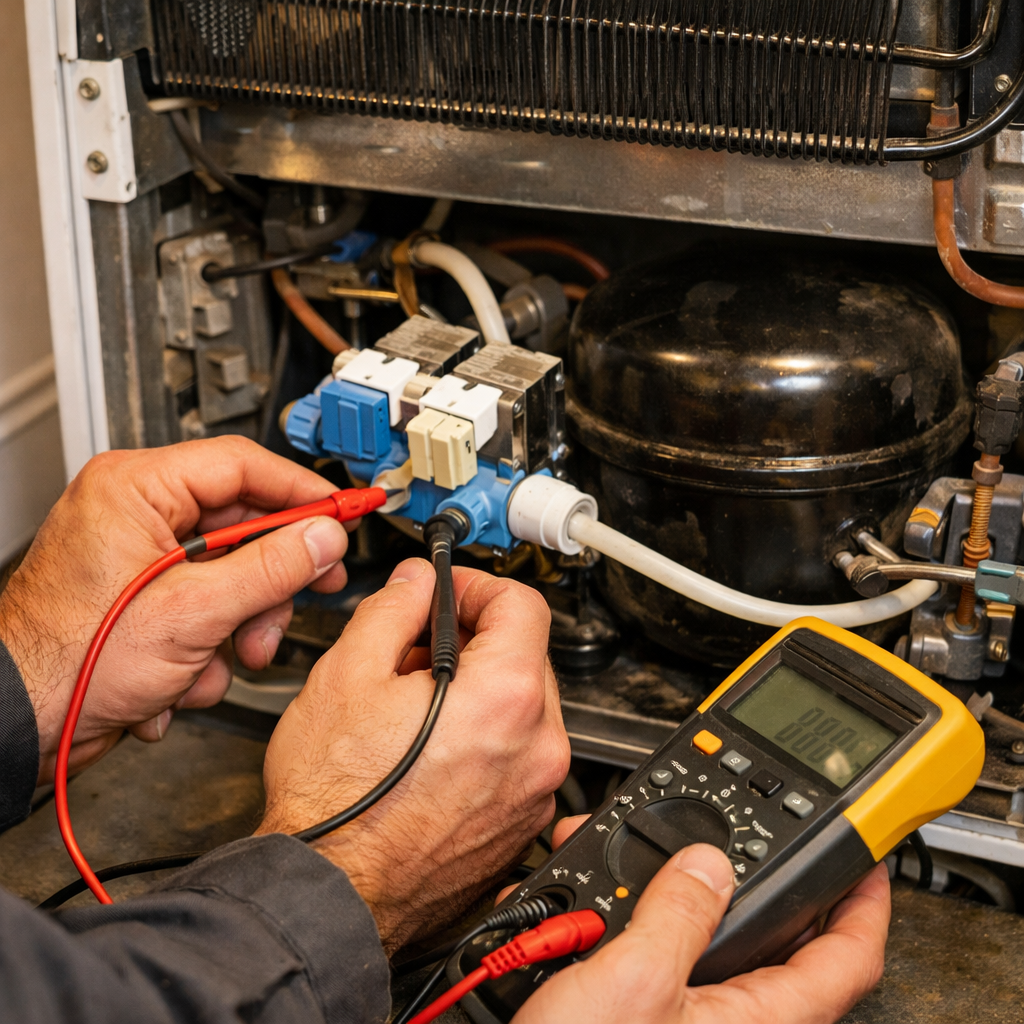
Remove the lower rear access panel by taking out the four ¼-inch hex screws using a ¼-inch nut driver. This panel covers the compressor, condenser coils, and associated electrical components that are the most common sources of abnormal noise. Set the screws aside in a small cup so they don’t get lost.
Step 3
Locate the start relay — a small plug-in component on the side pin of the compressor — and pull it straight off without unscrewing anything. Give it a firm shake next to your ear; a rattling sound inside the relay is a reliable indicator that the internal contact has broken down, which causes the compressor to struggle or short-cycle loudly. Replacement relays for this model run $12–20 and are one of the most common and easiest fixes for compressor noise.
Step 4
With the start relay removed, test the adjacent overload protector, which clips onto the compressor and acts as a thermal safety cutoff. Set your multimeter to Rx1 and probe both terminals at room temperature — a continuous reading confirms it’s functioning, while an open circuit means it has failed and needs replacement. A bad overload protector can cause the compressor to repeatedly attempt to start and shut off, producing a loud clicking or humming cycle.
Step 5
Use a vacuum with a soft brush attachment to thoroughly clean the condenser coils visible in the lower rear of the unit. Dust and debris buildup insulates the coils and forces the compressor to run hotter and longer than designed, which generates excessive noise and shortens its lifespan. Aim to clean the coils at least once a year as a preventive measure.
Step 6
Plug the refrigerator back in and monitor it for at least 30 minutes, listening for whether the noise has resolved. If the compressor still runs continuously, feels extremely hot to the touch, or produces a high-pitched whine after you’ve replaced the relay and cleaned the coils, the inverter compressor control board may be the source of the fault — a repair that requires a qualified technician and specialized diagnostics. Do not continue running the unit unattended if you notice burning smells or the compressor fails to cycle off at all.
Where to Buy Replacement Parts
Find genuine OEM and aftermarket replacement parts for your LG LRMVS3006S (French Door) on Amazon:
- LG refrigerator compressor start relay ADX73591305
- LG refrigerator overload protector replacement EAU60905404
- refrigerator condenser coil cleaning brush kit
When to Call a Professional
If the issue persists after completing all steps above, the problem may involve the sealed refrigerant system, a failed main control board, or wiring that requires specialized diagnostic equipment. Contact a licensed appliance technician — attempting sealed-system repairs without EPA 608 certification is illegal and unsafe.
“`html
How Much Does This Repair Cost?
DIY parts for fixing compressor noise on the LG LRMVS3006S typically run between $20–$150, depending on whether you need mounts, a relay, or a capacitor. A professional service call usually costs $150–$300 once you factor in labor and parts. Tackling this repair yourself can save you $100 or more.
“`
Frequently Asked Questions
Is it safe to keep using my LG LRMVS3006S while the compressor is making noise?
Short-term use is generally okay, but prolonged operation with a noisy compressor can lead to complete cooling failure. Address the issue promptly to avoid spoiled food or a more costly repair.
Could the compressor noise on my LG LRMVS3006S be covered under warranty?
LG offers a 10-year limited warranty on the linear compressor in this model. Check your purchase date and contact LG support before paying for any repairs.
What does a failing compressor sound like on the LG LRMVS3006S?
A failing compressor typically produces a loud humming, clicking, or rattling noise coming from the rear of the refrigerator. If the noise occurs frequently or the fridge stops cooling, the compressor likely needs professional inspection.
Recommended Products
These are the parts and tools we recommend for this repair, based on compatibility and customer reviews:
- 2 Pcs WR02X12008 Refrigerator Evaporator Fan Motor Grommet Replaces GE AP3795810, 1091586, PS963756,2 Pcs WR02X10540 WR02X11329 Refrigerator Grommet Lid Bumper Replacement,Replaces AP3414570 912732
- Lg 4H00982E Room Air Conditioner Compressor Grommet Genuine Original Equipment Manufacturer (OEM) Part
- LG Electronics 5040JA2009B Refrigerator Evaporator Fan Motor Rubber Grommet
As an Amazon Associate, I earn from qualifying purchases.


