Ceramic Fuse Replacement for GE JES1072SHSS Countertop Microwave
The ceramic fuse in your GE JES1072SHSS is critical for protecting the microwave’s internal circuitry from electrical overcurrent conditions. When this fuse fails—often due to power surges, door seal issues, or faults in internal components—you’ll find your microwave completely unresponsive. This repair can be classified as MODERATE difficulty due to the need to access internal components and work around high-voltage systems. However, with the right safety precautions and basic electrical knowledge, most homeowners can tackle this repair.
Symptoms
- Your microwave has no display illumination and appears completely dead when plugged in.
- Control panel buttons are unresponsive, with no beeping sounds.
- The interior light fails to activate when the door is opened.
- The turntable motor does not engage or rotate.
- The cooling fan does not operate even after extended non-use periods.
- No electrical activity whatsoever, despite confirmed power at the outlet.
⚠️ Safety Warning
CRITICAL: Microwaves contain high-voltage capacitors that can retain lethal electrical charges even when unplugged. The GE JES1072SHSS magnetron capacitor can hold up to 2,100 volts and must be properly discharged before starting this repair. Always unplug the unit for at least 24 hours before service, and use an insulated screwdriver to short the capacitor terminals through a high-wattage resistor. Never attempt this repair on a plugged-in unit. Wear safety glasses and insulated gloves throughout the procedure. If you’re not comfortable working with high-voltage systems, it’s best to call in a qualified technician.
Parts Needed
- Ceramic fuse assembly – GE part number WB27X10388 (20-amp, 250-volt ceramic fuse)
- Alternative compatible fuse: Littelfuse 5AG series, 20A 250V fast-acting ceramic fuse
- Fuse holder clips (if damaged) – GE part number WB2X9998
- Electrical contact cleaner spray for terminal cleaning
Tools Required
- Phillips head screwdriver with magnetic tip
- Flathead screwdriver (insulated handle preferred)
- Digital multimeter with continuity testing capability
- Needle-nose pliers with insulated handles
- Work gloves rated for electrical work
- Flashlight or headlamp for interior illumination
- Anti-static wrist strap (recommended for component protection)
Step-by-Step Instructions
Step 1: Power Disconnection and Waiting Period
🔨 Pro Tip from Dave
On the JES1072SHSS specifically, the ceramic fuse almost never fails on its own. If it blew, I’d bet on the secondary door interlock switch being the real culprit. Test all three door switches with a multimeter before you button everything back up. Skipping that step is one of the most costly mistakes I see DIYers make on this model.
Unplug your GE JES1072SHSS from the electrical outlet and wait at least 24 hours to allow internal capacitors to discharge. It’s a good idea to place a visible reminder note on the unit to prevent accidental reconnection during this waiting period. This step is essential for your safety, as the high-voltage capacitor can hold dangerous charges for extended periods.
Step 2: Remove Outer Case Assembly
Position the microwave with the right side panel facing you. Remove the three Phillips head screws located on the bottom edge of this panel, about 2 inches from the front, center, and rear edges. Take out the two screws on the top rear edge of the same panel. Carefully slide the entire outer case assembly toward the rear of the unit about 1 inch, then lift it upward to disengage the front locking tabs.
Step 3: Locate the Primary Fuse Assembly
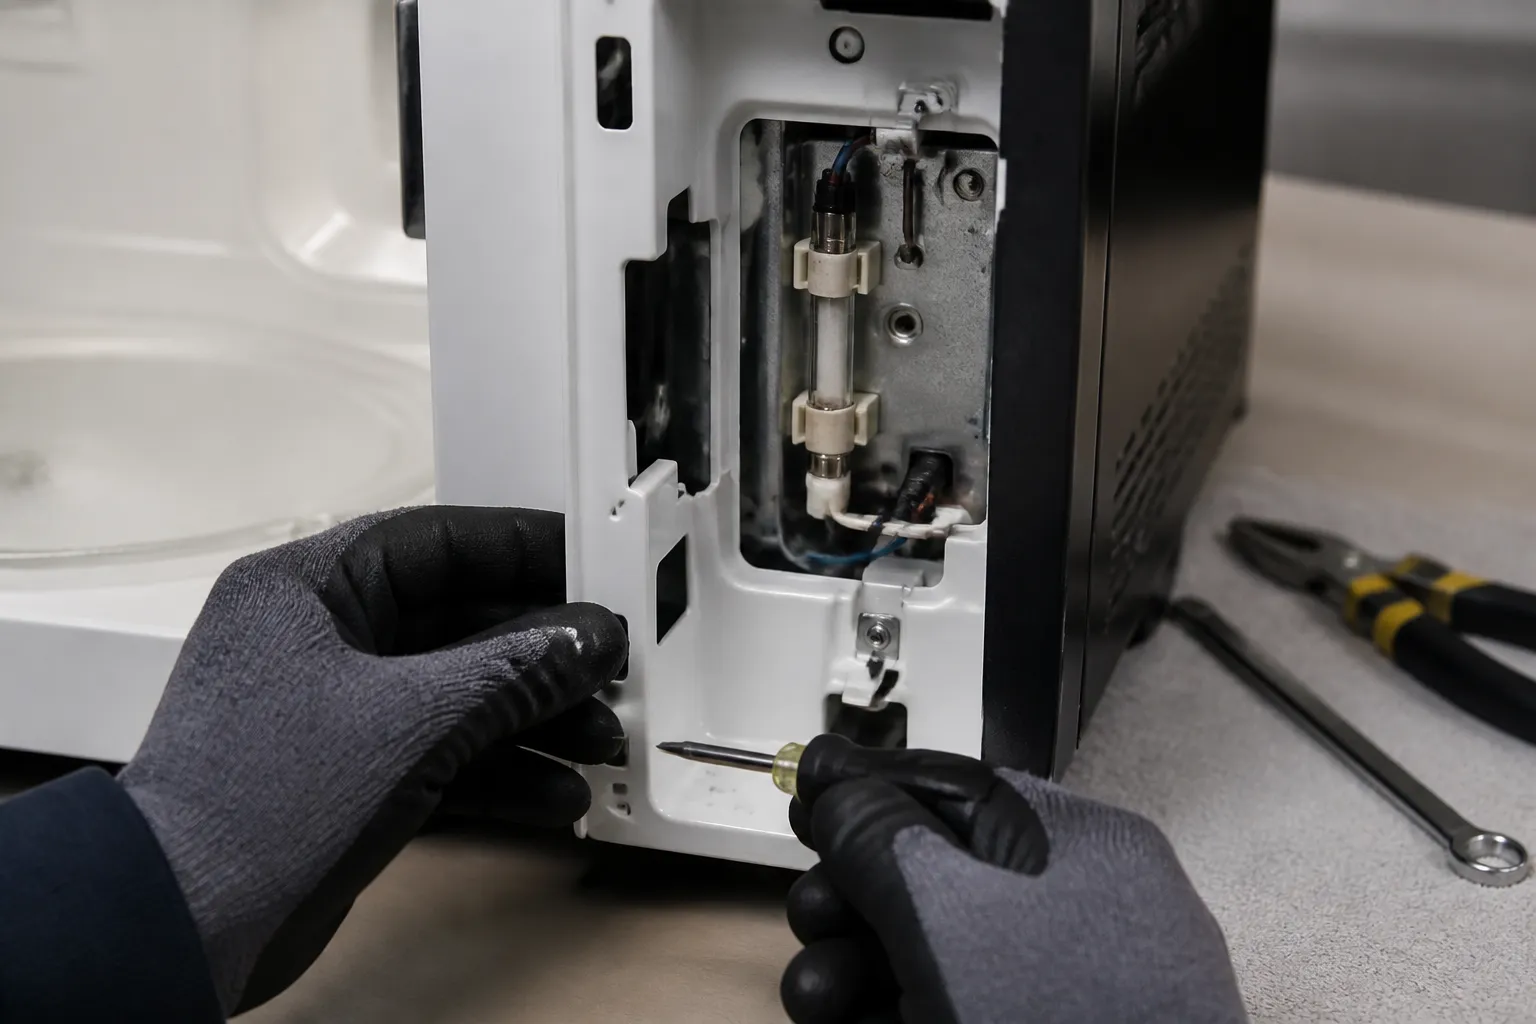
With the case removed, locate the main electrical compartment on the right side of the GE JES1072SHSS. The primary ceramic fuse sits vertically in a black plastic holder, approximately 3 inches from the front panel and 2 inches down from the top edge. The fuse holder is secured with two metal spring clips holding a white or off-white ceramic fuse that measures about 1.25 inches in length.
Step 4: Photograph Wire Connections
Before disconnecting any components, use your phone to photograph the fuse assembly and the surrounding wire connections from several angles. Pay special attention to the two wire terminals connected to the fuse holder—typically, you’ll find a brown or black wire on the line side and a red or blue wire on the load side. These photos will be invaluable during reassembly.
Step 5: Test the Existing Fuse
Set your digital multimeter to continuity mode (usually marked by a diode symbol or sound wave icon). Without removing the fuse, touch the meter probes to each end of the ceramic fuse body. A good fuse will show continuity (near zero ohms resistance) and may produce an audible beep. No continuity reading indicates a blown fuse that needs replacement.
Step 6: Remove the Defective Fuse
Carefully disconnect the two wire terminals from the fuse holder by gently pulling the spade connectors straight off—avoid twisting or bending motions. Remember that the GE JES1072SHSS uses 0.25-inch quick-disconnect terminals. Use needle-nose pliers to grasp the metal portions of the connectors; never pull on the wires themselves. Remove the fuse from its holder by compressing the spring clips and lifting the ceramic body straight up.
Step 7: Install the Replacement Fuse
Insert the new WB27X10388 ceramic fuse into the holder by aligning it vertically and pressing down until the spring clips engage securely on both ends. Ensure the fuse sits flush in the holder with about 0.125 inches of the ceramic body visible above the clip level. Verify that both metal end caps of the fuse make solid contact with the holder terminals.
Step 8: Reconnect Electrical Terminals
Reattach the wire connectors to the fuse holder terminals, ensuring they slide completely onto the metal tabs with an audible click. The connection should require moderate force to remove when properly seated. If any corrosion or discoloration is present, apply a light coat of electrical contact cleaner to the terminals before making final connections.
Step 9: Perform Continuity Verification
With the new fuse installed and connections made, test continuity across the fuse assembly again using your multimeter. You should measure very low resistance (typically 0.1 to 0.3 ohms), indicating a proper electrical path through the new component. Any reading above 1 ohm or no continuity suggests installation problems that need correcting.
Step 10: Reassemble the Outer Case
Position the outer case assembly over the GE JES1072SHSS chassis, making sure the front edge tabs align with their slots. Slide the case forward about 1 inch until it seats completely flush with the front panel. Replace all five Phillips head screws in their original locations on the right side panel, tightening to snug but not overtightened to avoid cracking the plastic housing.
Step 11: Initial Power Test
Reconnect the power cord to a known good electrical outlet. The display should illuminate immediately, showing the default clock setting (typically flashing 12:00). If the display remains dark, unplug the unit and recheck all connections and fuse installation before going further with diagnostics.
Step 12: Functional Verification Test
Place a microwave-safe cup with 8 ounces of water in the center of the turntable. Set the GE JES1072SHSS to cook for 1 minute at 50% power. Verify that the turntable rotates, the interior light illuminates, the cooling fan operates, and the water shows signs of heating after the cycle completes. This confirms that all primary microwave functions are properly restored.
Troubleshooting
- If the display remains dark after fuse replacement, check the secondary 15-amp fuse located near the control board, which may have also failed during the original overcurrent event.
- When the microwave powers on but does not heat, the magnetron or high-voltage diode may have sustained damage that requires professional diagnosis and repair.
- If the new fuse blows immediately upon power application, an underlying short circuit exists in the magnetron, transformer, or capacitor assembly that requires professional service.
- Intermittent operation after repair typically indicates loose wire connections at the fuse holder terminals or degraded door seal switches causing arcing conditions.
- If control panel functions work but interior components (turntable, light, fan) do not operate, check the secondary power distribution circuit and thermal cutoff switches.
- Repeated fuse failures within short time periods suggest voltage regulation problems or door alignment issues causing the magnetron to draw excessive current.
When to Call a Professional
- Multiple fuses continue to fail after replacement, indicating serious internal component damage that requires comprehensive diagnosis.
- You discover burn marks, melted plastic, or unusual odors during disassembly that suggest overheating or electrical fire conditions.
- The microwave produces unusual sounds (buzzing, crackling, or loud humming) during operation after fuse replacement.
- You lack confidence working around high-voltage electrical systems or don’t have the proper safety equipment for capacitor discharge procedures.
When to Call a Professional
Most of the repairs in this guide are within reach for a careful DIYer with basic tools. From my experience, if you replace the fuse and it blows again immediately upon closing the door or powering on, or if you measured more than 240V at the outlet before starting, those are hard stops. You’re now dealing with either a failed magnetron, a shorted high-voltage capacitor, or a wiring fault that requires a certified technician with proper discharge tools to diagnose safely. When in doubt, a diagnostic service call typically costs $80–$120 and can save you from a misdiagnosis that costs more in parts.
Recommended Parts & Tools
ALLECIN 20A 250V 5x20MM Fast Blow Ceramic Fuses 20 Amp 250
These ceramic fuses are the exact replacement type needed for the GE JES1072SHSS microwave’s protection circuit. The 20 amp, 250 volt fast-blow ceramic fuses match the original specifications and will restore proper overcurrent protection to your countertop microwave.
Precision Screwdriver Set with Phillips and Flathead Bits
This precision screwdriver set is essential for safely removing the cabinet screws and accessing the fuse compartment in your GE JES1072SHSS microwave. The various Phillips and flathead bits will handle all the small screws encountered during disassembly and reassembly of the microwave housing.
The Ceramic Fuse That Stops the JES1072SHSS from Dead-on-Arrival Repeats
Once you’ve confirmed the door interlock switch isn’t the culprit, the ceramic fuse is your next move. Having the right spec on hand means you won’t waste a service call trip if this turns out to be the actual failure point. I always keep a pack in the van because this fuse blows often enough that a single replacement won’t cut it if you’re diagnosing multiple units or want a spare handy.
What works
- The 20A 250V fast-blow rating matches the JES1072SHSS spec exactly—no guessing or cross-referencing against conflicting part numbers online.
- The 5x20mm form factor fits the ceramic fuse holder without forcing or adapter nonsense; it drops in and seats cleanly on the first try.
- Buying a 10-pack means you have backups if the underlying door switch issue causes repeat failures while you’re troubleshooting—you won’t be dead in the water waiting for a reorder.
What doesn’t
- If your microwave is also blowing fuses due to a shorted high-voltage capacitor or magnetron, swapping the fuse alone won’t fix the root problem—the new one will blow too.
- Generic “universal” fuse packs sometimes include mixed specs or lower-quality ceramic that doesn’t hold the rating consistently; stick with the correctly labeled 20A 250V to avoid repeat failures.
The biggest trap I see is when someone orders a slow-blow fuse by mistake, pops it in, and then the microwave won’t heat even though “the fuse didn’t blow.” Slow-blow and fast-blow are not interchangeable on this model. Grab the ALLECIN 20A 250V 5x20MM Fast Blow Ceramic Fuses 20 Amp 250 and confirm it’s fast-blow before checkout.
About This Article

Written by Dave Holt. Dave Holt has been taking apart and fixing household appliances since he was a teenager who couldn't leave a broken one alone. Eighteen years later, after fixing things for neighbors, friends, and anyone who'd let him, he's seen almost every failure mode there is. When he writes a repair guide here, it's based on the actual job, not a manufacturer overview. More about this site.
Scope and limits. Dave is a self-taught repairer, not a certified appliance technician. Unplug before you open anything, and leave sealed refrigeration systems, gas connections, and hardwired circuits to a qualified technician.