Door latch misaligned
This step-by-step repair guide walks you through fixing door latch misaligned on your Bosch SHPM88Z75N. With the right tools and parts, most homeowners can complete this repair in 1–2 hours and avoid a costly service call.
🔨 Pro Tip from Dave
On the SHPM88Z75N, a lot of techs overlook the door hinge tension before touching the latch — worn hinge springs (part 00754869) let the door sag slightly, which throws the latch out of alignment entirely. Replacing the latch without addressing hinge tension first is the number one mistake I see, and you’ll be back to square one within months.
Part of our Top 20 Dishwasher Models & Common Repair Issues Guide. Browse all dishwasher repair guides for related models and issues.
“`html
Common Symptoms & Causes
If your Bosch SHPM88Z75N has a misaligned door latch, you may notice one or more of the following symptoms:
- The dishwasher door does not click shut or feels loose when closed
- The control panel remains unresponsive after closing the door
- The cycle fails to start and the door indicator light stays on
- The door springs open or gaps slightly during a wash cycle
This issue is most commonly caused by normal wear on the latch assembly, a bent or warped door strike, or repeated forceful closing that shifts the latch out of its proper alignment over time.
“`
Safety First
- Unplug the dishwasher from the power outlet before starting any repair — never work on a live appliance.
- Shut off the water supply valve before disconnecting any water lines or hoses.
- Wear work gloves when handling metal brackets, sheet metal edges, or sharp components.
- Take photos with your phone before disconnecting any wiring harnesses or connectors.
- Work in a well-lit area with enough floor space to lay removed panels flat.
Tools & Parts Needed
Essential Tools
- Phillips #2 screwdriver
- Torx T20 screwdriver
- Needle-nose pliers
- Multimeter
- Flashlight
Replacement Parts
- Door latch assembly
- door hinge spring/cable kit
- T20 Torx driver
- Phillips screwdriver
Step-by-Step Repair Instructions
Step 1
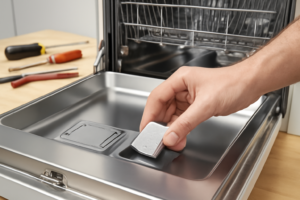
Open the door fully and inspect the latch assembly on the top rail of the door, because a chipped plastic hook or broken spring means the latch can no longer grip the strike and the door will pop open mid-cycle. Remove the 2 T20 Torx screws, unplug the harness, and swap in a new latch if you see any visible damage. Pro tip: photograph the harness connector orientation before unplugging to avoid reversing it on reassembly.
Step 2
Examine the door strike mounted on the tub’s top edge, since a bent or worn strike sits too low or at the wrong angle and lets the latch slide past without catching. Use pliers to carefully bend a deformed strike back to its original upright position, or replace it if the metal is cracked or the tab is badly worn. This is a common cause of misalignment even when the latch itself tests fine.
Step 3
Test the door latch micro-switch on the Rx1 setting of your multimeter to confirm the switch closes when the latch engages and reads open when the door is open, because a failed switch can mimic a mechanical misalignment by preventing the control board from recognizing a properly closed door. If the switch stays open or closed regardless of latch position, replace the switch. Safety note: disconnect power to the dishwasher at the breaker before probing any electrical components.
Step 4
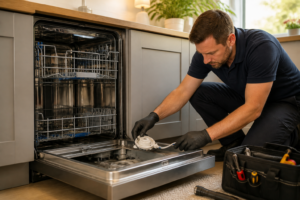
Remove the kick plate and inspect the hinge cables that run along both sides of the dishwasher cabinet, because a frayed cable or broken hinge spring causes the door to hang unevenly, shifting the latch away from the strike by several millimeters. Even slight door sag is enough to cause consistent misalignment, so look for visible fraying, kinking, or a spring that has lost tension. Replace the full hinge cable kit if either side shows wear, since the cables typically fail together.
Step 5
If all components test good, adjust the door position itself by loosening the 4 T20 Torx side-rail mounting screws on the inside of the door on each side, then shifting the door slightly left or right until the latch and strike line up and the latch engages with a clean click. Make small incremental shifts and test the engagement after each adjustment before fully re-tightening the screws. Pro tip: have a helper hold the door steady while you tighten to prevent it from drifting back out of position.
Step 6
Reassemble any removed panels, restore power, and run a full wash cycle including the drain phase to confirm the door holds closed under real operating pressure and does not pop open when the pump kicks on. A door that passes the manual click test but opens during the drain cycle usually points to a weak latch spring or marginal strike engagement, so revisit steps 1 and 2 if the problem recurs.
Where to Buy Replacement Parts
Find genuine OEM and aftermarket replacement parts for your Bosch SHPM88Z75N on Amazon:
- Bosch SHPM88Z75N door latch assembly 00631770 replacement
- Bosch dishwasher door hinge spring cable kit 00754876
- Bosch dishwasher door alignment adjustment
When to Call a Professional
If the issue persists after completing all steps above, the problem may involve the sealed refrigerant system, a failed main control board, or wiring that requires specialized diagnostic equipment. Contact a licensed appliance technician — attempting sealed-system repairs without EPA 608 certification is illegal and unsafe.
“`html
How Much Does This Repair Cost?
Replacing or realigning a door latch on a Bosch SHPM88Z75N typically costs $10–$50 in parts when done yourself. A professional service call for the same repair usually runs $150–$300, including labor and diagnostic fees. Tackling this repair DIY-style can save you $100 or more, making it a worthwhile fix for most homeowners.
“`
Frequently Asked Questions
How do I know if the door latch on my Bosch SHPM88Z75N is misaligned?
If the dishwasher door doesn’t click shut firmly or the cycle won’t start, the latch is likely misaligned. You may also notice the door sitting unevenly or feeling loose when closed.
Can I realign the door latch on my Bosch SHPM88Z75N without a technician?
Yes, this is a DIY-friendly repair that typically requires only a screwdriver. Loosening the strike plate screws and repositioning the latch usually resolves the issue.
What causes the door latch to become misaligned over time?
Regular use, door slamming, or a slightly unlevel dishwasher can gradually shift the latch out of position. Checking and adjusting the appliance’s leveling feet can help prevent recurring misalignment.
Recommended Products
These are the parts and tools we recommend for this repair, based on compatibility and customer reviews:
- Bosch 00419827 Dishwasher Door Latch Assembly
- Bosch 00438026 Genuine OEM Door Latch Dishwashers
- BOSCH 00630783 Dishwasher Door Lock (Replaces 630783) Genuine Original Equipment Manufacturer (OEM) Part
As an Amazon Associate, I earn from qualifying purchases.