Control Panel Button Repair Guide for Toshiba EM925A5A-SS Microwave
The Toshiba EM925A5A-SS countertop microwave’s control panel buttons may become unresponsive due to several factors including membrane switch failure, control board malfunction, or accumulated moisture and debris beneath the button membrane. This is a relatively common issue that typically manifests after 2-3 years of regular use. The most frequent cause is degradation of the flexible membrane circuit that connects the button presses to the main control board. This repair is rated as MODERATE difficulty, requiring careful disassembly of the microwave and basic electronics troubleshooting skills. While the repair involves working inside a microwave oven, following proper safety procedures makes this a manageable DIY repair for most homeowners with basic technical experience.
Symptoms
- One or more buttons on the Toshiba EM925A5A-SS control panel require excessive pressure to register presses
- Digital display shows correct time but certain number pad buttons (0-9) or function buttons fail to respond
- Start button requires multiple presses or completely fails to initiate cooking cycles
- Power level and time adjustment buttons become intermittent or completely non-functional
- Control panel beeps inconsistently when buttons are pressed, or produces no beep sound despite button activation
- Display shows error codes or random characters when attempting to use specific button combinations on the Toshiba EM925A5A-SS
⚠️ Safety Warning
CRITICAL SAFETY NOTICE: Microwave ovens contain high-voltage capacitors that retain lethal electrical charges even when unplugged. The magnetron capacitor in the Toshiba EM925A5A-SS can hold up to 2100 volts and must be properly discharged before beginning any repair work. Always unplug the unit and wait at least 60 seconds before opening. Use insulated tools and discharge the capacitor by touching an insulated screwdriver across the capacitor terminals while wearing safety glasses and rubber gloves. Never attempt this repair if you are not comfortable working with electrical components. The high-voltage transformer and magnetron components should not be disturbed during this repair, but exercise extreme caution around these components located in the right rear section of the unit.
Parts Needed
- Toshiba Control Panel Assembly (Part #: 23588901 or compatible membrane switch assembly for EM925A5A-SS)
- Control Board PCB (Part #: 431F5A5652 – only if control board testing indicates failure)
- Ribbon Cable Connector (14-pin flat flex cable, 1mm pitch – if damaged during disassembly)
- Adhesive foam tape strips (3M VHB 4910, 1/8-inch thickness) for securing new control panel membrane
- Isopropyl alcohol (99% concentration) for cleaning contact surfaces
- Dielectric grease (small tube) for protecting electrical connections
Tools Required
- Phillips head screwdriver (size #1 and #2)
- Flat-blade screwdriver (1/4-inch width) with insulated handle
- Digital multimeter with continuity testing capability
- Plastic prying tools or spudger set for removing adhesive components
- Needle-nose pliers for handling small connectors
- Safety glasses and insulated work gloves
- Flashlight or work light for interior visibility
Step-by-Step Instructions
Step 1: Power Down and Prepare Workspace
🔨 Pro Tip from Dave
Before you assume the membrane switch is dead, unplug the unit for a full 60 seconds and plug it back in — I’ve seen the control board on this model enter a fault state that mimics a completely dead panel, and a hard reset clears it about 20% of the time, saving you an unnecessary parts order. Also, when you do pull the membrane connector off the control board, look for the faint greenish tinge of corrosion on the ribbon contacts, because that’s the real silent killer on this model and a light pass with 91% isopropyl on a cotton swab will sometimes bring the whole panel back to life.
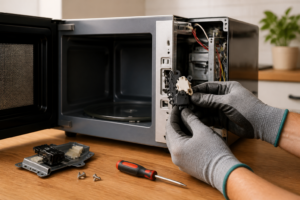
Unplug the Toshiba EM925A5A-SS from the electrical outlet and wait a minimum of 90 seconds for internal components to discharge. Remove any items from inside the microwave cavity and clean the exterior control panel with a slightly damp cloth. Position the unit on a stable work surface with adequate lighting. Ensure you have at least 12 inches of clearance on all sides for safe disassembly access.
Step 2: Remove Outer Casing
Locate and remove the single Phillips screw on the left side panel of the Toshiba EM925A5A-SS, positioned approximately 2 inches from the rear edge. Remove two Phillips screws from the right side panel in corresponding positions. On the back panel, remove six Phillips screws arranged in two rows of three screws each, spaced 4 inches apart horizontally. Carefully slide the outer metal casing toward the back of the unit approximately 1/2 inch, then lift it up and away from the base assembly.
Step 3: Discharge High Voltage Capacitor
Locate the large cylindrical capacitor mounted vertically on the right side of the Toshiba EM925A5A-SS internal chassis, near the magnetron assembly. Using an insulated screwdriver, carefully touch the metal blade across both capacitor terminals simultaneously while wearing safety glasses. You may hear a small pop or see a small spark – this is normal. Repeat this process twice to ensure complete discharge. The capacitor terminals are clearly visible and located on the top of the cylindrical component.
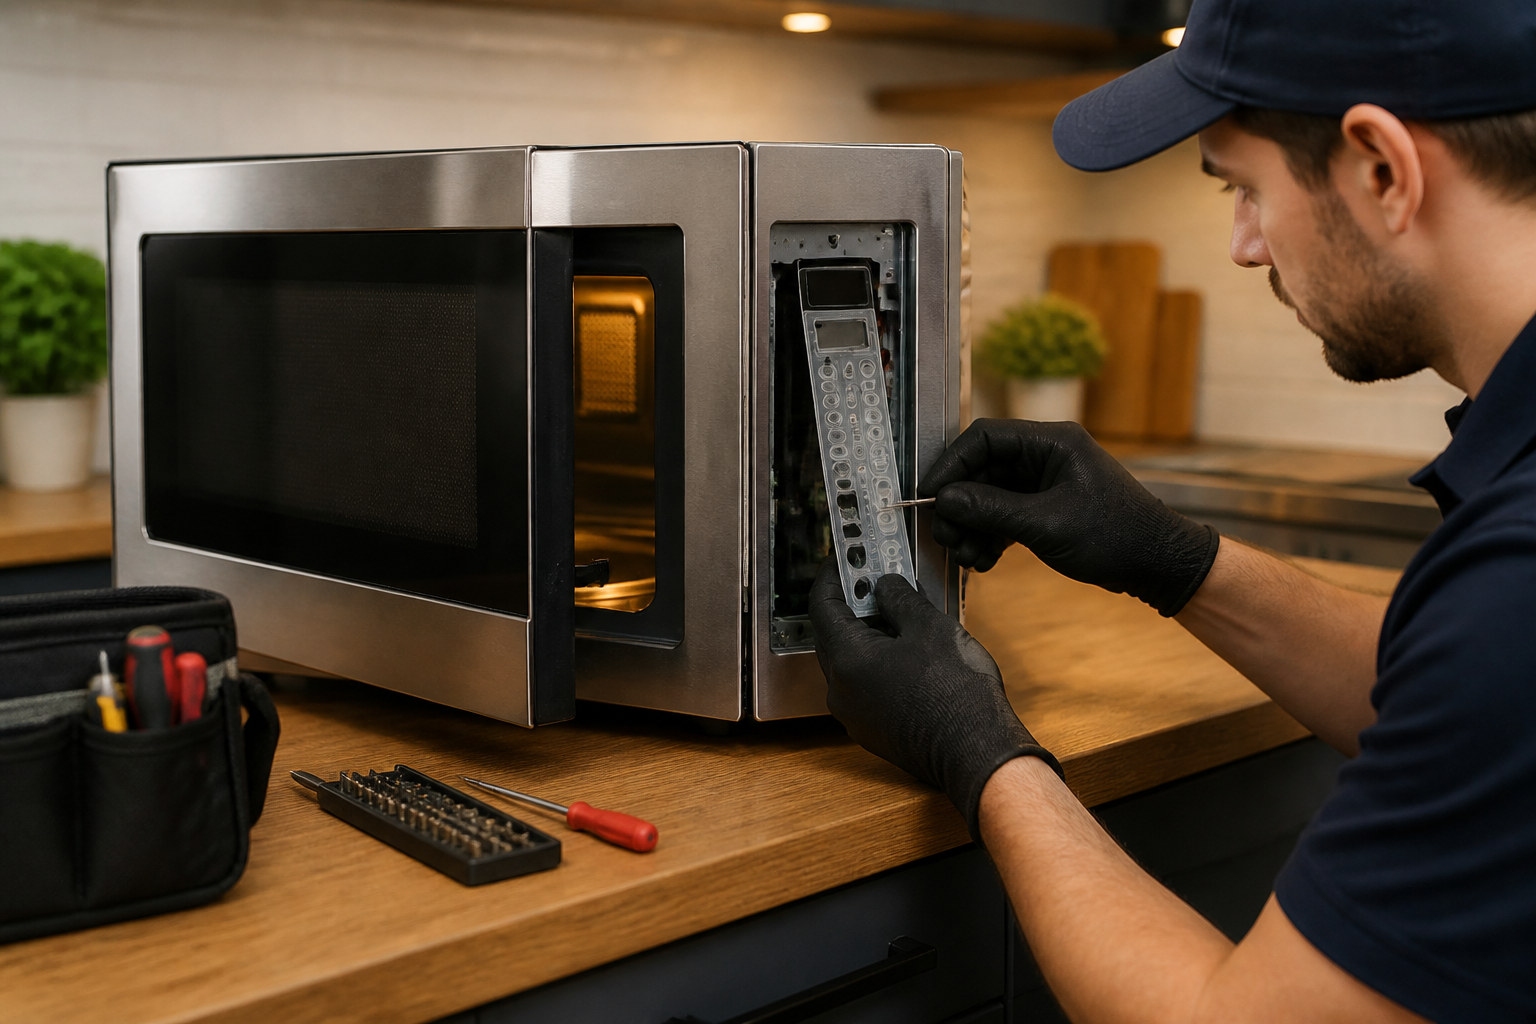
Step 4: Access Control Panel Assembly
Remove the control panel bezel by locating four plastic clips positioned at the top and bottom edges of the panel frame. Gently press each clip inward while pulling the bezel forward. The bezel will separate from the front door frame, revealing the membrane switch assembly underneath. Take note of the ribbon cable orientation before proceeding – it should be positioned with the blue stripe facing toward the door interior.
Step 5: Disconnect Control Panel Wiring
Locate the 14-pin ribbon cable connector positioned behind the control panel assembly on the Toshiba EM925A5A-SS. This flat, flexible cable connects the button membrane to the main control board. Carefully lift the small plastic locking tab on the connector (typically white or black in color) and gently pull the ribbon cable straight out. Do not bend or twist the cable during removal as this can cause permanent damage to the conductors.
Step 6: Test Button Membrane Continuity
Using your multimeter set to continuity mode (or lowest resistance setting), test each button position on the membrane switch. Place one probe on the common ground trace (typically the leftmost contact on the ribbon cable end) and touch the other probe to each button contact pad. A functioning button should show continuity (beep) when pressed and open circuit when released. Document which buttons fail this test – common failures on the Toshiba EM925A5A-SS include the Start button and number pad buttons 1, 2, and 3.
Step 7: Remove and Replace Membrane Assembly
The membrane switch assembly is secured with adhesive foam tape around its perimeter. Using a plastic prying tool, carefully work around the edges to separate the membrane from the control panel mounting surface. Clean any remaining adhesive residue with isopropyl alcohol. Install the new membrane assembly by aligning the button positions precisely with the control panel openings and pressing firmly around all edges to ensure proper adhesion.
Step 8: Test Control Board (If Membrane Tests Good)
If the membrane switch tests functional, the issue may be with the main control board. With the Toshiba EM925A5A-SS still unplugged, locate the control board mounted behind the display panel. Check for obvious signs of damage such as burned components, swollen capacitors, or corrosion. Using your multimeter, test the 5V DC supply voltage at the ribbon cable connector pins – you should measure approximately 4.8-5.2 volts between the power and ground traces when the unit is plugged in and powered on.
Step 9: Clean and Inspect Internal Connections
Examine all wire connections leading to and from the control board assembly. Look for signs of corrosion, loose connections, or damaged wire insulation. Pay particular attention to the door switch connections and the thermal fuse connections, as these can affect control panel operation on the Toshiba EM925A5A-SS. Clean any corroded connections with isopropyl alcohol and ensure all push-on connectors are firmly seated.
Step 10: Reassemble Control Panel
Connect the new ribbon cable to the control board connector, ensuring the cable is fully inserted and the locking tab clicks into place. The blue stripe should face the same direction as noted during disassembly. Carefully route the ribbon cable to avoid pinching when the bezel is reinstalled. Snap the control panel bezel back into position, ensuring all four clips engage properly with their mounting tabs.
Step 11: Reinstall Outer Casing
Position the outer metal casing over the internal chassis assembly, aligning the rear edge first. Slide the casing forward until it sits flush with the front panel. Reinstall all screws in reverse order of removal: six screws on the back panel, two screws on the right side panel, and one screw on the left side panel. Ensure all screws are snug but do not overtighten as this can strip the mounting holes.
Step 12: Test Repair and Calibrate
Plug the Toshiba EM925A5A-SS back into the electrical outlet and test each control panel button systematically. Verify that the display responds correctly to button presses and that all cooking functions operate normally. Test a brief 30-second heating cycle with a microwave-safe cup of water to ensure the magnetron operates correctly and that the Start button functions properly. Check that the door light illuminates and the turntable rotates during operation.
Troubleshooting
- If buttons still don’t respond after membrane replacement, check that the ribbon cable is fully inserted and the connector locking tab is properly engaged – incomplete connection is the most common cause of continued failure
- If only specific buttons remain non-functional, verify the new membrane assembly is designed specifically for the Toshiba EM925A5A-SS model, as button layouts vary between models
- If the display shows garbled characters or error codes, check for moisture ingress around the control board area and ensure all connections are clean and dry
- If buttons respond intermittently, the control board may have failing solder joints – inspect the board under good lighting for cracked or cold solder connections around the ribbon cable connector
- If the microwave operates but control panel remains completely dead, test the 5V supply voltage at the control board – readings outside the 4.8-5.2V range indicate power supply problems
- If door light fails to illuminate during testing, check door switch operation as faulty door switches can affect control panel functionality on this model
When to Call a Professional
- If you are uncomfortable working around high-voltage components or lack experience with electrical troubleshooting procedures
- If the magnetron, high-voltage transformer, or waveguide components require service, as these repairs require specialized equipment and training
- If multiple systems fail simultaneously (heating, lighting, turntable) indicating potential power supply or transformer issues beyond basic control panel problems
- If you discover evidence of electrical arcing, burned components, or unusual odors during disassembly, as these may indicate more serious safety hazards requiring professional diagnosis
When to Call a Professional
Most of the repairs in this guide are within reach for a careful DIYer with basic tools. In my experience, if you’ve confirmed the membrane switch is intact, the hard reset didn’t help, and individual buttons are triggering the wrong functions rather than simply not responding, you’re most likely looking at a failed control board with corrupted firmware or a shorted logic circuit — a repair that requires component-level diagnostics and isn’t worth attempting without professional equipment and training. When in doubt, a diagnostic service call typically costs $80–$120 and can save you from a misdiagnosis that costs more in parts.
Recommended Parts & Tools
Toshiba Microwave Control Panel Membrane Switch
This replacement control panel membrane switch is specifically designed for Toshiba EM925A5A-SS microwave models and directly addresses non-responsive button issues. The membrane contains all the pressure-sensitive buttons and connects to the main control board to restore proper function. Check current pricing on Amazon.
Electronics Contact Cleaner Spray for Appliance Repair
This professional-grade contact cleaner can help restore functionality to sticky or unresponsive control panel buttons on your Toshiba EM925A5A-SS microwave. The spray safely removes dirt, grease, and oxidation from electrical contacts without damaging sensitive components. Check current pricing on Amazon.