Diverter valve
This step-by-step repair guide walks you through fixing diverter valve on your Fisher & Paykel DD24DHTX9N. With the right tools and parts, most homeowners can complete this repair in 1–2 hours and avoid a costly service call.
🔨 Pro Tip from Dave
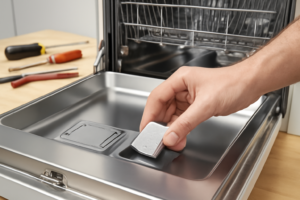
On the DD24DHTX9N, the diverter valve assembly is accessed from the bottom of the drawer tub — a step many DIYers miss by pulling the wrong panel first. Look for part number 524638P, and watch out for the small O-ring on the valve seat; it often stays stuck in the housing when you remove the old valve and gets overlooked, causing a leak on the new install if not replaced or cleared.
Part of our Top 20 Dishwasher Models & Common Repair Issues Guide. Browse all dishwasher repair guides for related models and issues.
“`html
Common Symptoms & Causes
The following symptoms suggest a faulty diverter valve on your Fisher & Paykel DD24DHTX9N dishwasher drawer.
- Only the top or bottom drawer is getting water during a wash cycle
- Dishes in one drawer consistently come out dirty or unwashed
- You can hear the wash pump running but water is not spraying in one drawer
- The dishwasher displays a water supply or flow-related fault code
These issues are typically caused by a worn, cracked, or electrically failed diverter valve that can no longer route water correctly between the two drawer compartments.
“`
Safety First
- Unplug the dishwasher from the power outlet before starting any repair — never work on a live appliance.
- Shut off the water supply valve before disconnecting any water lines or hoses.
- Wear work gloves when handling metal brackets, sheet metal edges, or sharp components.
- Take photos with your phone before disconnecting any wiring harnesses or connectors.
- Work in a well-lit area with enough floor space to lay removed panels flat.
Tools & Parts Needed
Essential Tools
- Phillips #2 screwdriver
- Torx T20 screwdriver
- Needle-nose pliers
- Multimeter
- Flashlight
Replacement Parts
Step-by-Step Repair Instructions
Step 1
Fisher & Paykel dual-drawer dishwashers use a diverter valve to independently route water to each drawer during a wash cycle. If one drawer is washing poorly or not filling with water, the diverter valve is likely failing to direct flow to that drawer. Understanding this helps you confirm the diverter — not the pump or spray arms — is the root cause before disassembling anything.
Step 2
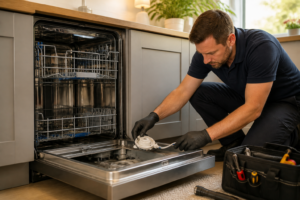
Before any work, disconnect power at the breaker or unplug the unit to eliminate shock risk — the diverter valve sits near water connections and live wiring. Carefully tilt the unit backward and remove the kick plate and base access panel to expose the sump area underneath; the diverter valve assembly will be visible directly below the sump. Tilting the unit is necessary because the valve is not accessible from the front alone.
Step 3
Set your multimeter to Rx1 and probe each solenoid coil on the diverter valve — a healthy coil should read 200–500Ω, confirming the electromagnet that moves the valve flapper is intact. An open reading (OL or infinite resistance) means the coil has burned out and can no longer actuate the valve, so the entire valve assembly must be replaced. Test both solenoids independently, since one drawer may work fine while the other coil has failed.
Step 4
With the valve still accessible, visually inspect the valve body for cracks and check the O-ring seal for compression or flat spots, both of which cause water to leak internally rather than route correctly to the intended drawer. A cracked body cannot be repaired — replace the full valve assembly; a flattened O-ring can often be resolved by fitting a correctly sized replacement O-ring and verifying it seats properly before reassembly. Pro tip: lightly lubricate the new O-ring with silicone grease to ensure a proper seal and extend its service life.
Step 5
Reconnect the wiring harness to the solenoids, restore the water supply, and return power to the unit before running a test cycle. Run both drawers simultaneously and watch for active water circulation in each drawer — this confirms the valve is correctly splitting flow between the two circuits. If one drawer still shows no water movement, recheck the harness connector seating, as a loose connector mimics a failed solenoid.
Step 6
Finally, run each drawer individually on a full wash cycle to verify equal wash performance in both, since simultaneous testing alone may mask a partial restriction in one circuit. Listen for the pump tone and check that spray arms are rotating and dishes come out clean in both drawers. This two-stage test — combined then separate — is the most reliable way to confirm the diverter valve repair is fully successful.
Where to Buy Replacement Parts
Find genuine OEM and aftermarket replacement parts for your Fisher & Paykel DD24DHTX9N on Amazon:
- Fisher Paykel DD24DHTX9N diverter valve replacement 524693
- Fisher Paykel drawer dishwasher water routing diverter actuator
- Fisher Paykel dishwasher not washing one drawer
When to Call a Professional
If the issue persists after completing all steps above, the problem may involve the sealed refrigerant system, a failed main control board, or wiring that requires specialized diagnostic equipment. Contact a licensed appliance technician — attempting sealed-system repairs without EPA 608 certification is illegal and unsafe.
How Much Does This Repair Cost?
A replacement diverter valve for the Fisher & Paykel DD24DHTX9N typically costs between $25 and $75 in parts alone. A professional service call for this repair usually runs $150–$300 once labor is included. By tackling this repair yourself, you can save over $100 while restoring your dishwasher to full working order.
Frequently Asked Questions
How do I know if the diverter valve is the problem on my Fisher & Paykel DD24DHTX9N?
Common signs include water not reaching one or both drawer compartments or poor washing performance on a specific drawer. A faulty diverter valve prevents proper water distribution between the two drawers.
Do I need to disconnect power before replacing the diverter valve?
Yes, always disconnect the dishwasher from power and shut off the water supply before starting any repair. This protects you from electrical shock and prevents water damage.
Can I replace the diverter valve myself, or should I hire a technician?
A confident DIYer with basic tools can replace the diverter valve by following the repair guide carefully. However, if you’re unsure about any step, contacting a certified appliance technician is recommended.
Recommended Products
These are the parts and tools we recommend for this repair, based on compatibility and customer reviews:
- FISHER & PAYKEL 426862P VALVE DIVERTER SD10 PACKED
- Fisher & Paykel Dishwasher Pump Motor and Washing Machine Motor Replacement – OEM Appliance Parts for Home Improvement, 6 x 6 x 4 inches
- 529730 Valve Inlet Double Fit for Fisher/Paykel Dishwasher, Dishwasher Double Inlet Valve Replace 33390003 522146 526850 AP6792087
As an Amazon Associate, I earn from qualifying purchases.