
Turntable Motor Replacement Guide
If your Frigidaire FGMV17WNVF over-the-range microwave turntable isn’t spinning because the motor has failed, replacing it is a repair that I’d classify as MODERATE difficulty. The turntable motor is essential for rotating the glass plate to ensure even heating, and this repair requires you to access the bottom of the microwave.
🔨 Pro Tip from Dave
When replacing the turntable motor on the FGMV17WNVF, order part number 5304464061 — it’s the correct OEM motor for this unit. A common mistake I see is forgetting to clean the motor shaft socket before installing the new motor, which can lead to uneven coupling and cause premature failure. Also, be cautious with the three mounting screws; they strip easily on this model, so make sure to use the right-sized Phillips head and avoid over-torquing.
Symptoms of Turntable Motor Failure
Common signs that indicate turntable motor failure include:
- Turntable doesn’t rotate at all
- Turntable starts then stops
- Grinding or humming noise from below
- Motor burned out – was working then stopped
- Visible damage or burning smell from the motor
- Uneven heating due to a non-rotating turntable
⚠️ Safety Warning
Always unplug the microwave before starting any repair. Wait at least 60 seconds after unplugging to allow capacitors to discharge. The turntable motor area is located at the bottom of the microwave and is generally low-voltage, but safety precautions are essential.
Parts Needed
Check each product page for other buying options. (Part #: 5304464119)
Note: You might also want to inspect the roller ring and turntable coupling if they show signs of wear or damage.
Tools Required
- Phillips Screwdriver – #2 size
- Needle-Nose Pliers – For wire connections
- Flashlight – To see under the microwave
- Clean cloth – For cleaning the motor area
Step-by-Step Instructions
Step 1: Unplug and Prepare
First, unplug the microwave from the wall outlet. Remove the glass turntable plate and the roller ring from inside the microwave, and set them aside in a safe spot. Turn the microwave upside down or on its side to access the bottom panel.
Step 2: Remove the Bottom Panel
Locate the screws securing the bottom panel — typically, there are 4-6 screws around the perimeter. Remove these screws using your Phillips screwdriver. Some models may also have clips in addition to screws. Carefully lift the bottom panel away to expose the turntable motor area.
Step 3: Locate the Turntable Motor
The turntable motor is situated in the center of the bottom area. It’s a small motor with a shaft extending up through the bottom of the microwave. This motor has wire connections and is usually mounted with screws or clips.
Step 4: Inspect the Motor
Before removing the motor, take a moment to inspect it:
- Check for visible damage, burning, or signs of overheating
- Look for loose wires or damaged connectors
- Inspect the motor shaft for any damage
- Check the coupling between the motor and the roller ring
- Confirm that the motor is indeed the problem (not the roller ring or support)
Step 5: Disconnect the Motor Wires
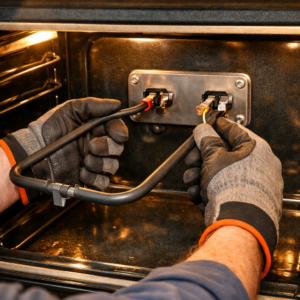
The turntable motor has wire connections that need to be disconnected. Use needle-nose pliers to gently pull the wire connectors off the motor terminals. A helpful tip is to take a photo before disconnecting to ensure you can reconnect them correctly later. The wires are usually color-coded.
Step 6: Remove the Motor Mounting Hardware
The motor is held in place with screws or clips. Use your Phillips screwdriver to remove the mounting screws. Some motors may have a bracket that needs to be taken off as well. Carefully set aside all the mounting hardware.
Step 7: Remove the Old Motor
After removing all mounting hardware, gently pull the motor away from its mounting location. The motor shaft will extend through the bottom, so you may need to carefully pull it down. Remove the old motor completely.
Step 8: Clean the Motor Area
While the motor is out, take the opportunity to clean the area:
- Remove any debris, grease, or food particles
- Clean the area where the new motor will be installed
- Wipe down the motor shaft opening
- Make sure the area is dry before installing the new motor
Step 9: Install the New Motor
Position the new Frigidaire 5304464119 turntable motor in the same location as the old one. Ensure the motor shaft extends properly through the opening at the bottom. The motor should sit flush against the mounting surface. Secure it with the mounting screws, but be careful not to overtighten.
Step 10: Reconnect the Wires
Using your earlier photo as a reference, reconnect the wires to the new motor terminals. Push the connectors firmly onto the terminals until they click into place. Make sure all connections are secure.
Step 11: Reinstall the Roller Ring and Plate
Turn the microwave back to its upright position. Place the roller ring in the bottom of the cavity (it should sit on the motor shaft or support). Then, place the glass turntable plate on top of the roller ring. Ensure everything is level.
Step 12: Test the Installation
Plug the microwave back into the wall outlet. Place a cup of water in the center of the turntable and start a 30-second cooking cycle. Watch to ensure:
- The turntable rotates smoothly
- No grinding or unusual noises
- The turntable remains level during rotation
- Rotation is steady and consistent
Troubleshooting
If the turntable still doesn’t rotate after replacement:
- Double-check that wire connections are secure
- Inspect the roller ring for damage (it may need replacement)
- Look at the turntable support (it could be damaged)
- Ensure the motor shaft is properly aligned
- Check for any obstructions that might be preventing rotation
- Verify you have the correct motor for your specific model
Maintenance Tips
To extend the life of your new turntable motor, consider these tips:
- Keep the turntable area clean and free of food debris
- Avoid overloading the turntable with heavy dishes
- Ensure the glass plate is level and not warped
- Clean the roller ring regularly
- Be gentle when closing the door to avoid damaging the motor mechanism
When to Call a Professional
If you find yourself in one of these situations, it may be time to consider professional help:
- Multiple components need replacement
- The problem persists even after replacement
- You’re unsure about your ability to install the motor correctly
← Back to Top 20 Microwave Models & Common Repair Issues Guide
How Much Does This Repair Cost?
| Repair route | Typical cost |
|---|---|
| Do it yourself | $20–$40 (turntable motor 5304464061) |
| Professional repair | $100–$180 (parts and labor) |
The cost for a replacement turntable motor (part 5304464061) generally ranges from $20 to $40 for a DIY repair. This makes it one of the most budget-friendly fixes for microwaves. A professional repair shop will usually charge between $100 and $180 total once you factor in labor, which highlights the savings you can achieve by tackling this repair yourself.
Recommended Products
Here are some parts and tools I recommend for this repair, based on compatibility and customer reviews:
- OEM 5304509440 Microwave Turntable Motor Compatible with Frigidaire 4583637 AP6230595 PS12071283 EAP12071283 Microwave Replacement Part
- [WB26X10038 Motor OEM Mania] WB26X10038 (SSM-16H MDPJ030AF) for GE Microwave Turntable Motor Replacement Part – Compatible with GE Frigidaire Replacement 5304408980 WB26X10038
- Cutetool TYJ50-8A2 Synchronous Motor 120v 60hz Suitable for Frigidaire Microwave Turntable Motor E199324, 5304509440 5304464113,WB26X32190, WB26X10176,3W, 5rpm Motor Replacement
The OEM Motor That Actually Stops the Grinding — Frigidaire 5304509440
When a turntable starts grinding or stops mid-cycle on the FGMV17WNVF, the motor is almost always the failure point — and this OEM part is the direct replacement that gets the job done without compatibility guessing. This is the one to order first because it matches Frigidaire’s specs exactly and arrives with the correct shaft and mounting tabs already calibrated for your model.
What works
- Shaft diameter and length match the original — no adapter kits or modifications needed, and the turntable coupling seats properly without forcing.
- Mounting holes and connector pins align with factory harness, so you’re not troubleshooting loose connections after installation.
- Rotates smoothly under load immediately after install — no break-in grinding or stuttering that sometimes signals a mismatch.
What doesn’t
- Costs more upfront than generic aftermarket motors, but the downtime risk and potential re-ordering aren’t worth the short-term savings on this model.
- Doesn’t address mechanical jams — if the turntable was grinding due to food debris or a broken ring lodged inside, the new motor will fail the same way until you clear the obstruction.
I learned this the hard way after a call back when I grabbed a generic 5 RPM motor that looked right on paper but had a slightly thinner shaft — the coupling would slip and the turntable wouldn’t engage consistently, which meant a second trip and re-diagnosis. Stick with OEM here. Check each product page for other buying options.
About This Article

Written by Dave Holt. I have been taking apart and fixing household appliances since I was a teenager who couldn't leave a broken one alone. Eighteen years later, after fixing things for neighbors, friends, and anyone who'd let me, I have seen almost every failure mode there is — and misdiagnosed my share along the way. I am self-taught, with no formal training or certifications. When I write a repair guide here, it is based on the actual job, not a manufacturer overview. More about this site.
Scope and limits. Dave is a self-taught repairer, not a certified appliance technician. Unplug before you open anything, and leave sealed refrigeration systems, gas connections, and hardwired circuits to a qualified technician.