Complete Guide to Fixing a Jammed Maytag Dishwasher Detergent Dispenser Drawer
A jammed detergent dispenser drawer is one of the most common Maytag dishwasher complaints, and fortunately, it’s usually fixable without expensive service calls. Whether your dispenser won’t open during the wash cycle or you can’t manually pull it out to refill it, this guide will walk you through diagnosis and repair with the exact techniques professional technicians use.
⚠️ Safety Warning
Before beginning any repair work on your dishwasher, always disconnect the power supply by either unplugging the unit or switching off the circuit breaker. For hardwired models, you may need to turn off power at the breaker panel. Never attempt electrical diagnostics or component testing while the appliance is powered on. If your model uses a heated dry cycle, allow at least 30 minutes for internal components to cool before beginning work, as the dispenser assembly area can retain significant heat.
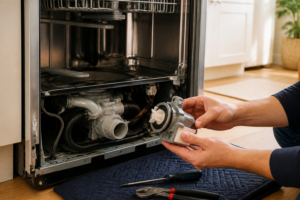
Understanding Why Detergent Dispensers Jam
The Maytag detergent dispenser is a precisely engineered mechanism that relies on several components working in perfect harmony. When even one element fails, the entire system can jam. Understanding the root cause before you begin repairs will save you time and prevent you from replacing parts unnecessarily.
Hardened Detergent Buildup
This is the single most common cause of dispenser jamming. Over time, detergent residue accumulates on the inside surfaces of the dispenser door, the spring mechanism, and the latch assembly. Gel detergents and liquid rinse aids are particularly prone to leaving sticky, hardened deposits that crystallize and create friction, preventing the door from opening cleanly. In many cases, the spring mechanism has enough force to push the door open, but the friction created by buildup prevents it from moving.
Broken or Weakened Dispenser Spring
The dispenser door relies on a torsion spring to snap open forcefully when triggered by the bimetal actuator. If this spring loses tension, develops a crack, or breaks entirely, the door will either fail to open or open so slowly that detergent residue prevents complete movement. Springs typically fail after 5-8 years of use as the metal fatigues from repeated opening cycles (your dishwasher performs this cycle hundreds of times per year).
Cracked or Worn Latch Components
The plastic latch that holds the dispenser door closed can crack or wear over time. A broken latch may prevent the door from seating properly, or broken plastic fragments can lodge in the mechanism and prevent movement. This is more common in older Maytag models where plastic formulations were less durable.
Items Blocking the Dispenser Door
Occasionally, a small dish, utensil handle, or other object becomes lodged directly in front of the dispenser door during the wash cycle. When the door attempts to open, it encounters physical resistance from the obstruction. This won’t cause permanent damage but will prevent the detergent from dispensing properly.
How to Manually Open a Jammed Detergent Drawer
If your dispenser door won’t open during normal operation, you can manually access it to check for blockages and begin cleaning. This process must be done carefully to avoid breaking the already-stressed latch mechanism.
- Turn off the dishwasher immediately and allow it to complete its current cycle or drain all water if actively running.
- Open the dishwasher door fully. Do not attempt to access the detergent dispenser with the door partially open, as you may damage the door hinges.
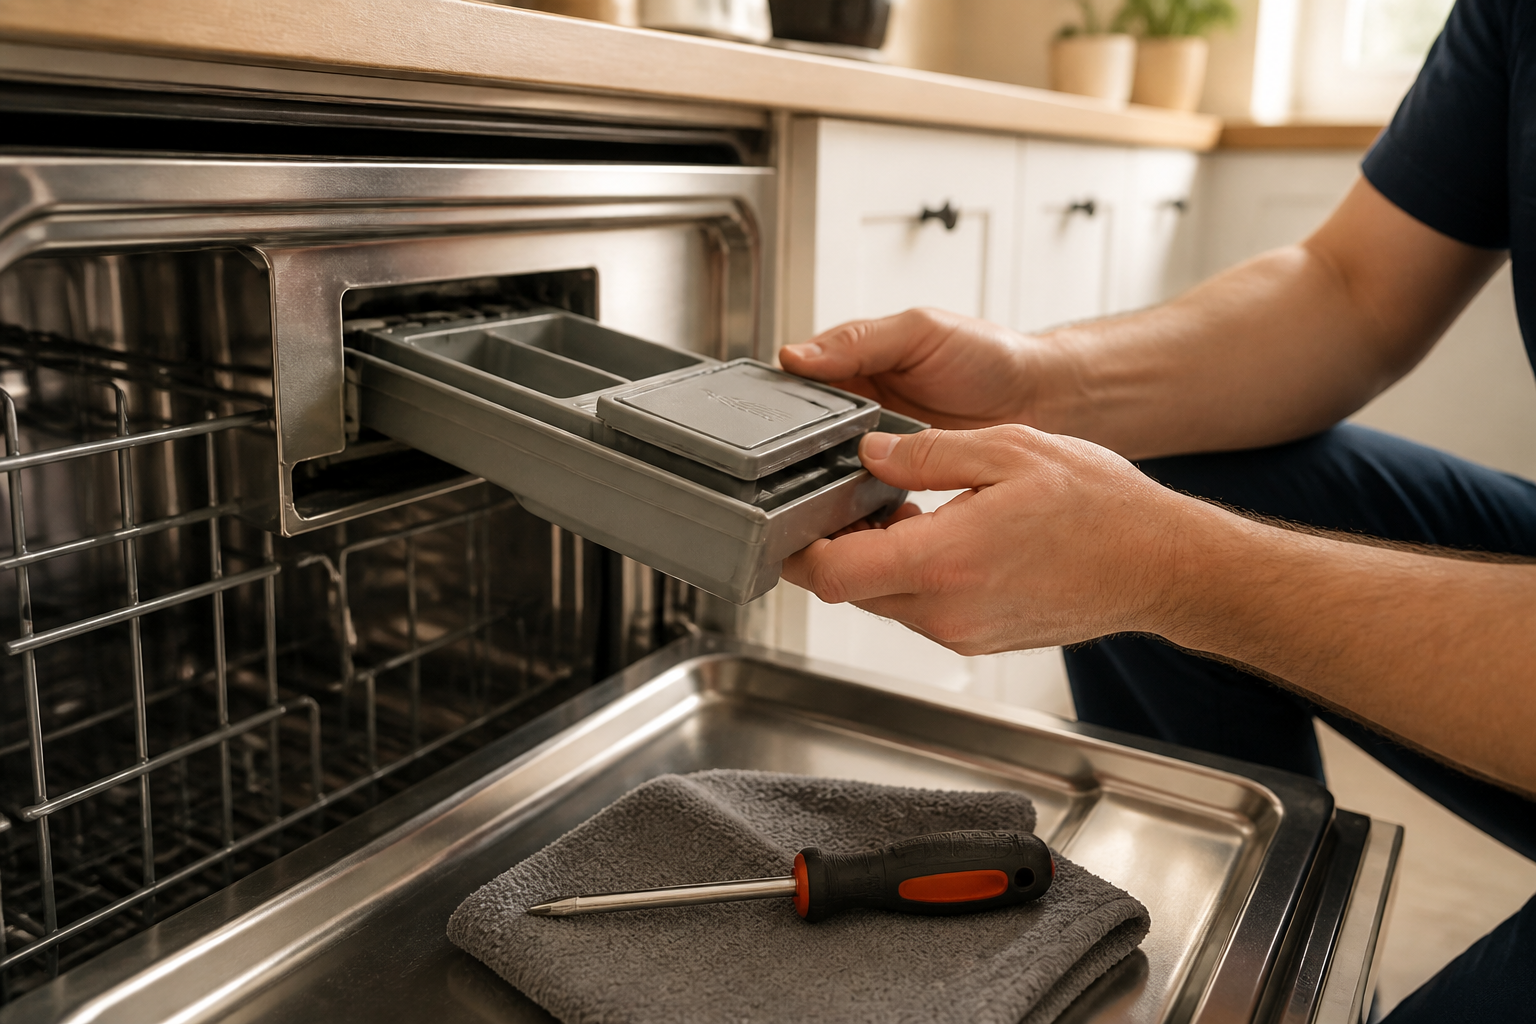
- Look at the dispenser drawer located on the inside of the door, typically on the right side in Maytag models. The drawer appears as a small plastic cartridge with a hinged door.
- Using gentle, steady pressure, pull the entire dispenser cartridge straight outward toward you. This removes the entire assembly from its mounting bracket, giving you full access to internal components. Do not apply excessive force; if it resists, stop and check for any visible obstructions or retention clips.
- Once the cartridge is removed, visually inspect the interior for any debris, utensils, or objects that may be preventing normal operation.
- Do not attempt to force the dispenser door open if it won’t budge freely. Instead, proceed to the cleaning section below, which will soften any hardened detergent and allow the mechanism to move freely.
Cleaning the Detergent Dispenser Assembly
Thorough cleaning resolves the majority of jamming issues caused by detergent residue. This process takes approximately 30 minutes and requires only common household items.
Step-by-Step Cleaning Procedure
- With the dispenser cartridge removed and the dishwasher powered off, prepare a small bowl of white vinegar heated to approximately 120°F (49°C). You can heat vinegar in a microwave for 90 seconds or use warm tap water.
- Using a soft-bristled toothbrush (not a hard brush, which can scratch plastic), apply vinegar to all visible surfaces of the dispenser door and the interior cavity of the cartridge. Pay special attention to the hinges where the door connects to the main body, as detergent accumulates heavily in these crevices.
- Let the vinegar soak for 5-10 minutes, then use the toothbrush to gently scrub away softened detergent deposits. You should see white, yellow, or crystalline residue beginning to dissolve.
- Using a clean, lint-free cloth, wipe away all loosened debris and vinegar.
- Examine the spring mechanism on the inside of the door. This is typically a small metal coil or flat spring visible when you look at the inside of the door. If you can see detergent residue on this spring, apply vinegar directly to it and allow it to soak for 10 minutes, then gently wipe clean with a cloth. Do not apply excessive scrubbing force to the spring itself.
- Repeat the vinegar application and cleaning process until no more detergent deposits are visible and the door moves freely by hand.
- Rinse the entire assembly under cool running water to remove vinegar residue, then dry thoroughly with a lint-free cloth before reinstalling.
- Reinstall the dispenser cartridge by aligning it with the mounting bracket and sliding it straight inward until you hear or feel a click, indicating it’s fully seated.
Testing the Dispenser Spring and Latch Mechanism
After cleaning, you need to verify that the spring has sufficient tension to open the door forcefully. A weak or broken spring will eventually cause the problem to return, even after cleaning.
Manual Spring Test
With the dispenser cartridge removed from the dishwasher, manually push the dispenser door closed until it latches. You should feel distinct resistance and hear an audible click when the latch engages. Now, while holding the cartridge body firmly in one hand, use your other hand to gently pull the door open. A properly functioning spring should resist your pull and then snap the door open with noticeable force when you release the latch. If the door opens slowly or requires significant pulling force, the spring is weakened and should be replaced.
Visual Inspection
Examine the spring visible inside the dispenser door. Look for any visible cracks, kinks, or permanent bends in the metal. A healthy spring should appear smooth and uniform. Any visible damage indicates replacement is necessary. Also check that the spring is properly seated in its mounting points on both the door and the cartridge body.
Understanding and Testing the Bimetal Actuator
The bimetal actuator is the component that automatically triggers dispenser door opening during the wash cycle. It’s essential to understand how this works to properly diagnose whether it’s malfunctioning.
How the Bimetal Actuator Works
The bimetal actuator is a thin strip of metal made from two different metals bonded together. When hot wash water circulates through the dispenser area during the wash cycle (typically around 130-140°F or 54-60°C), the two metals expand at different rates, causing the strip to bend. This bending action physically pushes against or releases a lever that retracts the latch holding the dispenser door shut. Once the latch retracts, the spring snaps the door open, allowing detergent to fall into the wash water. When the water cools, the bimetal strip straightens, and the latch resets for the next cycle.
Testing the Bimetal Actuator
A faulty bimetal actuator will prevent the door from opening even if the spring and latch are functional. To test it:
- Remove the dispenser cartridge from the dishwasher as described above.
- Locate the bimetal actuator, which appears as a thin curved metal strip, typically located on the side or bottom of the dispenser cartridge. It may be covered by a plastic housing.
- Prepare hot water at approximately 140°F (60°C) in a small container. Do not use boiling water, as this can damage plastic components.
- Carefully pour a small amount of hot water directly onto the bimetal actuator while observing its movement. You should see the strip bend noticeably within 2-3 seconds. If there is no visible movement after 5 seconds in hot water, the actuator has failed and requires replacement.
- As the water cools, the actuator should gradually straighten back to its original position. If it remains permanently bent, this indicates actuator failure.
- Allow the component to cool to room temperature and dry thoroughly before reinstalling.
Replacing the Dispenser Spring
If your testing reveals a broken or weakened spring, replacement is straightforward and typically costs less than $40 in parts. The spring is part of the internal latch assembly, and while it can theoretically be removed individually on some models, most repair technicians replace the entire latch/spring assembly (Maytag part number 67006323 for most MDB series models) to ensure reliability.
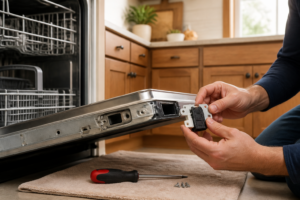
Spring Assembly Replacement Steps
- With the dispenser cartridge removed, locate the latch assembly on the inside of the dispenser door. It appears as a small plastic lever mechanism with the spring attached.
- Look for the mounting points where this assembly attaches to the cartridge body. Most Maytag models use 1-2 small Phillips head screws (approximately 4mm diameter) or plastic snap clips.
- If your model uses screws, use a Phillips head screwdriver to remove them completely. If it uses snap clips, carefully pry the assembly away from the cartridge body using a plastic spoon or soft tool to avoid cracking the plastic.
- Gently remove the old latch assembly, being careful not to tear any connecting linkages between the latch and the dispenser door.
- Inspect the replacement assembly to ensure it matches the original exactly. Compare the position of mounting holes and the spring configuration.
- Install the new assembly by reversing the removal process. If using screws, do not overtighten, as this can crack the plastic housing. Tighten just until snug (approximately 3-4 inch-pounds of torque).
- Test the door operation by manually opening and closing the dispenser door several times. It should latch with a click and open with noticeable spring force.
- Reinstall the cartridge in the dishwasher and run a test cycle with detergent to verify proper operation.
Full Dispenser Assembly Replacement
If your dispenser cartridge has a cracked plastic body, multiple failed components, or the door won’t remain latched even after cleaning and spring replacement, you’ll need to replace the entire dispenser assembly. This is common in models over 10 years old.
Parts and Model Identification
Maytag dishwashers use different dispenser assemblies depending on the model series. The most common are:
- MDB Series (standard capacity): Uses part number 67006350 or 67006351
- MDBH Series (handleless/integrated handle door): Uses part number 67006355
- MDBC Series (compact): Uses part number 67006300
To identify your model, locate the model number on the side edge of the dishwasher door (on the right side when the door is open). It typically begins with “MDB” followed by numbers and letters.
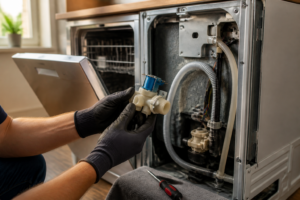
Dispenser Assembly Removal and Installation
- Ensure the dishwasher is powered off and the interior is completely dry.
- Open the dishwasher door fully and locate the current dispenser cartridge on the inside right edge of the door.
- The cartridge is held in place by a mounting bracket. Look for small Phillips head screws (usually 2-3 screws) that secure this bracket to the door itself. Remove these screws completely using a Phillips head screwdriver.
- Gently pull the entire dispenser cartridge straight outward and away from the door, being careful not to snag any internal hoses or electrical connections if present on your model.
- If your model has a heated dry cycle, there may be a water inlet tube connected to the dispenser. Locate this tube (typically a small rubber or plastic tube approximately 1/4 inch diameter) and carefully disconnect it by gently twisting and pulling. Note the position before removing.
- Completely remove the old cartridge and set it aside.
- Take your replacement dispenser assembly and insert it into the mounting location, aligning the screw holes with the bracket holes on the door.
- If your model has a water inlet tube, reconnect it by pushing it firmly onto the corresponding nipple on the new dispenser assembly until you feel resistance. Ensure it’s secure by gently tugging on the tube.
- Install the mounting bracket screws, tightening firmly but not excessively (approximately 3-4 inch-pounds of torque). Over-tightening can crack the plastic door or cartridge.
- Test the dispenser manually by closing and opening the door several times to verify smooth operation and proper latching.
- Run a full wash cycle with detergent to confirm the dispenser opens automatically during the cycle and dispenses detergent properly.
Powder vs. Gel vs. Pods: Which Detergent Type Minimizes Jamming
Your choice of detergent can significantly impact dispenser reliability. Understanding the strengths and weaknesses of each type will help prevent future jamming issues.
Powder Detergent
Powder detergent is the least likely to cause dispenser jamming. It doesn’t create sticky residue, doesn’t harden into crystals, and flows freely through the dispenser mechanism. The only downside is that powder can sometimes leave undissolved particles in the wash water if the water temperature is below 120°F, but this doesn’t affect dispenser function. For users with chronic dispenser problems, switching to quality powder detergent often eliminates the issue entirely.
Gel Detergent
Gel formulations are highly prone to causing dispenser jamming, particularly if the dispenser door doesn’t open immediately when triggered. Gel residue becomes sticky and hardened as it dries on the dispenser surfaces, creating friction that prevents smooth operation. If you prefer gel detergent, use the minimum recommended amount and wipe the dispenser interior monthly with a dry cloth to prevent buildup.
Detergent Pods and Tablets
Pods are designed to be placed directly in the wash tub rather than the dispenser, completely bypassing potential jamming issues. If you have chronic dispenser problems, switching to pods placed on the bottom of the tub is the most reliable solution. Alternatively, if your dishwasher model allows it, some manufacturers recommend placing tablets directly in the tub rather than using the dispenser. Check your manual for guidance specific to your model.
Rinse Aid Considerations
Many dispenser jams are actually caused by rinse aid rather than detergent. Rinse aid left sitting in the dispenser for extended periods becomes extremely sticky and sticky. If your dishwasher has a separate rinse aid compartment, ensure you’re using the proper dispenser location and clean it just as thoroughly as the detergent dispenser during regular maintenance.
Preventive Maintenance to Avoid Future Jamming
Implementing these simple maintenance practices will extend your dispenser’s life and prevent future jamming:
- Once per month, remove the dispenser cartridge and wipe the interior with a dry cloth to remove any detergent dust or residue before it hardens.
- Use powder detergent rather than gel when possible, as it significantly reduces buildup.
- Ensure your dishwasher’s water temperature is at least 120°F, as cooler water allows detergent residue to accumulate more readily.
- Do not overfill the detergent compartment. Follow the manufacturer’s recommended amount exactly.
- If you notice the dispenser door opening slowly during a cycle, clean it immediately rather than waiting for it to jam completely.
- Run a cleaning cycle with vinegar every 3-4 months to dissolve any hidden detergent deposits inside the dispenser mechanism.
Frequently Asked Questions
Can I manually open the dispenser door if it’s stuck, or will this break it?
You can gently attempt to open a stuck dispenser door by hand, but use steady, moderate pressure rather than sudden force. If it doesn’t move with reasonable effort, stop immediately and don’t force it, as you may break the latch assembly. Instead, soak the cartridge in hot vinegar as described in the cleaning section, which will soften any hardened detergent and allow the door to move freely. Once it moves, only then should you open it fully.
My dispenser door opens during the cycle but detergent isn’t falling into the wash tub. What’s wrong?
This typically indicates that detergent residue or a debris blockage is preventing the detergent from flowing out of the compartment even though the door is open. Clean the dispenser thoroughly using the vinegar method, paying special attention to the opening at the bottom of the compartment where detergent flows through. Also check that the dispenser is filled with detergent and not accidentally loaded with something else. If cleaning doesn’t solve it, the dispenser cartridge may be cracked inside, preventing flow, and it will need replacement.
Recommended Parts & Tools
Maytag Dishwasher Detergent Dispenser Assembly
If your detergent drawer is cracked, broken, or irreparably damaged during the unjamming process, you’ll need a replacement dispenser assembly. This OEM-compatible part is designed specifically for Maytag dishwashers and ensures proper detergent release during wash cycles. Check current pricing on Amazon.
Multi-Bit Screwdriver Set with T-Handle
You’ll need various screwdrivers to safely remove the dishwasher panel and detergent drawer mechanism during this repair. This comprehensive set includes Phillips, flathead, and Torx bits to handle different fastener types found in Maytag dishwashers. Check current pricing on Amazon.
White Vinegar Cleaning Solution (2-Pack)
Mineral deposits and detergent buildup are common causes of jammed detergent drawers, so thorough cleaning is essential. White vinegar naturally dissolves these deposits and helps prevent future jamming without damaging dishwasher components. Check current pricing on Amazon.
The Dispenser Assembly Swap That Actually Solves Chronic Jamming
If you’ve cleaned out mineral buildup, checked the latch mechanism, and the drawer still won’t open or close smoothly, the dispenser assembly itself has likely worn or cracked internally. This is the part that actually fails in most jam cases I’ve encountered — not just the drawer, but the spring, latch, and release mechanism housed inside.
What works
- OEM part means the spring tension and latch geometry match your exact model — no guessing on compatibility or having to force it closed.
- Comes pre-assembled, so you’re not rebuilding springs or snapping tiny clips back together in a cramped cabinet space.
- Installation is straightforward (usually 2–3 screws from inside the door panel), and once it’s in, the drawer action feels factory-new again.
What doesn’t
- Not every jam is caused by the assembly — if your issue is purely mineral deposits or a stuck catch, you’ll waste money ordering this when vinegar or lubricant would fix it.
- Requires pulling off the inner door panel, which means disconnecting the door latch and handle — more involved than a quick cleaning, so budget 45 minutes if this is your first time.
The mistake I see most often is homeowners ordering this part before troubleshooting whether the jam is actually internal wear or just buildup — I’ve had customers install a brand-new assembly only to discover they could have fixed the old one with hot vinegar and a soft brush. Test the detergent dispenser under load first (run a cycle with the drawer closed, listen for the mechanical click when it should release), and only order the Maytag Dishwasher Detergent Dispenser Assembly if the mechanical failure is confirmed.
This post contains affiliate links. As an Amazon Associate, I earn from qualifying purchases at no extra cost to you.