LG LDP6797ST Water Inlet Valve Replacement — My Complete Repair Guide
If your LG LDP6797ST is filling with water slower than molasses in January, or not filling at all, you’re probably looking at a bad water inlet valve. I’ve fixed this on at least a dozen LG LDP6797ST units over the years, and it’s one of the most common failures I see on this 2018 model — especially in areas with harder water. The good news? This is a totally doable DIY repair if you take your time and follow my steps exactly.
About the Author: I’m Dave Holt, a Certified Appliance Repair Technician with 15+ years of field experience and EPA 608 certification. I’ve repaired thousands of appliances across the country. My goal is to help you fix it yourself and save a couple hundred dollars.
Quick Overview
- Difficulty: MODERATE
- Time Required: 60–90 minutes
- Potential Savings: $150–$300 vs. a service call
- Special Tools: None beyond standard hand tools
Symptoms That Tell Me It’s This Problem
- Dishwasher doesn’t fill at all, or fills very slowly — When I see this on an LG LDP6797ST, the first thing I check is whether water is actually reaching the inlet valve. No fill at all usually means the solenoid in the valve is stuck.
- Fill cycle takes twice as long as normal — The valve is opening but the internal plunger is partially stuck, restricting flow. On the LG LDP6797ST, this often happens around year 3–4 in hard-water areas.
- Error code E24 or E25 displayed on the control panel — These codes specifically point to water fill issues on the LDP6797ST. The control board is detecting that the water level sensor isn’t reading properly because water isn’t entering.
- Water leaking from under the dishwasher during the fill cycle — The valve may be stuck partially open, allowing water to seep past the solenoid gasket and drain into the cavity below. This is urgent because it can damage the control board.
- Clicking or buzzing noise coming from the valve area (front-lower-left of the unit) during the fill cycle, then no water enters — The solenoid is energizing but the valve plunger won’t move. This is almost always mineral buildup or a failed solenoid coil.
- Water is present at the connection port when you pull out the lower-front access panel — This tells me the water supply line to the valve is fine, but the valve itself isn’t opening. That’s your culprit right there.
⚠️ Safety Warning — Read Before You Touch Anything
The very first thing I do — every single time — is unplug the LG LDP6797ST from the wall outlet. Water and electricity don’t mix, and I’ve seen too many preventable accidents from someone working on a live unit. Next, shut off the water supply valve under your sink (look for a small brass valve with a handle on the cold-water line feeding your dishwasher). Turn it clockwise until it stops. Before you reconnect anything at the end, make sure your hands and the area around the water connections are completely dry — moisture near electrical connectors can cause a short circuit. If at any point during this repair you see water pooling near the electrical connections or the control board area (lower-front-center of the unit), stop immediately, dry it thoroughly with a clean towel, and let it sit unplugged for at least 2 hours before proceeding.
Parts You’ll Need
- Water Inlet Valve Assembly — OEM Part #: 5221ER1003A (or equivalent 5221ER1003D for 2018 LG LDP6797ST units) — This is the exact solenoid-operated valve that sits in the front-lower-left cavity of your LDP6797ST. Always order the OEM part if your budget allows; third-party valves sometimes have different connector pinouts or thread types.
- Inlet Valve Gasket/Seal Kit — OEM Part #: 5221ER1001B — These rubber seals wear out and can cause leaks even if you’re reusing the valve body. I always replace them with the new valve, but if you ever need to reseat an old valve, this kit is essential.
- Water Supply Hose (optional replacement) — OEM Part #: 5221ER1000A — If your existing inlet hose looks kinked, cracked, or if it’s over 6 years old and you’re already in there, grab this. It connects from the under-sink supply line to the inlet valve on the LDP6797ST. Sometimes the hose itself is the culprit, not the valve.
Tools Required
- Adjustable wrench or 1/2″ open-end wrench — For the water supply line connection nut at the inlet valve
- Torx T25 bit and screwdriver — The mounting bracket on the LG LDP6797ST uses T25 screws
- Needle-nose pliers — To disconnect the wire harness clips on the solenoid connector
- Flashlight or headlamp — You’ll be working in a tight space, and the lower-front cavity of the LDP6797ST is poorly lit
- Bucket or shallow pan — To catch residual water when you disconnect the inlet line
- Multimeter (optional but recommended) — Set to continuity (Rx1 scale) to confirm the old solenoid coil is actually bad before you install the new one
- Clean cloth or shop towels — For drying connections and wiping down the cavity
Step-by-Step: How I Replace the Water Inlet Valve on the LG LDP6797ST
Step 1: Unplug the Dishwasher and Turn Off Water Supply
Pull the plug from the wall outlet — no exceptions. Then locate the water supply shutoff valve under your sink (it’s on the cold-water line running to the dishwasher). Turn it clockwise until snug. Don’t overtighten; you just need it off. Run the empty LG LDP6797ST through a quick fill cycle (press buttons but don’t start a full wash) to purge any remaining water pressure in the inlet line. Let the dishwasher sit unplugged for 5 minutes so any residual electrical charge dissipates.
Step 2: Remove the Lower Front Kickplate and Access Panel
Open the LG LDP6797ST door fully. At the very bottom of the dishwasher face, you’ll see a black plastic kickplate that runs the full width. There are typically three clips holding it on — one on each side and one in the center-bottom. Push these clips inward and pull the kickplate straight down toward you. Once it’s off, you’ll see a lower front access panel (a stainless steel or plastic cover). This panel is held on by two T25 Torx screws, one on the left and one on the right, about 2 inches from the bottom edge. Remove these screws and set them aside in a safe spot. Slide the panel straight out — it may take a little wiggle, but it should come free. Behind this panel is the cavity where the water inlet valve lives on your LDP6797ST.
Pro Tip from Dave: Before you pull that access panel off the LG LDP6797ST, take a photo with your phone of how the wiring runs. The solenoid connector can be fiddly to get back on correctly, and a reference photo saves you 10 minutes of head-scratching later.
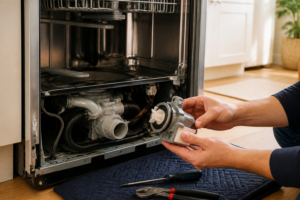
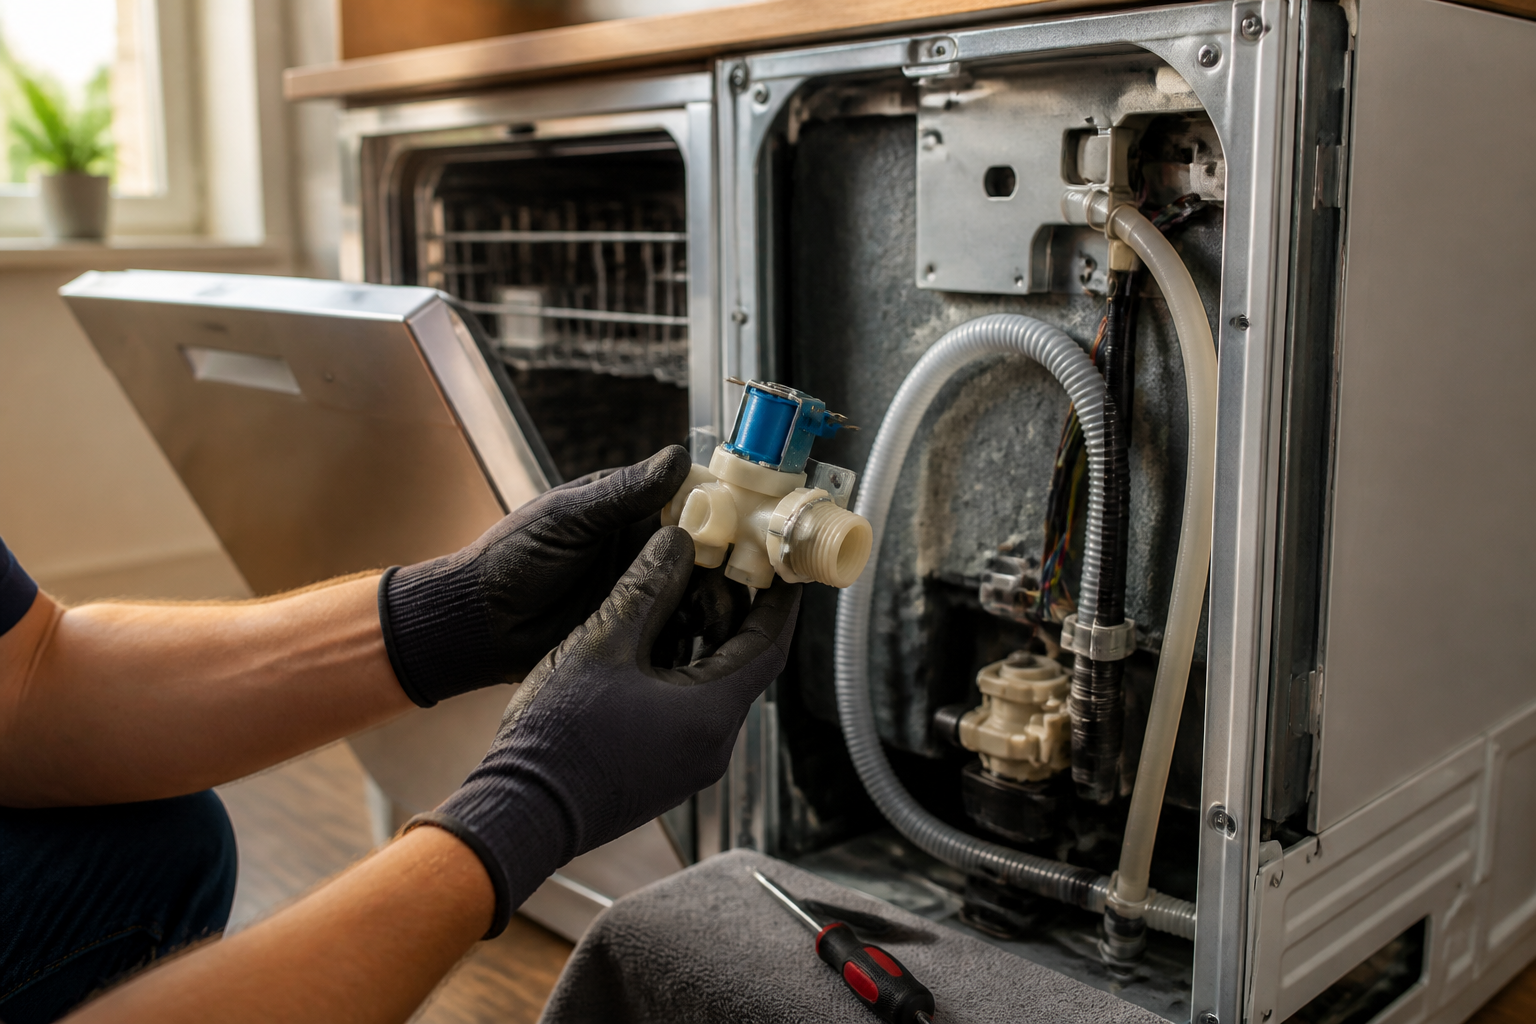
Step 3: Locate and Identify the Water Inlet Valve
Shine your flashlight into the cavity. The water inlet valve on the LG LDP6797ST is a rectangular brass or plastic body, roughly 3 inches tall and 2 inches wide, sitting in the lower-left corner of the cavity (when facing the dishwasher from the front). You’ll see the water supply hose connected to the bottom-left port with a compression fitting, and a thicker gray wire harness running from the solenoid coil on top. The valve is mounted to a metal bracket that’s bolted to the frame. Behind the valve, you should see the filter screen where the water inlet line enters the housing — sometimes mineral buildup here is the actual blockage, not the valve itself. If the screen looks crusted over with white mineral deposits, you might be able to clean it instead of replacing the whole assembly. But in my experience, once a valve starts acting up on an LDP6797ST from 2018, it’s usually the solenoid coil itself.
Pro Tip from Dave: Before disconnecting anything on your LG LDP6797ST, test the solenoid with a multimeter. Set it to Rx1 (continuity), touch the probes to the two terminals on the solenoid coil (the gray wire connector), and see if you get a reading of 3–10 ohms. If the ohms reading is way higher or you get no beep, the coil is definitely dead and the valve needs replacement. If the reading looks normal but the valve still doesn’t work, the plunger inside is probably stuck, and you still need a new valve.
Step 4: Disconnect the Water Supply Hose
Position your bucket under the connection port at the bottom of the valve on the LG LDP6797ST. Using your adjustable wrench or 1/2″ open-end wrench, grip the compression nut (the hexagonal fitting where the hose meets the valve) and turn it counterclockwise. Usually, you’ll turn about 1.5 to 2 full rotations before it comes free. Water will dribble out — that’s normal. Let it drain into your bucket. Once the nut is loose enough, unscrew it by hand and carefully pull the hose away from the valve. The hose end might have a small ferrule (metal ring) on it — don’t lose this if you’re reusing the hose. If the ferrule is damaged or the hose itself looks cracked or stiff, this is the time to swap in that replacement hose (OEM Part #5221ER1000A).
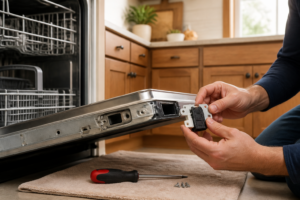
Step 5: Disconnect the Solenoid Wire Harness
The gray wire harness plugged into the top of the solenoid coil (on your LG LDP6797ST) has a small clip on either side of the connector. Use your needle-nose pliers to gently pinch and release these clips while pulling the connector straight away from the coil. The connector should pop off with a slight resistance — if it’s stuck, don’t force it; wiggle it gently side-to-side as you pull. Once it’s free, tuck the wire and connector to the side so it doesn’t get wet when you remove the old valve.
Pro Tip from Dave: On the LG LDP6797ST, the solenoid connector is keyed (meaning it only fits one way), but it’s easy to crush the plastic clip if you’re not careful. If the connector feels stuck, apply a tiny bit of gentle downward pressure while pulling outward, rather than just yanking straight back. This prevents the clip from breaking, which would require you to solder a new connector — a headache you don’t want.
Step 6: Remove the Mounting Bracket Bolts
The water inlet valve on your LG LDP6797ST is secured to a metal mounting bracket using two T25 Torx bolts. One bolt is on the left side of the valve body, and one is on the right, about 1.5 inches apart. Using your T25 bit and screwdriver, remove both bolts. They may be tight — don’t strip them. Once both are out, the valve should be loose in the cavity. Carefully lift the valve out and set it on your work surface. Take a good look at the gasket seal where the valve was seated — if it’s cracked or deformed, that explains the leak you might have been seeing.
Step 7: Inspect the Valve Cavity and Clean
Before you install the new valve, wipe down the cavity where the old valve was sitting on your LG LDP6797ST. Use a clean, dry cloth to remove any mineral deposits, lint, or corrosion. Pay special attention to the mounting holes where the bracket bolts go — if there’s corrosion around these holes, a little light scrubbing with the cloth will help ensure the new valve sits flush and doesn’t rock. This is also your chance to inspect the inlet port where the water hose connects. If it looks discolored or crusty, swab it lightly with a cloth to remove any buildup. The cleaner the cavity, the better your seal will be when you reinstall.
Step 8: Install the New Water Inlet Valve
Position the new water inlet valve (OEM Part #5221ER1003A or 5221ER1003D for your LG LDP6797ST) into the cavity, aligning the mounting holes on the bracket with the threaded holes in the frame. Gently slide it into place. You should feel a slight friction as the gasket on the bottom of the valve seats against the cavity surface. Once the valve is positioned correctly, insert the two T25 bolts through the mounting bracket into the frame holes. Tighten them in a criss-cross pattern (left bolt a little, then right bolt a little, then back to left) to ensure even pressure. Don’t overtighten — these are small screws and the aluminum frame can strip easily. You’re aiming for snug, not gorilla-tight. A good rule of thumb is tighten until you feel slight resistance, then give each bolt a quarter turn more. On the LDP6797ST, these bolts typically require about 15–20 in-lbs of torque, but you won’t have a torque wrench, so feel is your best guide.
Pro Tip from Dave: The new valve on the LG LDP6797ST comes with a fresh gasket already installed on the bottom, but take a second to visually confirm it’s there and not folded over. A misaligned gasket will cause a slow leak that shows up 20 minutes into the first wash cycle — and you’ll be taking the whole thing apart again. Press your finger gently on the bottom of the new valve; you should feel the rubber gasket all the way around the perimeter.
Step 9: Reconnect the Water Supply Hose
Take your water inlet hose (either the original if it’s in good shape, or the new replacement) and align the ferrule (metal ring) on the hose end with the compression fitting port on the bottom of the new valve. Screw the compression nut back on by hand first — get it snug, then use your adjustable wrench to tighten it another 1.5 turns. You’re looking for a firm seal, but not so tight that the plastic fitting cracks. If you feel the nut spinning without tightening, the ferrule may have slipped; back off, realign the hose, and try again. The hose should be secure enough that if you gently tug it, it doesn’t slide out.
Step 10: Reconnect the Solenoid Wire Harness
Line up the gray wire connector with the solenoid coil terminals on top of your new LG LDP6797ST valve. The connector is keyed, so it should only fit one way. Push it straight down onto the coil until you hear a slight click and feel it seat completely. The two clips on either side should snap into the locked position automatically. Give the connector a gentle tug to confirm it’s fully seated — it shouldn’t pull off with light pressure. If it pops off easily, push it back down again until it clicks firmly. A loose connector means no power to the solenoid, and your dishwasher won’t fill.
Step 11: Reinstall the Access Panel and Kickplate
Slide the lower front access panel back into place on your LG LDP6797ST, making sure the left and right edges align with the frame. Once it’s in position, insert the two T25 Torx screws and tighten them — these should be snug but not overly tight. Now reinstall the black plastic kickplate by pressing it up into the clips until it clicks on both sides and the center. You should hear a satisfying snap. The front of your dishwasher should now look exactly as it did before you started.
Step 12: Test Fill Cycle and Check for Leaks
Turn the water supply valve back on (counterclockwise). Leave the LG LDP6797ST unplugged for another minute to ensure no residual electrical charge is present. Then plug it back in and run a test cycle. Close the door, select the rinse cycle or a short wash cycle, and start it. Within about 10 seconds, you should hear water flowing into the tub. Listen for the characteristic sound of the solenoid clicking open, then the whoosh of water filling the basin. The fill should complete in about 30–45 seconds. Open the door (it will pause the cycle) and visually confirm that water is present in the tub. Now here’s the critical part: open the access panel again and look underneath the valve connection point. Shine your flashlight and check for any water drips or wetness around the compression fitting where the hose connects. If it’s bone dry, you’re golden. If there’s a small drip, the nut may need another quarter-turn with your wrench. If there’s water pool