
Drive belt snap
This step-by-step repair guide walks you through fixing drive belt snap on your GE GTD65EBSJWS (Electric). With the right tools and parts, most homeowners can complete this repair in 1–2 hours and avoid a costly service call.
🔨 Pro Tip from Dave
On the GTD65EBSJWS, always replace the idler pulley (part number WE12X22278) at the same time as the belt — this model’s pulley wears unevenly and is usually what caused the belt to snap in the first place. A common mistake is routing the new belt (WE12M29) incorrectly around the motor pulley; double-check the diagram on the cabinet interior before closing it up.
Part of our Top 20 Dryer Models & Common Repair Issues Guide. Browse all dryer repair guides for related models and issues.
“`html
Common Symptoms & Causes
If your GE GTD65EBSJWS is experiencing a snapped drive belt, you’ll likely notice one or more of the following symptoms before or after the failure occurs.
- The dryer drum does not spin even though the motor runs and the machine powers on normally
- Clothes come out completely wet after a full drying cycle with no tumbling occurring
- A loud thumping or snapping sound was heard just before the drum stopped rotating
- The drum spins freely with no resistance when turned by hand with the dryer unplugged
This issue is typically caused by normal wear and tear on the drive belt over time, as the belt becomes brittle and frayed from years of heat exposure and continuous use.
“`
Safety First
- Unplug the dryer from the power outlet before starting any repair — never work on a live appliance.
- Wear work gloves when handling metal brackets, sheet metal edges, or sharp components.
- Take photos with your phone before disconnecting any wiring harnesses or connectors.
- Work in a well-lit area with enough floor space to lay removed panels flat.
Tools & Parts Needed
Essential Tools
- Phillips #2 screwdriver
- ¼” nut driver
- Putty knife
- Multimeter
- Work gloves
Replacement Parts
- Drive belt
- idler pulley
- drum support rollers (set of 2)
- ¼” hex driver
Step-by-Step Repair Instructions
Step 1
Unplug the dryer from the wall outlet before touching anything — capacitors in the motor can hold a charge briefly, so waiting 30 seconds after unplugging is a smart habit. Open the dryer door and try to spin the drum by hand; a properly tensioned drum has noticeable resistance, so if it spins completely free with no drag, the drive belt has snapped and confirmed your diagnosis.
Step 2
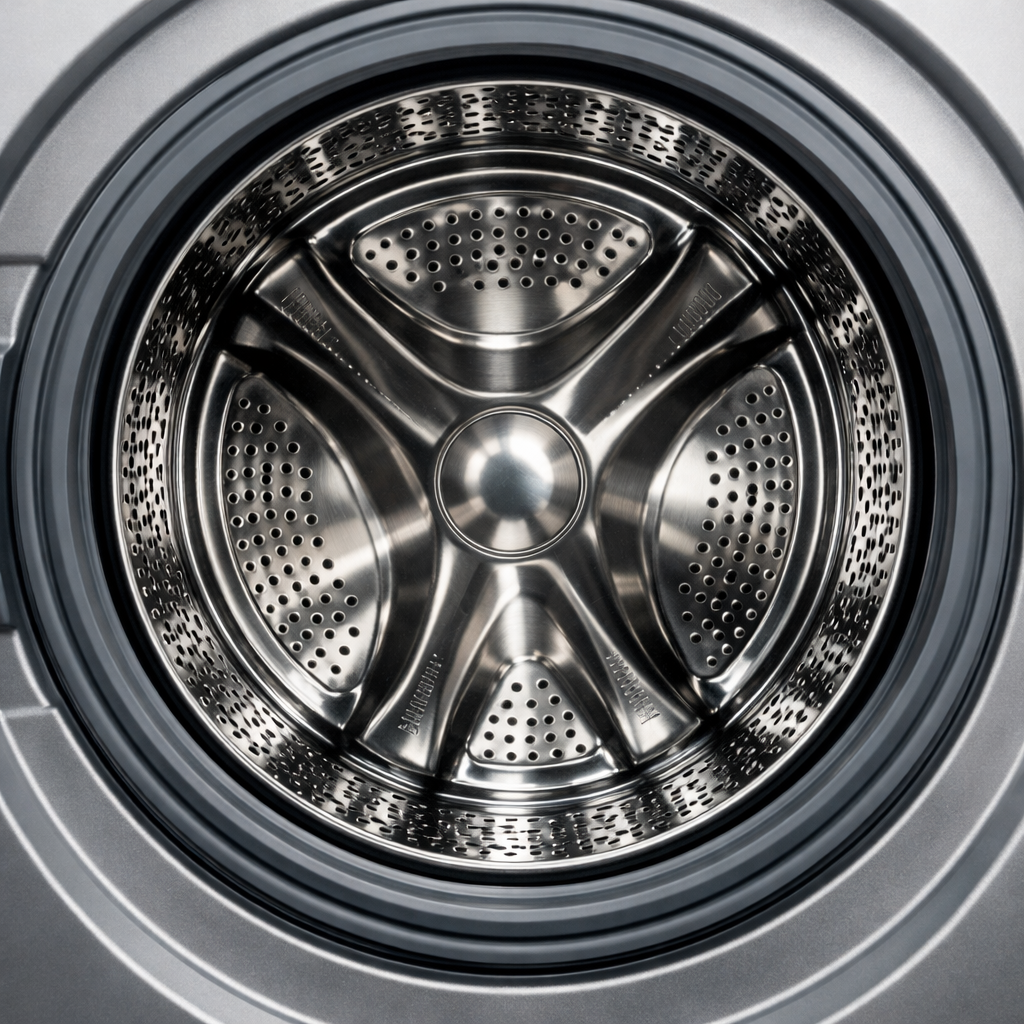
Remove the rear panel by taking out the five quarter-inch hex screws around its perimeter, then set the panel aside and visually confirm the broken belt. While you have clear access, spin the idler pulley — the spring-loaded pulley mounted at the bottom of the rear panel — by hand; a smooth spin is normal, but grinding, roughness, or wobble indicates a worn bearing that will kill the new belt quickly if not replaced now.
Step 3
With the rear panel off, locate the two drum support rollers at the bottom of the rear panel and spin each one by hand. You are looking for wobble, flat spots, or a roller that refuses to spin freely, any of which causes the drum to drag unevenly and can wear a new belt prematurely; if one roller shows any of these symptoms, replace the full set as a matched pair since they wear at the same rate.
Step 4
Loop the new belt around the drum with the grooved side facing inward against the drum surface — installing it smooth-side-in is one of the most common mistakes and will cause slipping or squealing. Thread the belt under the idler pulley first, then stretch it up and over the motor shaft pulley; the idler’s spring tension is what locks the belt taut, so if the routing feels too loose, double-check you have gone under the idler and not over it.
Step 5
Before closing anything up, rotate the drum by hand through at least two full revolutions and confirm the belt stays centered in the drum’s groove channel. If the belt walks to one side or pops off, the routing around the idler or motor pulley is incorrect — catching this now saves you from pulling the panel again after a failed test run.
Step 6
Reinstall the rear panel and hand-tighten the five hex screws before fully torquing them to keep the panel aligned. Plug the dryer back in and run a 10-minute Timed Dry cycle, staying nearby to listen — the drum should turn smoothly and silently, and any squealing, thumping, or burning smell means the belt is misrouted or a pulley you should have replaced is now failing under load.
Where to Buy Replacement Parts
Find genuine OEM and aftermarket replacement parts for your GE GTD65EBSJWS (Electric) on Amazon:
- GE GTD65EBSJWS drive belt WE12M29 replacement
- GE electric dryer idler pulley WE1M504 replacement
- GE dryer drum roller WE1M481 bearing replacement
When to Call a Professional
If the issue persists after completing all steps above, the problem may involve the sealed refrigerant system, a failed main control board, or wiring that requires specialized diagnostic equipment. Contact a licensed appliance technician — attempting sealed-system repairs without EPA 608 certification is illegal and unsafe.
“`html
How Much Does This Repair Cost?
A replacement drive belt for the GE GTD65EBSJWS typically costs between $10 and $30 for the part alone. Professional appliance repair technicians generally charge $150 to $300 once you factor in the service call fee and labor. Tackling this repair yourself can save you $120 to $270, making DIY a smart and budget-friendly choice.
“`
## Frequently Asked Questions
Frequently Asked Questions
How do I know if the drive belt on my GE GTD65EBSJWS is broken?
If your dryer runs but the drum doesn’t spin, a snapped drive belt is the most likely cause. You may also hear the motor humming without any tumbling motion.
What replacement belt does the GE GTD65EBSJWS require?
This model uses a specific multi-rib drum belt, so check your owner’s manual or match the part number before purchasing. Using the wrong belt can cause premature wear or poor drum performance.
Is it safe to replace the drive belt myself without professional help?
Yes, this is a manageable DIY repair if you’re comfortable with basic tools and remember to unplug the dryer first. Always discharge any stored electricity and follow each disassembly step carefully.
Recommended Products
These are the parts and tools we recommend for this repair, based on compatibility and customer reviews:
- PartsBroz WE12M29 WE03X29897 Dryer Belt Drive fits for GE Dryer Belt Replacement, Whirlpool, Hotpoint, Kenmore Parts WE12M22 PS16542496 WE12M33 for GTD33EASK0WW GTD42EASJ2WW GTD42GASJ2WW GTD45EASJ2WS
- WE12M29 WE03X29897 Dryer Belt (89.5in) fits for Whirlpool, Hotpoint, GE Dryer Belt Replacement, Replace for Dryer Drum Drive Belt WE12M22, WE12M33, PS16542496 for GTD33eask0ww, GTD42easj2ww
- Dryer Belt for GE GTD42EASJ2WW/ GTD33EASK0WW/ GTD42GASJ2WW/ GTD33GASK0WW/ DBXR463ED2WW/ DBXR463ED1WW/ GTDP490ED7WS/ GTDP490ED7WS, Dryer Drive Belt Replacement Parts.
As an Amazon Associate, I earn from qualifying purchases.


