Common Ice Maker Repair Guide: Essential Tools, Safety, and Troubleshooting
This comprehensive guide covers everything you need to know about ice maker repair, from essential tools and critical safety warnings to the most common problems and when to repair versus replace. Whether you have a refrigerator ice maker or a standalone unit, this guide will help you diagnose issues, stay safe during repairs, and make informed decisions about your ice maker.
This guide is part of our comprehensive Top 20 Ice Maker Models & Common Repair Issues Guide. Check out the full guide for detailed repair information on specific ice maker models.

🛠️ Essential Tools for Ice Maker Repair
Having the right tools is crucial for successful ice maker repairs. The tools you need depend on whether you’re working on a refrigerator ice maker or a standalone unit. Here’s a comprehensive breakdown of essential tools for each type:
For Refrigerator Ice Makers
- Multimeter – Essential for testing electrical connections and water valve functionality. A digital multimeter allows you to check for continuity, measure voltage, and diagnose electrical issues safely. Look for models with auto-ranging and a clear display. Cost: $20-40 for a basic model, $50-100 for professional-grade units.
- Screwdrivers – Both Phillips and flathead screwdrivers are necessary for removing panels, accessing components, and disassembling the ice maker assembly. A magnetic tip helps prevent dropping screws in tight spaces. Consider a multi-bit screwdriver set for versatility.
- 1/4″ Nut driver – Specifically needed to remove ice maker mounting screws. Many ice makers use hex-head screws that require a nut driver rather than a standard screwdriver. A 1/4″ drive socket set with various sizes is also useful.
- Flashlight – Freezer compartments are dark, and you’ll need good lighting to see wire connections, water lines, and component locations. A headlamp is even better as it keeps your hands free. LED flashlights provide bright, focused light without generating heat.
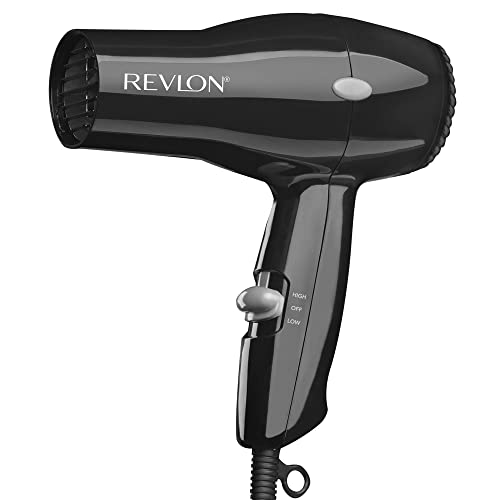
- Hair dryer – Used to safely thaw frozen water lines without damaging them. Never use a heat gun or open flame, as these can melt plastic components. A hair dryer on low heat setting provides gentle, controlled warming. This is especially important when water lines freeze due to freezer temperatures being too low.
- Small container – Essential for catching water that drains during repairs. Even after shutting off the water supply, residual water will drip from disconnected lines. A shallow pan or bowl placed under connections prevents water damage to your floor.
- Camera/phone – Document wire connections before disconnecting them. Modern ice makers have complex wiring harnesses, and photos help ensure you reconnect everything correctly. Take multiple angles and close-up shots of connection points.


For Standalone Ice Makers
- Descaling solution – Citric acid or commercial cleaner specifically designed for ice makers. Mineral buildup is the most common problem with standalone units, especially in hard water areas. Commercial descalers are formulated to dissolve calcium and magnesium deposits without damaging components. Cost: $10-15 for commercial solutions, or use food-grade citric acid powder for a natural alternative.
- Soft cloths – Microfiber or lint-free cloths for cleaning sensors and surfaces without scratching. Ice maker sensors are delicate and can give false readings if dirty. Avoid abrasive materials that could damage sensor surfaces or leave residue.
- Vinegar
– Natural descaling alternative that’s safe and effective. White vinegar (5% acidity) works well for light mineral buildup. Mix equal parts vinegar and water for a gentle cleaning solution. Run through the unit, then flush with clean water. More eco-friendly than commercial chemicals.

- Small brush – Soft-bristled brush for cleaning pump intake and filters. Toothbrushes work well for tight spaces, or use a dedicated cleaning brush. Avoid metal brushes that could scratch components. This helps remove debris that clogs water flow.
- Distilled water – Use for testing unit after descaling to ensure clean operation. Distilled water has no minerals, so it won’t leave deposits during testing. After descaling, run several cycles with distilled water before using tap water again. This helps verify the cleaning was successful.
- Level – Ensure unit sits level for proper operation. Standalone ice makers must be level for water to drain correctly and for sensors to function properly. A small bubble level placed on top of the unit helps you adjust the feet. Even a slight tilt can cause operational issues.


Safety Equipment
- Rubber gloves – Protect hands from cleaning chemicals and cold surfaces. Nitrile or latex gloves provide good protection while maintaining dexterity. When working with descaling solutions, gloves prevent skin irritation. They also protect against sharp edges inside freezer compartments.
- Safety glasses – Essential when working with cleaning solutions that could splash. Descaling solutions can irritate eyes, and safety glasses provide basic protection. Even when not using chemicals, glasses protect from ice chips or debris when working inside units.
- Towels – Multiple towels for cleaning up water spills and protecting surfaces. Have several towels ready before starting any repair involving water lines. Place towels under the work area and keep extras nearby. Water damage can be costly, so prevention is key.


⚠️ CRITICAL SAFETY WARNINGS
ELECTRICAL SAFETY (Refrigerator Ice Makers)
ALWAYS disconnect power before working on refrigerator ice makers:
- Unplug refrigerator from wall outlet – If the outlet is accessible, simply unplug the refrigerator. This is the most straightforward method, but ensure the outlet isn’t behind the refrigerator where it’s hard to reach.
- Turn off circuit breaker for refrigerator circuit – If you can’t access the outlet, turn off the dedicated circuit breaker. Most refrigerators have their own 15-20 amp circuit. Label the breaker clearly so you know which one controls the refrigerator.
- Wait 5 minutes for capacitors to discharge – Refrigerators contain capacitors that store electrical charge even after power is disconnected. Waiting 5 minutes allows these to discharge safely, preventing potential electric shock. This is especially important when working near control boards.
- Verify power is off with voltage tester – Never assume power is off. Use a non-contact voltage tester to verify no electricity is present before touching any wires. Test multiple points to be certain. A voltage tester is inexpensive and could save your life.
- Keep hands dry when working with electrical connections – Water and electricity are a deadly combination. Ensure your hands are completely dry, and avoid working in areas where water might be present. If you’ve been working with water lines, dry your hands thoroughly before touching any electrical components.

WATER DAMAGE PREVENTION
Shut off water supply:
- Locate water shut-off valve – The valve is usually behind the refrigerator or under the kitchen sink. It may be a small lever valve or a traditional turn valve. If you can’t find it, check the basement or utility room where the main water line enters the house.
- Turn valve clockwise to close – Most valves turn clockwise to close (righty-tighty). Turn until it stops, but don’t force it if it’s stuck. If the valve is difficult to turn, it may need maintenance, but don’t use excessive force that could break it.
- Disconnect water line only after shutting off water – Always shut off water before disconnecting any lines. Even a small amount of water pressure can cause significant water damage. Have your container ready before disconnecting.
- Have towels ready – residual water will drip – Even after shutting off the water, residual water in the lines will drain out. Have multiple towels positioned to catch this water. Check towels periodically and replace if they become saturated.
- Use a bucket under connections when disconnecting – A bucket provides a larger capacity than a small container. Place it directly under the connection point before loosening. This catches both the initial rush of water and any slow drips that follow.
REFRIGERANT SAFETY (Standalone Units)
DO NOT attempt to repair sealed refrigeration systems:
- ❌ Never puncture refrigerant lines – Refrigerant lines contain pressurized gas that can cause serious injury if released. Puncturing a line releases refrigerant into the atmosphere, which is harmful to the environment and potentially dangerous. The escaping gas can also cause frostbite on contact with skin.
- ❌ Don’t disassemble compressor – The compressor is the heart of the cooling system and contains refrigerant under high pressure. Disassembling it requires specialized tools and EPA certification. Attempting to open it can result in injury and environmental damage.
- ❌ Refrigerant requires EPA-certified technician – Handling refrigerant legally requires EPA Section 608 certification. Unauthorized handling can result in fines and is dangerous. Refrigerants are regulated substances that must be properly recovered and disposed of.
- ❌ Sealed system repairs not cost-effective on consumer units – The cost of professional refrigerant work typically exceeds the value of budget standalone ice makers. Even on premium units, sealed system repairs are expensive and may not be worth the investment.
- ✅ Focus on cleaning, descaling, and minor part replacement – These are the repairs you can safely do yourself. Most ice maker problems are related to water flow, mineral buildup, or simple component failures that don’t involve the sealed refrigeration system.
DESCALING SAFETY
When using cleaning solutions:
- ✅ Always follow product instructions – Each descaling product has specific instructions for dilution, contact time, and rinsing. Following instructions ensures effective cleaning without damaging components. Using too strong a solution can damage plastic parts, while too weak won’t remove buildup.
- ✅ Use food-safe descalers for ice makers – Since ice makers produce ice you’ll consume, use only food-safe cleaning products. Look for products specifically labeled safe for ice makers or food contact surfaces. Avoid industrial descalers that may contain harmful chemicals.
- ✅ Rinse thoroughly after descaling – Residual cleaning solution can affect ice taste and potentially be harmful. Run multiple rinse cycles with clean water after descaling. Some manufacturers recommend running 5-10 ice cycles and discarding the ice before using it.
- ✅ Run several ice cycles and discard before consuming – The first few batches of ice after descaling may contain traces of cleaning solution or loosened mineral deposits. Discard these batches to ensure clean, safe ice. This is especially important if you used commercial descalers.
- ❌ Never mix cleaning chemicals – Mixing different cleaning chemicals can create dangerous gases or toxic compounds. Always use one cleaning product at a time. Never mix vinegar with bleach or other chemicals, as this can produce toxic chlorine gas.
- ❌ Don’t use harsh chemicals like bleach – Bleach and other harsh chemicals can damage plastic components, leave harmful residues, and affect ice taste. They may also corrode metal parts. Stick to recommended descaling solutions or natural alternatives like vinegar.
🧊 Most Common Ice Maker Problems (All Types)
1. Not Making Ice At All (40% of issues)
Refrigerator Ice Makers:
- Water supply shut off – Most common! Check valve behind fridge. The water shut-off valve may have been accidentally closed during other repairs or maintenance. It’s often located behind the refrigerator, under the sink, or in a utility room. Simply turning it back on often solves the problem immediately.
- Clogged water filter – Replace every 6 months. Water filters become clogged with sediment and minerals over time, restricting water flow to the ice maker. A filter that’s been in place for 6+ months may be completely blocked. Most manufacturers recommend replacement every 6 months, but in hard water areas, you may need to replace more frequently.
- Frozen water line – Freezer too cold, line freezes. If your freezer is set below 0°F, the water line can freeze solid, preventing water from reaching the ice maker. This is common in very cold climates or when freezer temperature is set too low. The ice maker needs water to make ice, so a frozen line stops production completely.
- Failed water inlet valve – No water reaching ice maker. The water inlet valve opens to allow water into the ice maker during the fill cycle. If this valve fails, water never reaches the ice maker, so no ice can be produced. Valves can fail due to mineral buildup, electrical issues, or mechanical wear.
- Ice maker power off – Check on/off switch on unit. Many ice makers have a simple on/off switch or lever. This may have been accidentally turned off, or the switch mechanism may have failed. Look for a small switch or lever on the ice maker assembly itself.
- Freezer not cold enough – Must be 0-5°F for ice production. Ice makers require the freezer to maintain a specific temperature range. If the freezer is warmer than 5°F, the ice maker may not cycle properly. Check your freezer temperature with a thermometer and adjust the thermostat if needed.
Standalone Ice Makers:
- Not plugged in or no power – Check outlet and cord. It may seem obvious, but many issues start with a simple power problem. Check that the unit is plugged in securely, the outlet is working (test with another device), and the power cord isn’t damaged. Some units have a power switch that may have been turned off.
- Water reservoir empty – Add water. Standalone units require manual water filling. If the reservoir is empty, the unit can’t produce ice. Check the water level indicator and fill to the appropriate level. Some units have sensors that prevent operation if water is too low.
- Room temperature too cold – Below 50°F, unit won’t work. Standalone ice makers are designed to operate in normal room temperatures. If the room is too cold (below 50°F), the unit may not function properly. Move the unit to a warmer location or increase room temperature.
- Compressor failure – Unit hums but no cooling. If you hear the compressor running but the unit isn’t cooling, the compressor may have failed. This is a sealed system issue that typically requires professional repair or unit replacement. The compressor is the most expensive component to replace.
- Frozen evaporator – Needs defrost cycle. Mineral buildup or operation issues can cause the evaporator to freeze solid. The unit needs to go through a defrost cycle to clear this. Some units have a manual defrost function, while others require unplugging and allowing to thaw.
DIY Troubleshooting Steps:
- ✅ Check power and water supply – Start with the basics. Verify the unit has power (check outlet, circuit breaker, power switch) and that water is available (check shut-off valve, water filter, water line). These simple checks solve many problems.
- ✅ Verify freezer temperature (refrigerator models) – Use a thermometer to check actual freezer temperature. It should be between 0-5°F. If it’s warmer, adjust the thermostat. If it’s colder, it may be freezing the water line.
- ✅ Replace water filter (if 6+ months old) – A clogged filter is one of the most common causes of ice maker problems. If your filter is 6 months or older, replace it even if it doesn’t look dirty. Filters can be clogged internally without visible signs.
- ✅ Check for frozen water lines – Look for ice buildup in the water line or around connections. If you find frozen sections, use a hair dryer on low heat to gently thaw them. Be careful not to overheat plastic components.
- ✅ Run test cycle (if available) – Many modern ice makers have a test or diagnostic mode. Consult your owner’s manual for instructions on running a test cycle. This can help identify specific problems with the ice maker’s operation.
2. Making Ice Slowly (25% of issues)
Common Causes:
- Clogged water filter – Most common cause. A partially clogged filter restricts water flow, slowing ice production. The filter may still allow some water through, but not enough for normal production rates. This is why slow production is often the first sign of a filter needing replacement.
- Low water pressure – Below 20 PSI affects performance. Ice makers need adequate water pressure to fill the ice mold quickly. If your home’s water pressure is below 20 PSI, ice production will be slow. You can check pressure with a gauge, and may need to install a pressure booster if pressure is consistently low.
- Warm freezer temperature – Above 10°F slows production. When the freezer is warmer than optimal, the ice-making process takes longer. Each cycle requires more time to freeze the water, resulting in slower overall production. Maintaining the proper temperature is crucial for efficient operation.
- Mineral buildup – Especially standalone units. Over time, minerals from water accumulate in the ice maker’s components, restricting water flow and reducing efficiency. This is more common in areas with hard water. Regular descaling prevents this buildup.
- Partially frozen water line – Restricted flow. If the water line is partially frozen, water can still flow but at a reduced rate. This causes slow ice production. The line may not be completely frozen, but ice crystals inside restrict the flow significantly.
- Old ice maker – 10+ years, components wearing out. As ice makers age, components wear out and become less efficient. Motors may run slower, valves may not open fully, and sensors may become less responsive. After 10+ years, replacement may be more cost-effective than repair.
Solutions:
- Replace water filter every 6 months – Regular filter replacement prevents clogs that slow production. Set a reminder on your calendar to replace filters on schedule.
- Check home water pressure (install booster if needed) – If pressure is consistently low, a pressure booster can improve ice production. However, check with a plumber first, as low pressure may indicate other plumbing issues.
- Lower freezer temperature to 0-5°F – Adjust your freezer thermostat to maintain optimal temperature. Use a thermometer to verify the actual temperature, as thermostat settings may not be accurate.
- Descale standalone units monthly – In hard water areas, monthly descaling prevents mineral buildup that slows production. Use commercial descalers or natural alternatives like vinegar.
- Thaw water line with hair dryer – If you suspect a partially frozen line, use a hair dryer on low heat to gently warm the line. Work slowly and check progress frequently.
- Consider replacement if unit is old – If your ice maker is 10+ years old and production is slow despite maintenance, replacement may be more cost-effective than continued repairs.
3. Ice Tastes Bad or Smells (15% of issues)
Causes:
- Old water filter – Bacteria and contaminants. Water filters not only remove sediment but also filter out bacteria, chlorine, and other contaminants that affect taste. An old filter may be harboring bacteria or no longer effectively filtering, allowing bad-tasting substances through.
- Stale ice in bin – Ice absorbs freezer odors. Ice left in the bin for extended periods absorbs odors from the freezer. Strong-smelling foods, cleaning products, or other items in the freezer can impart their smell to the ice over time.
- Dirty ice maker – Mold or mineral buildup. If the ice maker isn’t cleaned regularly, mold can grow in moist areas, and mineral deposits can harbor bacteria. This is especially common in standalone units that aren’t maintained properly.
- Contaminated water supply – Well water or old pipes. If your water source has issues (well water with high mineral content, old pipes with rust, etc.), these problems will affect your ice. The ice maker can’t improve water quality beyond what the filter provides.
- Food odors in freezer – Ice absorbs smells. Freezers with strong-smelling foods (fish, onions, etc.) will have those odors absorbed by the ice. This is particularly noticeable if foods aren’t properly sealed.
Solutions:
- Replace water filter immediately – Don’t wait for the scheduled replacement if ice tastes bad. A new filter often solves taste issues immediately.
- Empty and clean ice bin with baking soda solution – Mix baking soda with water to create a cleaning solution. This neutralizes odors and removes residue. Rinse thoroughly after cleaning.
- Run cleaning cycle on standalone units – Most standalone units have a cleaning cycle. Run this according to manufacturer instructions, using recommended cleaning solutions.
- Use activated carbon water filter for source water – Activated carbon filters are more effective at removing taste and odor compounds than basic sediment filters. Consider upgrading your water filter type.
- Keep baking soda box in freezer to absorb odors – An open box of baking soda in the freezer helps absorb odors before they reach the ice. Replace the box every 2-3 months.
- Store strong-smelling foods in airtight containers – Proper food storage prevents odors from spreading to the ice. Use sealed containers for foods with strong smells.
4. Ice Cubes Clumped Together (10% of issues)
Refrigerator Ice Makers:
- Freezer temperature fluctuating – Causes slight melting and refreezing. If the freezer temperature fluctuates, ice may partially melt and then refreeze, causing cubes to stick together. This often happens when the freezer door is opened frequently or the thermostat cycles.
- Infrequent use – Ice sits too long, clumps together. Ice that sits in the bin for extended periods can develop a thin layer of frost that causes cubes to stick together. Using ice regularly prevents this buildup.
- High humidity – Moisture enters freezer. High humidity in the room can cause excess moisture to enter the freezer, creating frost that makes ice cubes stick together. This is more common in humid climates or during summer months.
- Poor door seal – Warm air causes partial melting. A damaged or worn door gasket allows warm, moist air to enter the freezer. This causes ice to partially melt and refreeze, creating clumps. Check the door seal for gaps or damage.
Standalone Ice Makers:
- Ice not harvested regularly – Ice melts slightly and refreezes. If ice isn’t removed from the bin regularly, it can develop a frost layer that causes clumping. The ice at the bottom may partially melt from the weight of ice above it.
- Ambient temperature too warm – Room above 90°F. Standalone units work best in temperatures between 50-90°F. If the room is too warm, ice may partially melt, causing clumping. Move the unit to a cooler location or improve room ventilation.
- Unit not level – Water doesn’t drain properly. If the unit isn’t level, water may not drain correctly, causing it to pool and refreeze, creating clumps. Use a level to ensure the unit sits perfectly level.
Solutions:
- Use ice more frequently – Regular use prevents ice from sitting too long and developing frost layers.
- Check and replace door gaskets if needed – A proper door seal prevents warm air from entering and causing temperature fluctuations.
- Ensure freezer maintains steady 0°F – Consistent temperature prevents partial melting and refreezing.
- Empty ice bin regularly on standalone units – Don’t let ice accumulate for extended periods.
- Keep room temperature at 50-90°F – Optimal room temperature ensures proper operation of standalone units.
- Level standalone units properly – Use a level and adjust the unit’s feet until it’s perfectly level.
5. Leaking Water (5% of issues)
Refrigerator Ice Makers:
- Water inlet valve leak – Connection loose or valve failed. The water inlet valve connects the water line to the ice maker. If the connection is loose or the valve itself is leaking, water will drip. This is often visible as water pooling under or behind the refrigerator.
- Cracked water line – Frozen line expanded and cracked. When water lines freeze, the expansion can crack the plastic line. This is more common in very cold freezers or when lines aren’t properly insulated. Cracks may be small and hard to see.
- Ice maker fill cup overflow – Water valve stuck open. The fill cup is where water enters the ice maker. If the water valve gets stuck in the open position, water continues flowing and overflows the cup, causing leaks.
- Defrost drain clogged – Water backs up and leaks. During defrost cycles, water should drain away. If the drain is clogged, water backs up and can leak from various points in the freezer.
Standalone Ice Makers:
- Drain plug loose – Bottom plug not sealed. Many standalone units have a drain plug at the bottom. If this plug is loose or the O-ring is damaged, water will leak. This is a simple fix – just tighten the plug or replace the O-ring. Overflow from water reservoir – Overfilled manually. If you manually fill the reservoir and overfill it, excess water will overflow. Always fill to the indicated level, not above it.
- Condensation drip – Normal in humid environments. Some condensation is normal, especially in humid environments. However, excessive dripping may indicate a problem with the unit’s design or operation.
- Internal leak – Pump or water system failure. If there’s a leak inside the unit (from the pump, water lines, etc.), this typically requires professional repair or unit replacement. Internal leaks are harder to diagnose and fix.
Solutions:
- Tighten water line connections – Check all connections and tighten if loose. Use proper tools to avoid over-tightening.
- Replace cracked water lines – If you find a cracked line, replace it immediately. Even small cracks can cause significant water damage over time.
- Replace water inlet valve if stuck – A stuck valve needs replacement. This is a common repair that’s usually straightforward.
- Clear defrost drain with hot water – Pour hot water down the defrost drain to clear clogs. You may need to use a small brush to remove stubborn debris.
- Check and tighten drain plugs – Ensure drain plugs are properly sealed with intact O-rings.
- Empty reservoir to correct level – Don’t overfill the water reservoir. Follow manufacturer guidelines for water levels.
- Use drip tray under standalone units – A drip tray catches normal condensation and prevents water damage.
6. Ice Cubes Too Small or Hollow (3% of issues)
Causes:
- Low water pressure – Less than 20 PSI. Insufficient water pressure means the ice maker doesn’t receive enough water to fill the mold completely, resulting in small or hollow cubes.
- Clogged water filter – Restricts water flow. A partially clogged filter allows some water through but not enough for proper ice formation.
- Water inlet valve partially clogged – Reduced water flow. Mineral buildup in the valve can restrict flow, preventing the ice maker from receiving adequate water.
- Ice maker fill time too short – Control setting issue. Some ice makers have adjustable fill times. If this is set too short, the mold doesn’t fill completely before freezing begins.
Solutions:
- Check home water pressure (install booster if low) – Use a pressure gauge to measure actual water pressure. If it’s consistently below 20 PSI, consider a pressure booster.
- Replace water filter – A new filter may restore proper water flow.
- Clean or replace water inlet valve – Remove mineral buildup or replace the valve if cleaning doesn’t help.
- Adjust ice maker fill time (if adjustable) – Consult your owner’s manual for instructions on adjusting fill time settings.
- May require professional adjustment – Some issues require professional diagnosis and adjustment of control settings.
7. Loud or Unusual Noises (2% of issues)
Normal Noises:
- Water filling ice mold (trickling sound) – This is the normal sound of water entering the ice maker during the fill cycle.
- Ice dropping into bin (clattering) – When ice is harvested, it drops into the bin, creating a clattering sound.
- Compressor running (humming) – The compressor makes a steady humming sound when operating normally.
- Fan running (gentle whir) – Cooling fans make a gentle whirring sound during operation.
Abnormal Noises:
- Grinding/buzzing – Motor or gear failure (refrigerator ice maker). This indicates mechanical problems with the ice maker’s motor or gears. The ice maker may still function but won’t last long with this issue.
- Loud rattling – Something loose inside unit. Loose components or ice stuck in the mechanism can cause rattling. This may be a simple fix if it’s just loose ice.
- Clicking repeatedly – Control board or relay failure. Repeated clicking usually indicates an electrical problem with the control board or a relay trying to activate but failing.
- Hissing – Refrigerant leak (professional repair needed). A hissing sound from a standalone unit may indicate a refrigerant leak. This requires immediate professional attention and is not a DIY repair.
- Squealing – Fan bearing worn out. Squealing typically comes from worn fan bearings. The fan may still work but will eventually fail completely.
Solutions:
- Grinding: Replace ice maker assembly – Mechanical failures in the ice maker assembly typically require complete replacement.
- Rattling: Check for loose ice in chute – Remove any ice that’s stuck in the mechanism or chute.
- Clicking: May need control board replacement – Electrical issues often require professional diagnosis and repair.
- Hissing: Call professional (refrigerant leak) – Never attempt to repair refrigerant leaks yourself. This requires EPA-certified technicians.
- Squealing: Replace fan motor – Fan motor replacement is usually straightforward if parts are available.
💰 Repair vs. Replace Decision Guide
REFRIGERATOR ICE MAKERS – When to Repair:
Repair Makes Sense When:
- ✅ Ice maker assembly under $150 – If the replacement part is reasonably priced, repair is usually worth it. Most ice maker assemblies cost between $70-150, making repair cost-effective.
- ✅ Refrigerator is less than 8 years old – Newer refrigerators are worth repairing. If your refrigerator is in good condition otherwise, fixing the ice maker extends its useful life.
- ✅ Simple water valve or filter replacement – These are easy, inexpensive repairs that anyone can do. Water valves cost $25-50, and filters are maintenance items anyway.
- ✅ Clear diagnosis of specific part failure – When you know exactly what’s wrong, repair is straightforward. Unclear problems may require multiple parts, making repair less cost-effective.
- ✅ Refrigerator otherwise works perfectly – If the refrigerator itself is functioning well, fixing just the ice maker makes sense. Don’t repair an ice maker if the refrigerator has other major issues.
Typical Repair Costs:
- Ice maker assembly: $70-150 (part) + $0-200 (labor if not DIY) – The most common repair. If you do it yourself, you only pay for the part. Professional installation adds $100-200 in labor costs.
- Water inlet valve: $25-50 (part) + 30 min DIY – A simple repair that most homeowners can handle. The valve is usually accessible and straightforward to replace.
- Water filter: $20-70 (maintenance item) – This is regular maintenance, not really a repair. Higher-end filters cost more but may last longer or filter better.
- Water line: $10-30 (part) + 1 hour DIY – Replacing a water line is usually straightforward. The main challenge is routing the new line properly.
Replace Ice Maker When:
- ❌ Refrigerator is 10+ years old – Older refrigerators may have other issues developing. If the refrigerator is near the end of its expected lifespan, replacement may be more practical.
- ❌ Multiple refrigerator issues beyond ice maker – If you’re dealing with multiple problems (cooling issues, compressor problems, etc.), it may be time to consider a new refrigerator rather than fixing individual components.
- ❌ Repair cost exceeds $200-300 – When repair costs approach the value of a new refrigerator, replacement becomes more attractive. Set a budget limit for repairs.
- ❌ Ice maker has failed multiple times – If the ice maker keeps breaking down, there may be underlying issues that make continued repair impractical.
- ❌ OEM parts no longer available (discontinued model) – If you can’t get the right parts, repair isn’t possible. Check parts availability before attempting repair on older models.
STANDALONE ICE MAKERS – When to Repair:
Repair Makes Sense When:
- ✅ Simple descaling/cleaning solves problem – Most standalone unit problems are solved by cleaning. This costs $10-15 and takes 30 minutes, making it always worth trying first.
- ✅ Pump or small part available and under $50 – If a simple part replacement fixes the issue and the part is affordable, repair makes sense. Pumps are often available for premium units.
- ✅ Unit is premium brand (GE Opal, Scotsman, U-Line) – Premium units are worth repairing because they’re expensive to replace ($500-1000+). A $100-200 repair on a $600 unit is cost-effective.
- ✅ Unit less than 3 years old – Newer units should still be under warranty or at least worth repairing. Most standalone units last 3-5 years with proper maintenance.
- ✅ Replacement part readily available – If you can easily get the part you need, repair is practical. Hard-to-find parts make repair difficult and expensive.
Typical Repair Costs:
- Descaling: $10-15 (solution) – The most common and cost-effective repair. Regular descaling prevents most problems.
- Pump replacement: $50-150 (if available) – Pumps are sometimes available for premium units. Budget units rarely have replacement pumps available.
- Control board: $100-200 (usually not worth it for budget units) – Control boards are expensive and often not worth replacing on budget units. Premium units may justify this cost.
- Fan motor: $30-80 – Fan motors are usually available and reasonably priced. This is a common repair that’s often worth doing.
Replace Standalone Unit When:
- ❌ Compressor failure (sealed system) – Compressor repair requires professional service and often costs more than a new budget unit. This is almost always a replacement situation.
- ❌ Budget unit ($100-200 range) has major failure – Budget units aren’t designed for extensive repairs. If a major component fails, replacement is usually more cost-effective.
- ❌ Unit is 3+ years old with significant issues – After 3 years, many budget units have reached their expected lifespan. Continued repairs may not be worth the investment.
- ❌ Repair cost exceeds 50% of new unit cost – As a general rule, if repair costs more than half the price of a new unit, replacement is usually the better choice.
- ❌ Parts not available for specific model – If you can’t get the parts you need, repair isn’t possible. Check parts availability before attempting repair.
Cost Comparison Example:
Scenario 1: GE Opal Nugget Ice Maker (Premium – $500+)
- Pump failure repair: $100-150
- New unit: $500-600
- Decision: REPAIR (premium unit worth repairing)
Scenario 2: Budget Portable Ice Maker ($150)
- Compressor failure: $200+ (if even possible)
- New unit: $150-200
- Decision: REPLACE (repair exceeds replacement cost)
🏆 Ice Maker Brand & Type Comparison
REFRIGERATOR ICE MAKER ASSEMBLIES
Most Reliable:
- GE – Classic twist-tray design lasts 15+ years. GE’s twist-tray ice makers are legendary for their durability. The simple mechanical design has fewer components to fail, and the quality construction means these units often outlast the refrigerator itself. Many GE ice makers from the 1990s are still working today.
- Whirlpool – Modular design, easy replacement, good longevity. Whirlpool’s modular ice maker design makes replacement straightforward, and the parts are widely available. The design is reliable, and most units last 8-12 years with proper maintenance. The modular approach also means you can often replace just the failed component rather than the entire assembly.
- Frigidaire – Simple, reliable, affordable parts. Frigidaire ice makers use straightforward designs that are easy to understand and repair. Parts are readily available and reasonably priced. These units typically last 8-10 years and are a good balance of reliability and affordability.
Least Reliable:
- Samsung – Notorious for ice maker failures after 2-3 years. Samsung has faced multiple class-action lawsuits over defective ice makers. Many units fail within the first few years, often due to design flaws or quality control issues. If you have a Samsung refrigerator, be prepared for potential ice maker problems.
- LG – Better than Samsung but still has issues. LG ice makers are more reliable than Samsung’s but still have higher failure rates than brands like GE or Whirlpool. Some models have specific known issues that develop over time.
- Budget brands – Generic ice makers in economy refrigerators. Generic or off-brand ice makers in budget refrigerators often use lower-quality components and have shorter lifespans. They may work initially but fail sooner than name-brand units.
Repair Tip: If your Samsung or LG ice maker fails within 5 years, check for class-action lawsuits or extended warranty coverage. Both brands have faced legal issues over defective ice makers, and you may be entitled to free replacement or extended warranty coverage. Search online for current class-action settlements related to your specific model.
Related Resources
For detailed repair guides on specific ice maker models, check out our Top 20 Ice Maker Models & Common Repair Issues Guide. This comprehensive guide covers individual models from Whirlpool, Samsung, LG, GE, Frigidaire, and more, with specific part numbers and step-by-step repair instructions.
Disclosure: As an Amazon Associate, we earn from qualifying purchases. This means if you click on an affiliate link and make a purchase, we may receive a small commission at no additional cost to you. This helps support our site and allows us to continue providing free repair guides.