Heating element failure
This step-by-step repair guide walks you through fixing heating element failure on your GE GDT645SYVFS. With the right tools and parts, most homeowners can complete this repair in 1–2 hours and avoid a costly service call.
🔨 Pro Tip from Dave
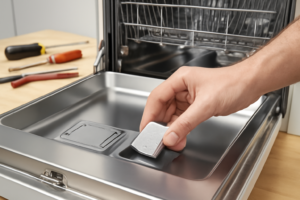
On the GDT645SYVFS, the heating element part number is WD05X20905 — make sure you source that exact part, as generic substitutes often don’t seat correctly in the sump assembly. A common mistake I see DIYers make is forgetting to disconnect the two wire harness connectors beneath the tub before wrestling the element out, which stresses the terminals and can cause a secondary wiring failure. Also, always inspect the thermal limiter while you’re in there.
Part of our Top 20 Dishwasher Models & Common Repair Issues Guide. Browse all dishwasher repair guides for related models and issues.
“`html
Common Symptoms & Causes
The following symptoms typically indicate a heating element failure on the GE GDT645SYVFS dishwasher.
- Dishes come out cold or wet after a completed wash cycle
- The drying cycle runs but produces no heat inside the tub
- Visible burn marks, cracks, or breaks on the heating element coil at the bottom of the dishwasher
- Control panel displays an error code such as “PF” or the unit stops mid-cycle unexpectedly
These issues are most commonly caused by a burned-out or physically damaged heating element, often resulting from normal wear, mineral buildup, or a sudden electrical surge over time.
“`
Safety First
- Unplug the dishwasher from the power outlet before starting any repair — never work on a live appliance.
- Shut off the water supply valve before disconnecting any water lines or hoses.
- Wear work gloves when handling metal brackets, sheet metal edges, or sharp components.
- Take photos with your phone before disconnecting any wiring harnesses or connectors.
- Work in a well-lit area with enough floor space to lay removed panels flat.
Tools & Parts Needed
Essential Tools
- Phillips #2 screwdriver
- Torx T20 screwdriver
- Needle-nose pliers
- Multimeter
- Flashlight
Replacement Parts
Step-by-Step Repair Instructions
Step 1
Disconnect the dishwasher from power at the breaker or by unplugging it before you begin, since you will be working near water and electrical components. Tilt the unit backward to expose the underside of the tub, then remove the kick plate to access the heating element — the large ring visible at the bottom of the wash tub. Working on a live appliance near moisture is a serious shock hazard, so confirm power is fully off before touching any components.
Step 2
Test the heating element with a multimeter set to Rx1 to determine whether it can still conduct electricity and generate heat. A healthy element reads 15–30 ohms; a reading of infinite resistance (open circuit) means the element has burned through and must be replaced. Also inspect the element visually for heavy scale or white crust buildup, which creates hot spots that cause premature failure and uneven heating.
Step 3
Locate the thermistor — a small probe-style sensor in the sump area — and test its resistance at room temperature, where a good thermistor reads approximately 50kΩ. The thermistor monitors water and tub temperature and feeds that data to the control board, so if it reads open or far outside that range, the control board may never activate the element even if the element itself is fine. Replace the thermistor if its reading is open or significantly out of range.
Step 4
To replace a failed element, unplug the spade terminals from the element’s mounting posts, then loosen the lock tabs by rotating them counter-clockwise a quarter turn to release the element from the tub. Pull the old element out from underneath, press the new element into position so it seats flush against the tub, and rotate the lock tabs clockwise a quarter turn to secure it. Pro tip: lightly coat the rubber seal on the new element with a thin layer of dish soap before installation to help it seat evenly and prevent early leaks.
Step 5
While you have access to the tub exterior near the element, locate the high-limit thermostat — a small disc-shaped safety device mounted on the outside of the tub wall. Its job is to cut power to the element if temperatures exceed a safe threshold, and if it has tripped and failed open, the element will never receive power regardless of the control board’s commands. Test it for continuity with your multimeter; any open reading means it must be replaced before the repair is complete.
Step 6
Once all components are reinstalled, return the dishwasher to its upright position, reattach the kick plate, and restore power. Run a full Normal cycle with the heated dry option selected so the element is actively called upon to heat both the wash water and the drying phase. At the end of the cycle, dishes should be hot to the touch and dry — if they are still cool or wet, recheck your wiring connections and confirm the thermistor and control board are communicating correctly.
Where to Buy Replacement Parts
Find genuine OEM and aftermarket replacement parts for your GE GDT645SYVFS on Amazon:
- GE GDT645SYVFS heating element WD26X22302 replacement
- GE dishwasher thermistor sensor WD21X10290 replacement
- GE dishwasher high limit thermostat replacement
When to Call a Professional
If the issue persists after completing all steps above, the problem may involve the sealed refrigerant system, a failed main control board, or wiring that requires specialized diagnostic equipment. Contact a licensed appliance technician — attempting sealed-system repairs without EPA 608 certification is illegal and unsafe.
“`html
How Much Does This Repair Cost?
Replacing a heating element on the GE GDT645SYVFS yourself typically costs between $20–$60 for the part alone. Hiring a professional appliance technician will usually run $150–$300, including labor and the service call fee. By tackling this repair yourself, you can save over $100 while restoring your dishwasher to full working order.
“`
## Frequently Asked Questions
Frequently Asked Questions
How do I know if the heating element is actually the problem on my GE GDT645SYVFS?
If your dishes come out wet or cold after a full cycle, the heating element is likely faulty. Use a multimeter to test for continuity — no continuity confirms the element needs replacement.
Is it safe to replace the heating element myself on the GDT645SYVFS?
Yes, this is a manageable DIY repair as long as you disconnect power before starting. Always unplug the dishwasher or shut off the circuit breaker beforehand.
Where can I find a replacement heating element for the GE GDT645SYVFS?
Order a compatible heating element using your model number from GE’s parts website or retailers like RepairClinic or PartSelect. Always verify the part number matches your specific unit.
Recommended Products
These are the parts and tools we recommend for this repair, based on compatibility and customer reviews:
As an Amazon Associate, I earn from qualifying purchases.