Water not filling
This step-by-step repair guide walks you through fixing water not filling on your GE GDT645SYVFS. With the right tools and parts, most homeowners can complete this repair in 1–2 hours and avoid a costly service call.
🔨 Pro Tip from Dave
On the GDT645SYVFS, the water inlet valve (part WD15X23724) is prone to partial failure where it restricts flow rather than stopping completely — many homeowners misdiagnose this as a control board issue. Always check the inlet screen for mineral buildup first before replacing the valve, and don’t overlook the float switch assembly, which can stick in the raised position on this model due to hard water deposits.
Part of our Top 20 Dishwasher Models & Common Repair Issues Guide. Browse all dishwasher repair guides for related models and issues.
“`html
Common Symptoms & Causes
These signs typically point to a water filling problem on your GE GDT645SYVFS dishwasher.
- Dishwasher runs but dishes come out dirty and dry after a full cycle
- You hear the door latch and cycle start, but no water rushing sound follows
- The control panel displays an error code such as “C1” or “C2” indicating a water supply fault
- Standing water from a previous cycle is absent, and the tub interior remains completely dry
This issue is most commonly caused by a failed water inlet valve, a kinked or blocked supply line, a faulty float switch, or a worn door latch assembly preventing the fill cycle from initiating.
“`
Safety First
- Unplug the dishwasher from the power outlet before starting any repair — never work on a live appliance.
- Shut off the water supply valve before disconnecting any water lines or hoses.
- Wear work gloves when handling metal brackets, sheet metal edges, or sharp components.
- Take photos with your phone before disconnecting any wiring harnesses or connectors.
- Work in a well-lit area with enough floor space to lay removed panels flat.
Tools & Parts Needed
Essential Tools
- Phillips #2 screwdriver
- Torx T20 screwdriver
- Needle-nose pliers
- Multimeter
- Flashlight
Replacement Parts
- Water inlet valve
- float switch
- multimeter
- Phillips screwdriver
Step-by-Step Repair Instructions
Step 1
Disconnect power at the breaker or by unplugging the dishwasher, then shut off the water supply valve under the sink. Working on live power or pressurized water lines risks electric shock and water damage, so always complete both steps before touching any components.
Step 2
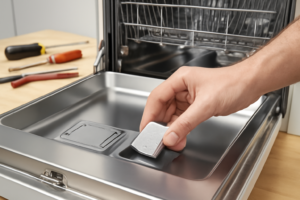
Locate the anti-flood float — a small plastic dome at the front-left corner of the tub floor — and lift it by hand to check if it springs back freely. This float signals the control board when water is too high, and if debris is holding it in the raised position, the board reads the tub as full and blocks the inlet valve from opening. Clean any buildup from beneath the float base, as this is one of the most common and easiest fixes for a no-fill condition.
Step 3
With the float removed, disconnect the two wires from the float switch and test it on Rx1 with a multimeter. In the float-up position the switch should show no continuity, and in the float-down (normal) position it should show continuity; a switch that fails this test is falsely telling the board the tub is full. Replace the float switch assembly if it does not read correctly in both positions.
Step 4
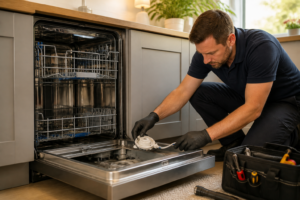
Pull off the kick plate at the bottom of the dishwasher to access the water inlet valve on the left side, then disconnect the solenoid wires and test resistance on Rx1. A healthy solenoid reads 200–500 ohms; an open reading (OL or infinite resistance) means the coil is burned out and the valve will never open regardless of what the control board commands. Pro tip: also visually inspect the inlet screen inside the valve fitting for sediment clogs, which can restrict flow even when the solenoid tests good.
Step 5
Reconnect the water supply line and restore power, then start a wash cycle and watch the tub for the first 30 seconds. You should hear the inlet valve click open and see water begin entering the tub; if fill starts normally, your repair is confirmed. Stay present for this first test run to catch any leaks at the supply connection or kick-plate area before reassembling.
Step 6
Listen through the fill phase: a normal cycle fills for roughly 3–4 minutes before the wash pump starts. If the tub still does not fill after you have replaced the inlet valve, the fill relay on the control board has likely failed and is not sending the 120V signal the valve needs to open. At this point the control board itself requires replacement, as relay-level faults on this board are not field-repairable.
Where to Buy Replacement Parts
Find genuine OEM and aftermarket replacement parts for your GE GDT645SYVFS on Amazon:
- GE GDT645SYVFS water inlet valve WD15X22950 replacement
- GE dishwasher float switch WD12X10216 replacement
- GE dishwasher fill valve solenoid test multimeter
When to Call a Professional
If the issue persists after completing all steps above, the problem may involve the sealed refrigerant system, a failed main control board, or wiring that requires specialized diagnostic equipment. Contact a licensed appliance technician — attempting sealed-system repairs without EPA 608 certification is illegal and unsafe.
“`html
How Much Does This Repair Cost?
DIY parts for fixing water not filling on the GE GDT645SYVFS typically cost between $15 and $80, depending on whether you’re replacing a water inlet valve, door latch, or float switch. A professional service call for the same repair usually runs $150 to $300 including labor. Tackling this repair yourself can save you $100 or more.
“`
## Frequently Asked Questions
Why is my GE GDT645SYVFS dishwasher not filling with water at all?
The most common cause is a faulty water inlet valve that has become clogged or failed electrically. Check that the water supply valve under the sink is fully open before replacing any parts.
How do I know if the float switch is causing the filling problem?
Locate the float assembly inside the dishwasher tub and manually lift it to ensure it moves freely. A stuck float tricks the dishwasher into thinking it’s full, stopping water from entering.
Can a door latch issue prevent my GDT645SYVFS from filling with water?
Yes, if the door latch or door latch switch is faulty, the dishwasher will not start its fill cycle as a safety measure. Test the latch switch for continuity with a multimeter to confirm it’s working properly.